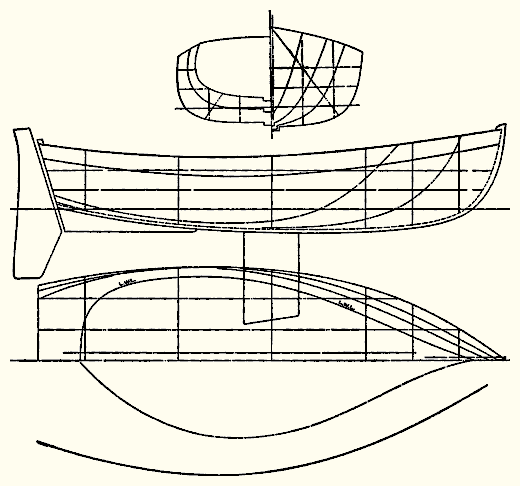
Lofting is the process of blowing up the relatively small-scale plans you get from your naval architect (in my case, from William Atkin), into full size plans.
This process is thought to be so complicated that many modern architects supply full-size plans to eliminate the need for lofting. Just roll out the plans and start building. But if you don't know how to loft, you can't build about 98% of boats, because full-size plans aren't available.
Plus, you miss out on all the fun of lofting, which really is a kind of relaxing exercise, once you have all your hair torn out.
The white-washed lofting board is simply a big, stable drawing surface. Just a big piece of paper, really. Once you've got that ready, it's time to start lofting.
And the first step is to draw the grid. Actually, 3 grids -- one for each standard 'view':
 | |
| The three standard views, from top to bottom: body plan, profile, half-breadth |
Note the grid of horizontal and vertical lines under the curves in the three views. This grid is the first thing you must loft, or blow up to full size. And it must be accurate if the full-sized plans are to be accurate.
When I was about half-way through my Cabin Boy project, I lamented that, in retrospect, I realized I did a lousy job lofting Cabin Boy's plans. That caused two problems:
1. the boat I built probably wasn't exactly Cabin Boy. It was a boat that was very close to Cabin Boy's shape, but not exactly.
2. it made it much more difficult to build, since the various pieces I built, based on my lofted plans, didn't fit together as precisely as they should have. This forced me to trim each piece so it would fit -- a time consuming process.
That didn't prevent Cabin Boy from floating or even performing fantastically. In fact, after 2000 miles of abuse -- including 2 months bottom up on a dock in Jacksonville, FL under the July and August sun, when it was too hot for me -- he never leaked a drop and followed behind the Blue Moon like a faithful servant.
But that lousy lofting job did cause me a whole lot of grief during the building.
So I am determined to get the lofting right this time. Vintage is much too complicated to build without a good set of plans. I must have plans I can depend on.
The first step in lofting is to draw a basic grid of horizontal Baseline (for profile view), Centerline (for half-breadth view) and vertical Station Lines.
 |
| Basic Grid diagram jalmberg |
Except for the Baseline, which is the first line you draw, I probably erased and redrew every line at least twice. You just have to be willing to do that to build a boat accurately.
That's why the call it fun!
 |
| Don't forget to wear your knee pads! photo jalmberg |
Here's one thing I learned: always use the same ruler to measure with. Believe it or not, not all rulers are exactly the same. You can drive yourself crazy by using two rulers that don't quite match up.
I learn things the hard way, so you don't have to!
>>> Next Episode: Battered by Battens
I followed all your episodes since day one. The new build is fascinating. Keep it up
ReplyDeleteCould you use saw horses and a simple old draftsman's Tee Square or a dry waller's Tee Square to do this? Keep up the good work. Your stories have been great entertainment and inspirational, too.
ReplyDeleteDaddy Dart in S.C.
Thanks, guys.
ReplyDeleteThere's lots of ways to set up the grid. As long as it comes out right, it's okay.
The big problem with squares is accuracy. If your perpendicular is just 0.005 degrees off, then it will be almost 1/4 inch off at the end of your 4' perpendicular. . Hard to believe, but that's geometry for you.
tan(.005) * 48 = 0.24"
Even worse if you try to use a square over a 10' length:
tan(.005) * 120 = 0.6"
And 0.005 degrees is a very small error.
I envy your patience and stickability mate.
ReplyDeleteLook forward to following this new project.
Might even look you up when I arrive in the States next year on the start of my adventure and buy you a beer.
Simon from Australia