So I never really understood the seemingly irrational hostility that 'doers' often have towards 'thinkers'. When told by my industrial arts (i.e. 'shop') teacher, "Stop over-thinking it, and just get on with it!", my open-mouth reaction was, "How?" How could I 'get on with' making that ashtray, or lamp, or whatever, without understanding exactly what it was I had to do?
It baffled me.
Two and a half years into my voyage through the unknown waters of boatbuilding and wooden boats, I finally get the whole 'just get on with it!' idea, and believe it's based on one simple insight that practical people must learn at a very early age: No matter how much you plan, things are still going to go wrong, so you might as well get on with it, and deal with problems as they (inevitably) arise.
I still enjoy thinking out a new process, and planning for whatever contingencies I can anticipate, but now I also enjoy leaping off the end of the pier, into the unknown depths, to discover what, exactly, is going to go wrong this time.
So, with steam box and boiler built and tested, it was time to just get on with it.
The next step in the project was to build some sort of form that my wood could be clamped to. Page 46-47 of John Brooks' "How to Build Glued-Lapstrake Wooden Boats" describes several ways to build such a form. The one that appealed to me involved making a set of clamping blocks, and screwing them down to the line I'd already lofted on my workbench.
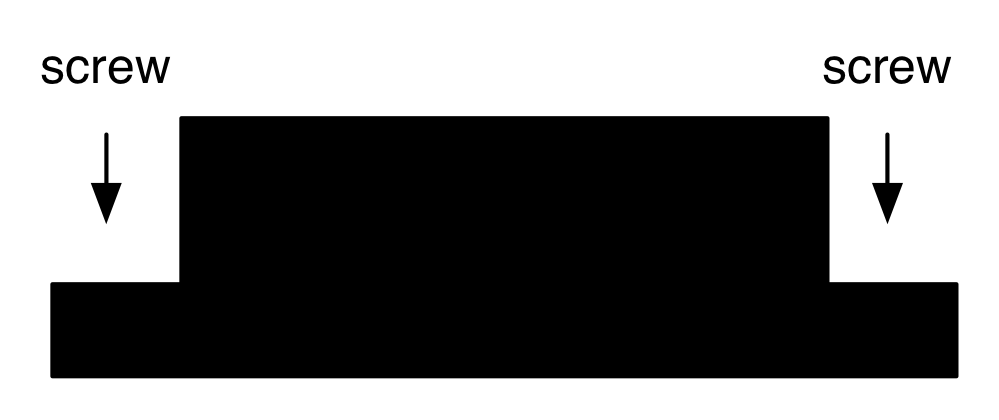 |
| John Brooks' clamping block |
So I decided to modify his clamping blocks to fit my application.
As they say, a little knowledge is a dangerous thing!
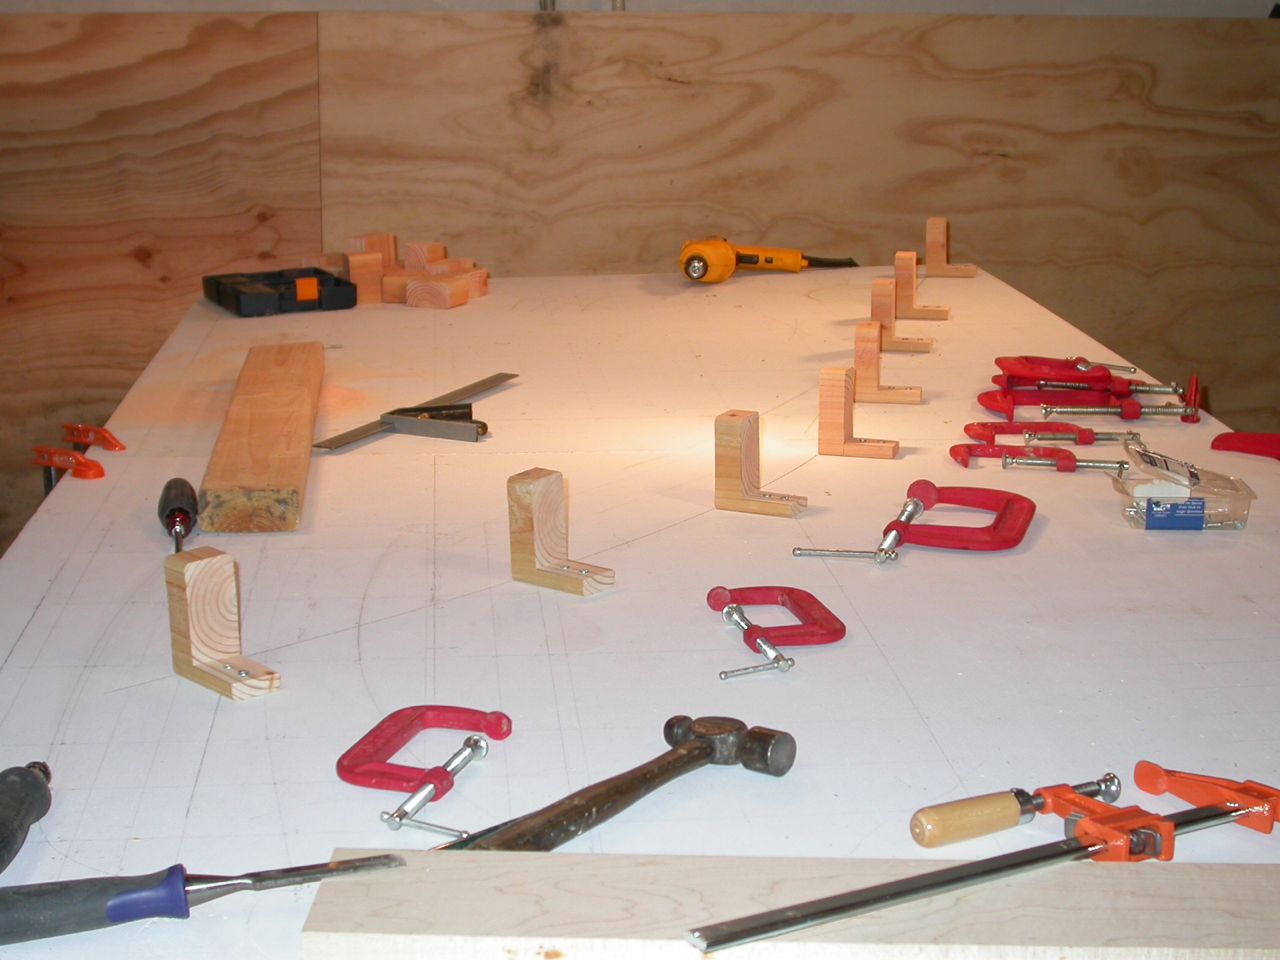 |
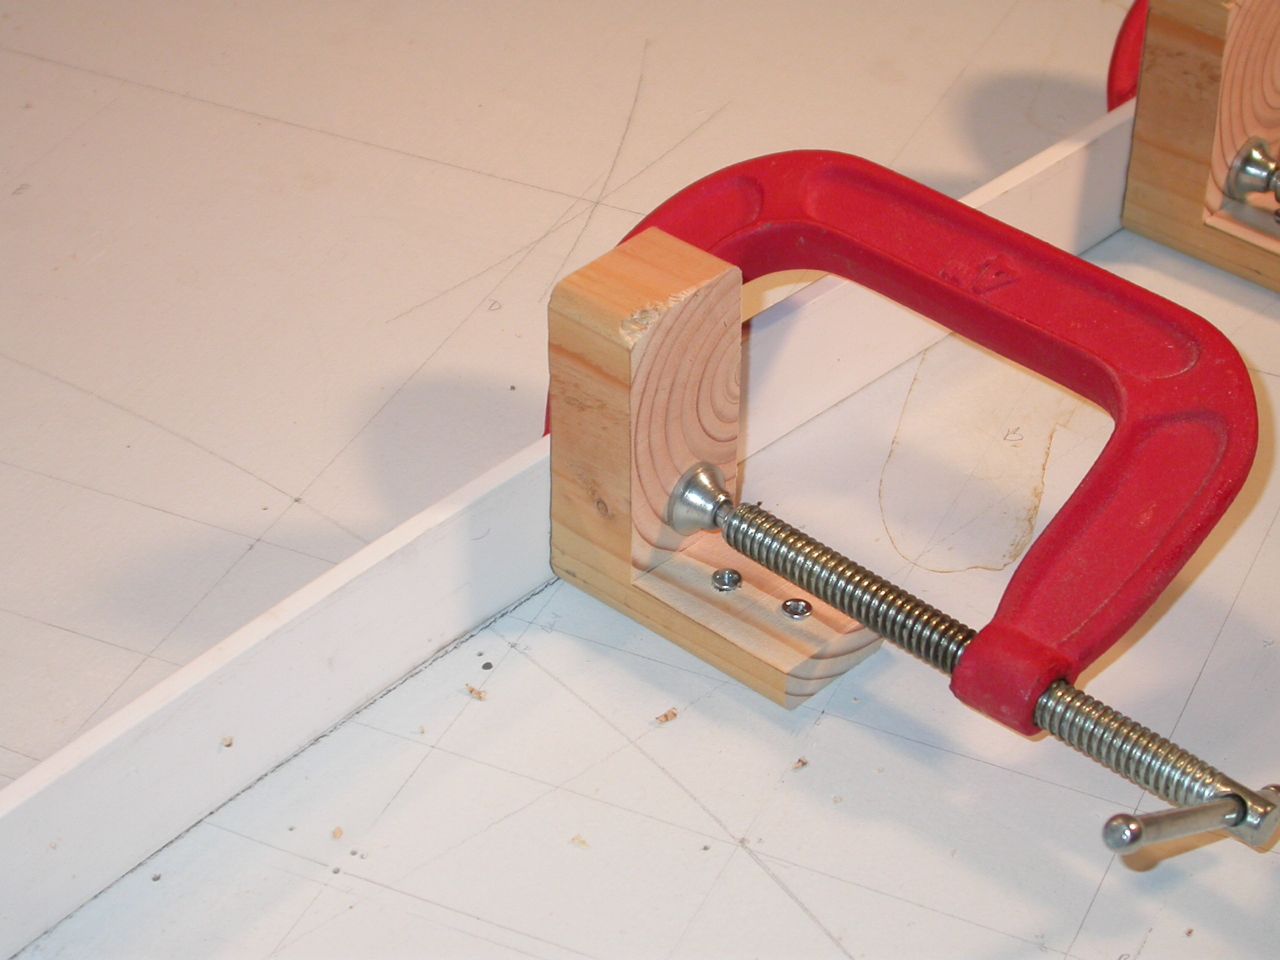
| Clamping blocks screwed down to table along line |
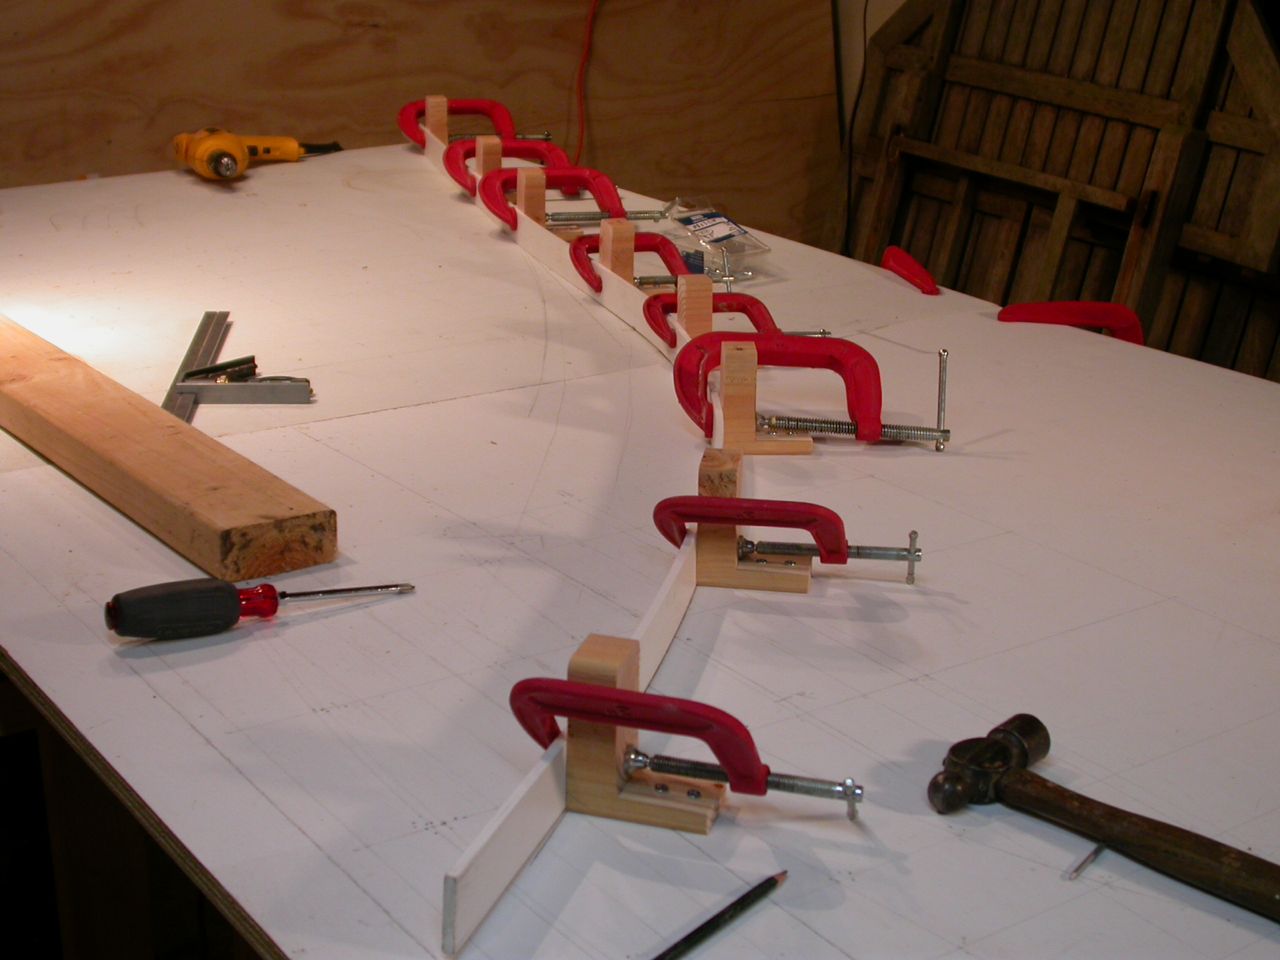
I screwed them into the workbench, along the line I had already lofted onto the bench top. I then clamped a plastic batten to the form, to make sure it followed the line.
 |
| Clamping batten to form |
 |
| Form and clamps tested and ready to go... I thought... |
Even Mother Nature was cooperating, by providing a 50 degree F day in the middle of February, for my first steam bending expedition. A warm day is important, I was told, because the colder the day, the harder it is to get the steam box up to operating temperature.
I started by pre-boiling the gallon of water in the kitchen. To save the bottom of my paint tin, I boiled the water in an electric kettle, and then kept it on simmer on the stove until I was ready to go.
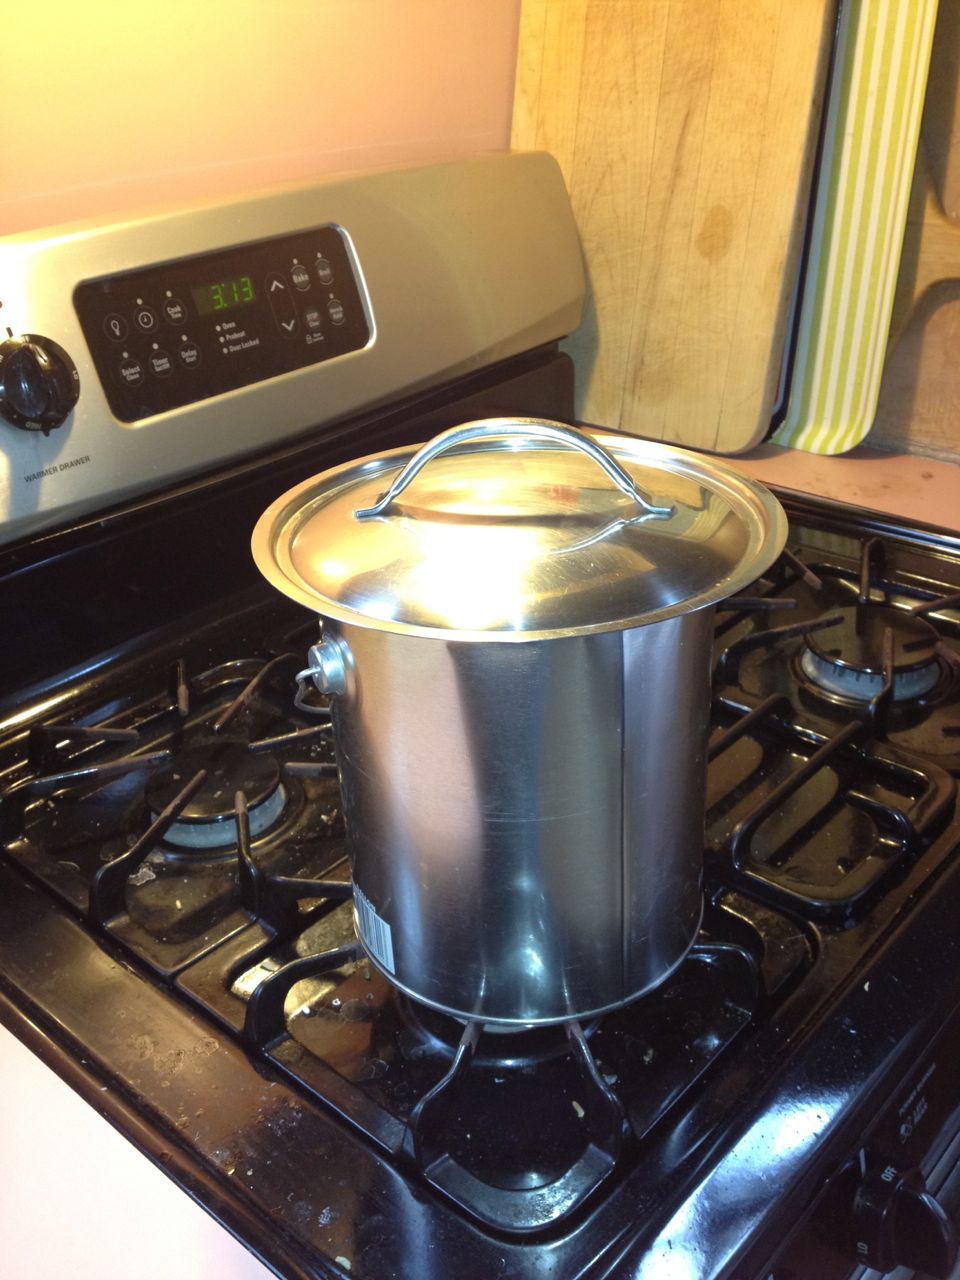 |
| Pre-boiling the water on kitchen stove to save propane & time |
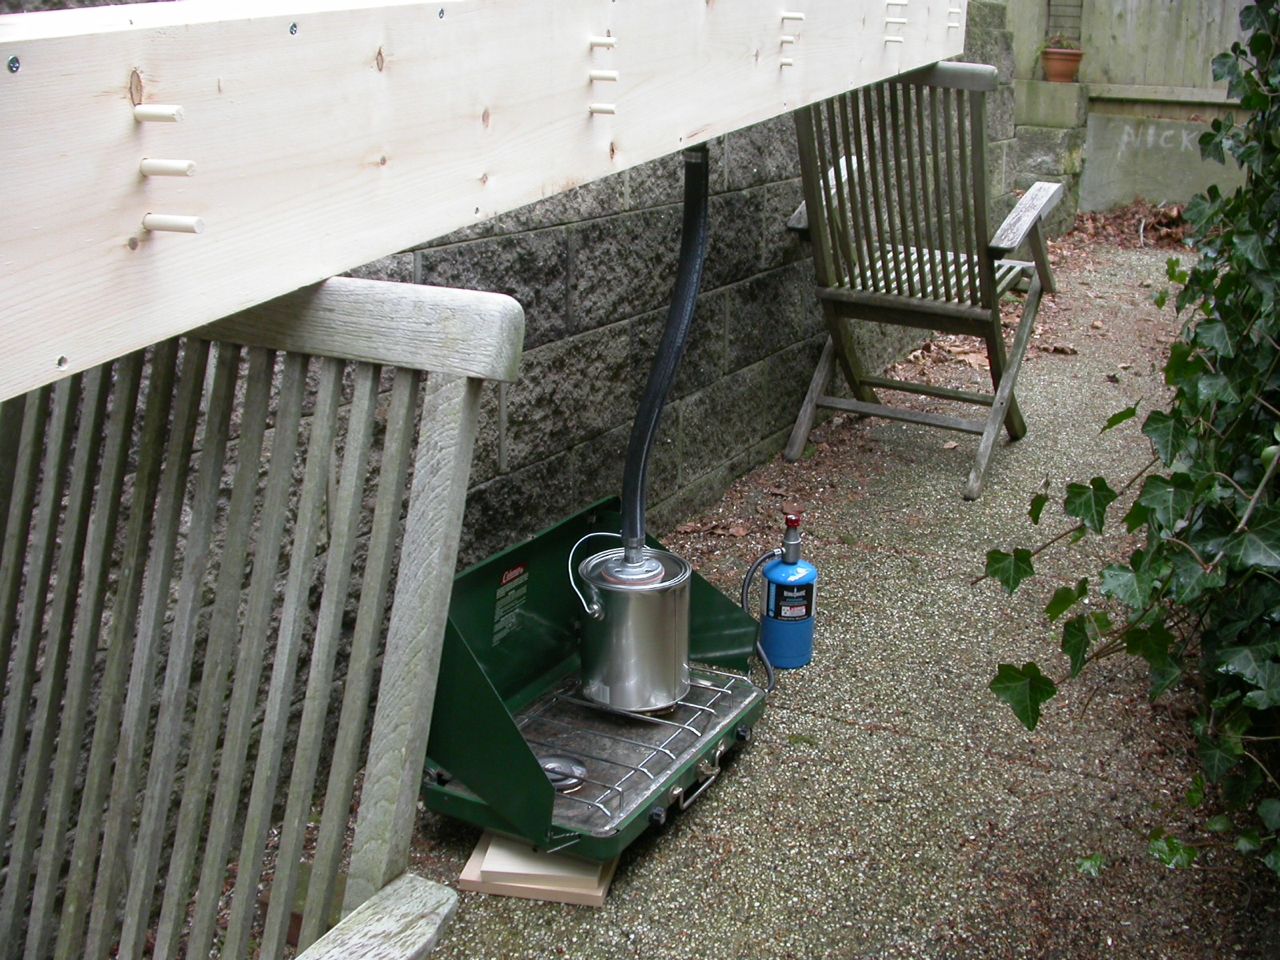 |
| Initial set up, well protected from any breezes. Outside temp about 50 F |
People keep telling me that my box is too complicated, but I can't quite figure out how a simpler box (without the pegs) could hold this amount of wood while allowing good steam circulation around the wood. Maybe someday this will be one of those obvious questions, but for now, I am happy with my box.
 |
| First set of boards loaded into steamer. |
H'mmm... a box... a closed box with no windows... Not much to look at...
After a few minutes, I realized I was missing some vital instrumentation: a temperature gauge. So I fetched my instant read thermometer from the kitchen, found a drill bit big enough for the probe, and drilled a hole in the box about a foot from the end.
Meanwhile, the boiler had been going for at least 20 minutes. When I put the thermometer into the hole, I was surprised to discover that the air inside the box was the same temperature as the air outside the box. This seemed rather peculiar.
After another half hour, the temperature had risen by 5 degrees or so, but obviously I wasn't going to 'steam' wood at 55 degrees. So I started gathering old blankets and a couple of fleeces and wrapped the box in them, to keep as much heat as possible inside the box.
This seemed to help, and slowly but surely the temperature rose up, and up, and up.
I wondered if the temperature was even in the box. The thermometer was at one end of the box; what was happening at the other end (which was slightly higher), or in the middle, near the steam inlet?
I drilled two more holes in the box -- one in the middle, and one at the other end -- and took additional measurements. Of course, the the temperature was higher in the center, but it was also higher at the other end -- the high end. Heat rises.
I fetched another, lower chair, and leveled the box. A few minutes later, the temperature gradient inside the box had evened out. Both ends were roughly equal, now.
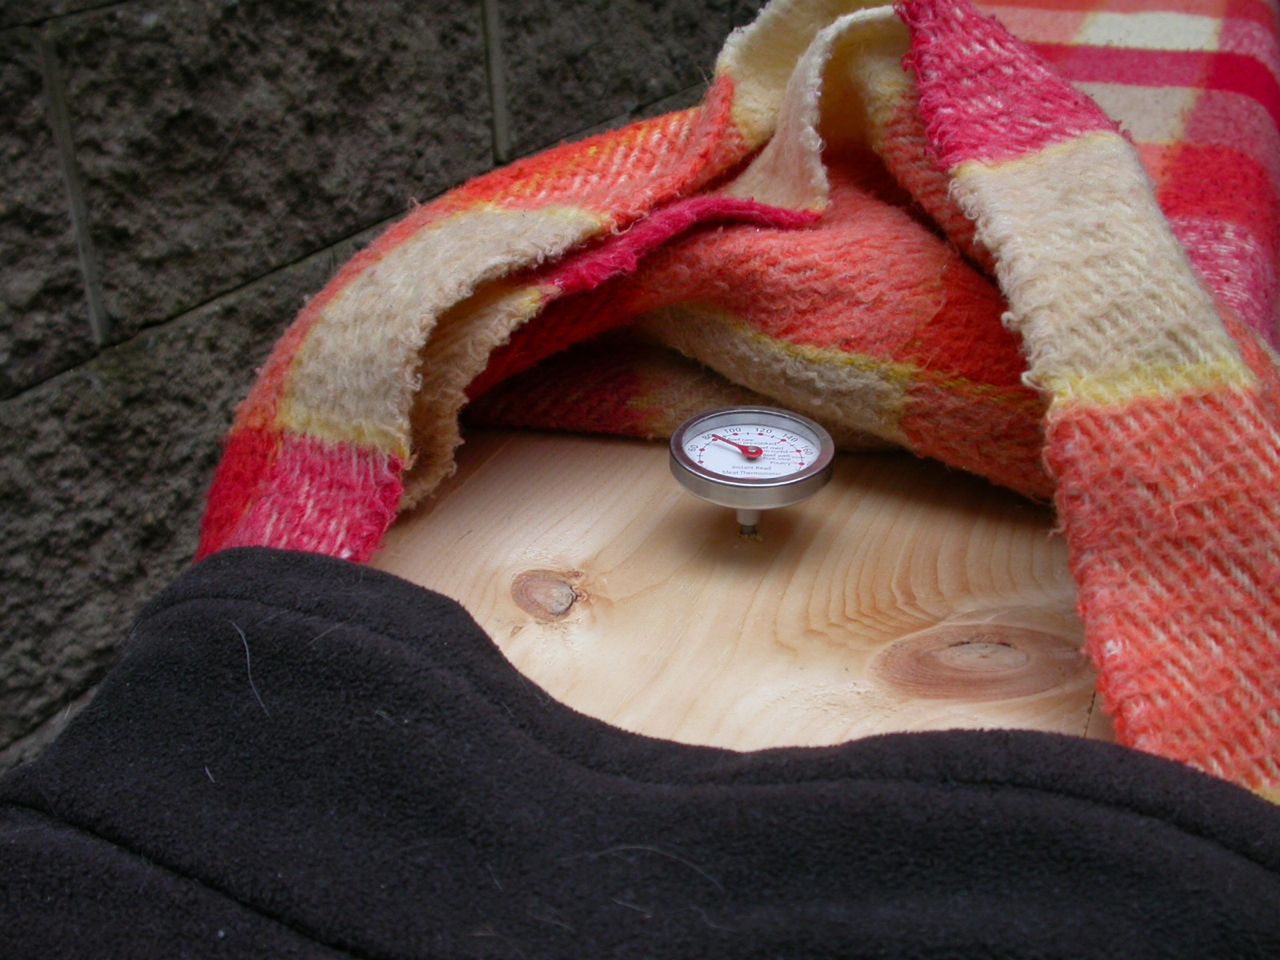 |
| Essential instrumentation |
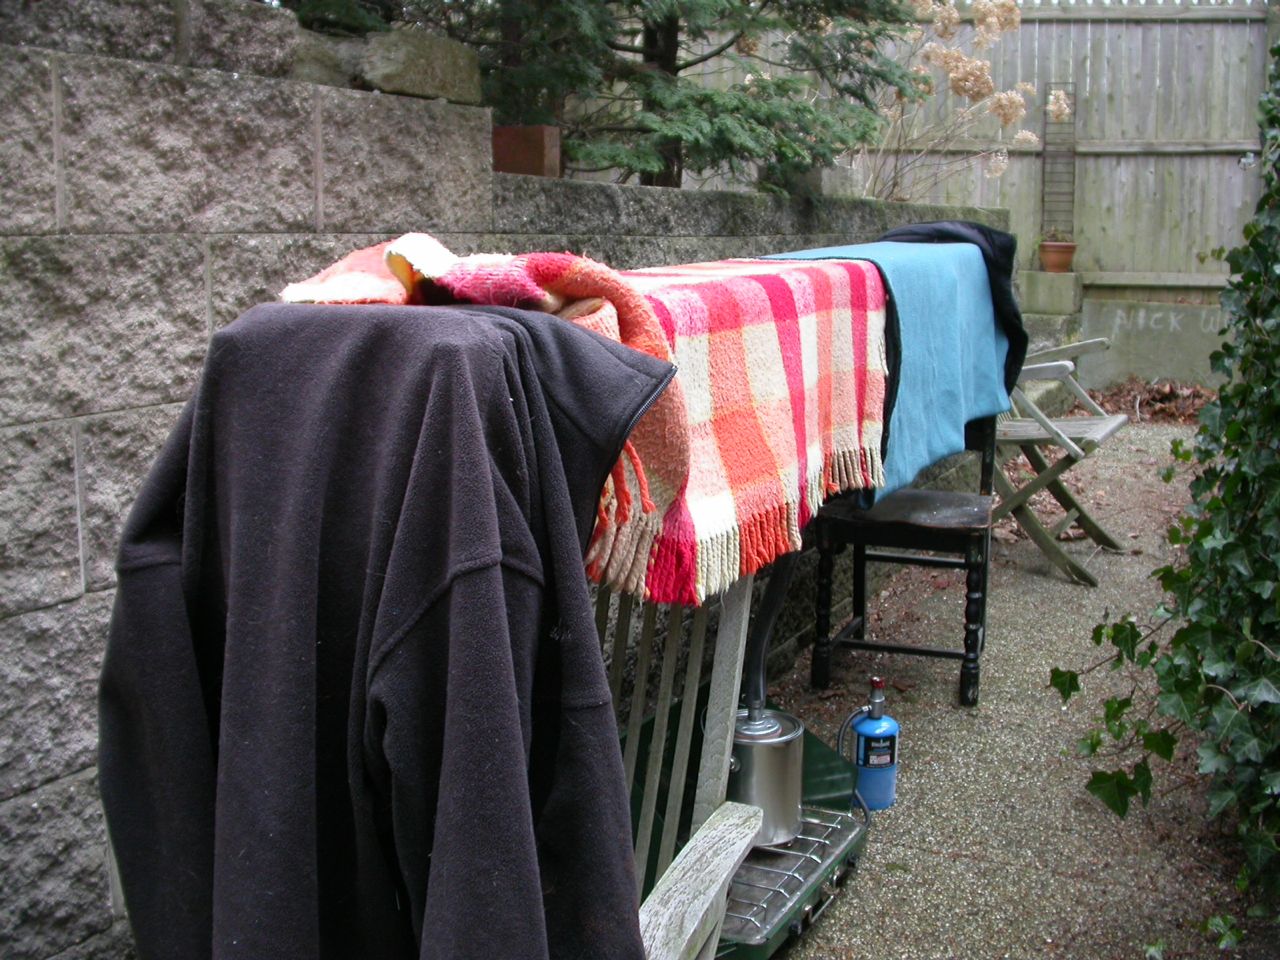 |
| Leveled out, with insulation |
I also started wondering if I was going to 'overcook' the wood -- a pitfall much discussed on the wooden boat forum. I had no idea what 'overcooked' meant, but it sounded bad, so I pulled a board out of the box to see how it was doing.
Not overcooked. Not even al dente. Uncooked pasta was more like it. I shoved it back in.
A watched pot never boils, so I took a break by logging onto the forum and expressing my angst to my fellow boat builders. 20 minutes later, I was back outside, and delighted to find my box was now at 200 degrees.
At 200 degrees, everything started to click. First, a peak inside the box confirmed that everything was a lot steamier and wetter than it had looked before. The steam box itself was changing shape, and -- yes -- all those gloom-and-doomsters who predicted that my fancy door would jam shut were correct: it did stick. Luckily, my dados were oversized enough so I could pry the door open, but after that close shave, I didn't put the door back in. I just draped a fleece over the end of the box.
After 1/2 hour at 200+ degrees, I again pulled a board out and tested it. The stiff, brittle, bone-dry hickory was wet, supple, and -- yes -- bendable! Amazing!
But was it 'done' enough to bend on to the form? Only one way to find out, so I carried it into my shop, and cautiously bent it into the sharpest part of the curve. If it was going to crack, this would be the moment, but it didn't -- it bent right into the curve.
Beautiful!
I didn't think I could bend all the boards into shape at the same time, so I brought in the boards one by one, clamping them next to their partners in turn, using just 3 clamps, to minimize the amount of clamping and unclamping.
However, as I bent the 4th board into the deepest part of the curve, the clamping block broke! It sheered off right where an experienced woodworker would expect it to sheer off: where the vertical part of the block met the horizontal part of the block (thus explaining the 'odd', but much stronger, shape of John Brooks' clamping blocks!)
Disaster!
I tried using the clamping blocks on either side of the failed block, but they too sheered off! In the battle between hickory and pine, hickory was winning!
Now this is the type of moment that 'do-ers' relish. It's the moment that rewards not only experience, but a well stocked junk box -- the kind of junk box that only do-ers accumulate. Built from failed or abandoned experiments, it contains a vast array of valuable bits and pieces.
My junk box had just the thing to save the day
Before heading off on my long voyage in the Blue Moon, I had the idea to build bulwarks that would give me some security on the BM's raised deck. For various reasons, I never installed those bulwarks, but the steel brackets I'd built for the bulwarks were still in my junk box.
In a few hectic minutes (wood cools quickly) I replaced my sheared off wooden blocks with much more sturdy steel ones.
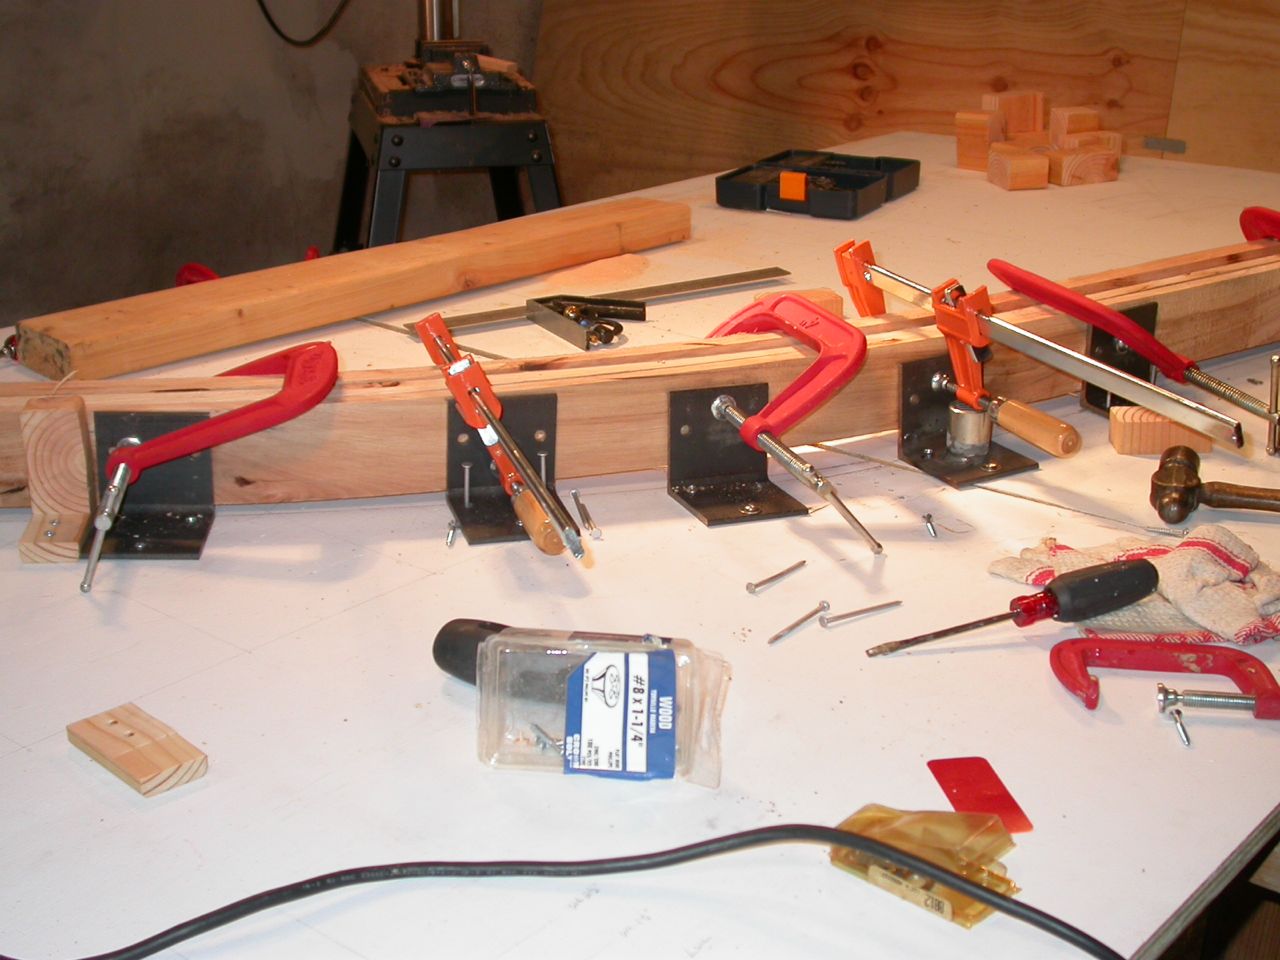 |
| Sturdier clamping stations |
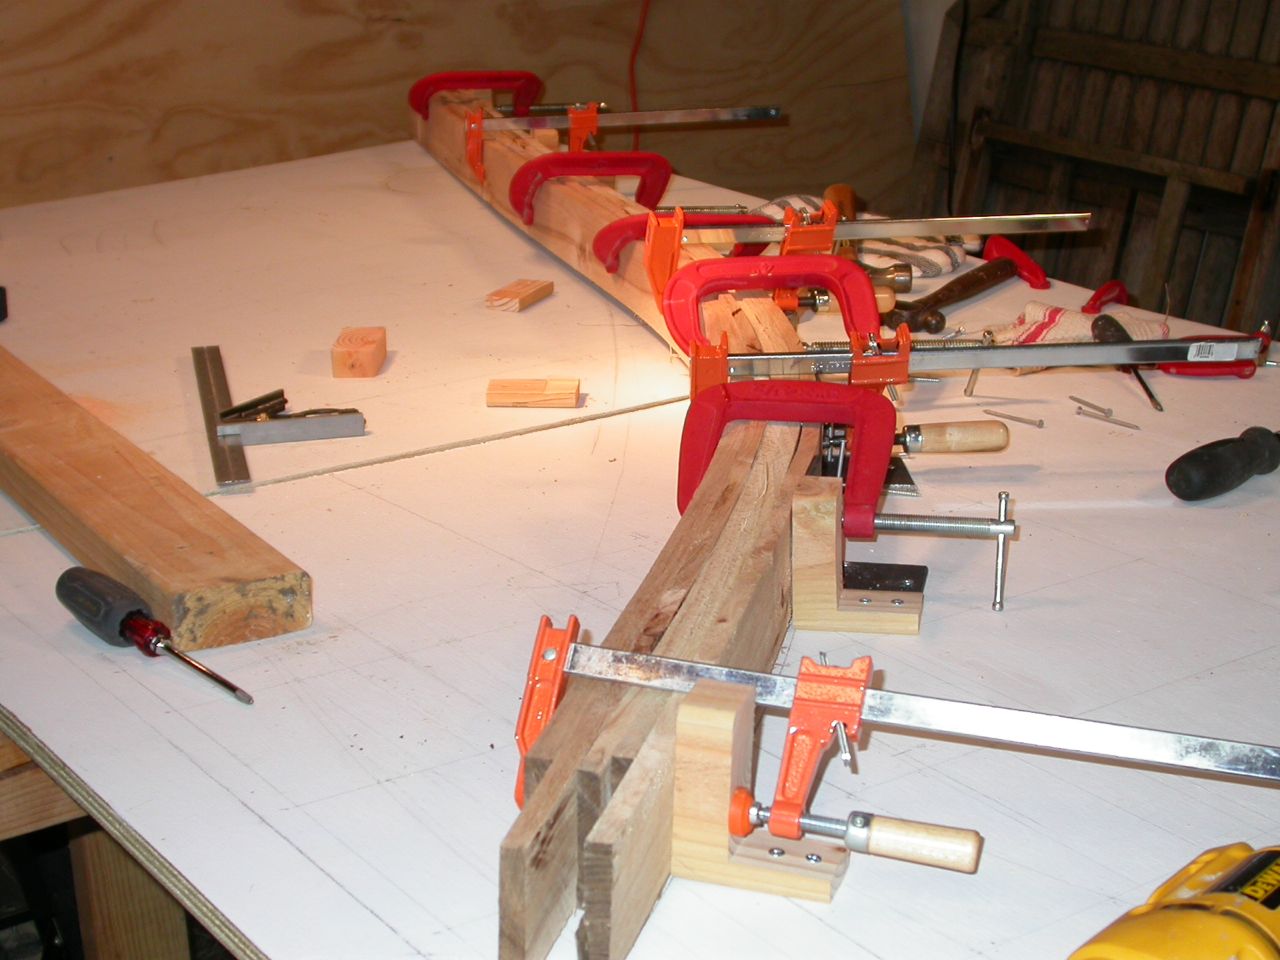 |
| All 5 boards clamped into place. Whew! |
I bent the final board into position, and then put clamps on all of the clamping blocks. The end blocks didn't have the same sort of stress as the center blocks, so they all held, thankfully.
And, just like that, I was done. My hickory was bent into shape. Success.
From reading in the Wood Handbook, I believe the next step is to let the wood cool and dry out for a couple of days. That should allow the wood to hold its shape after being unclamped form the forms.
It will then be time to glue the boards together. I plan to tackle that part, tomorrow, so stay tuned!
>>> Next Episode: Confessions of an Epoxy Hater
Nice job, John. To get a faster rise in temperature you must make a better circulation for the steam in addition to the isolation. There must be a small escape-exit for the steam opposite to the entrance valve.
ReplyDeleteYou might describe this as a "learning curve"?
ReplyDeleteIt is very likely that your hickory will spring out a bit when you take it off the clamps, but don't worry about bending it back to the correct shape as you glue it up. It now "knows" the curve you want. ;)
If you have any more of those steel angles, you could substitute some of the other weak wooden blocks for the glueing. Remember to cover your blocks with something to stop the wood being glued to them.
Wow! Great way to overcome that snag! Will you use the steel clamp blocks for the glue-up, or make different blocks?
ReplyDeleteExcellent post, it took me 20 years to get the "get on with it" approach. Really enjoying your blog, keep up the good work!
ReplyDelete/Anders
Can't wait to see how this ends!
ReplyDeleteGood idea about swapping out the rest of the wooden blocks for steel ones. It would be a real pain to have them break with everything smeared in epoxy. I hate using epoxy, anyway, (though I love the result) so want to make the next step as excitement-free as possible.
ReplyDeleteJerry: there were small openings on both ends of the box, and after I ditched the door, a fairly big opening on one end. I think it just needed time to heat up, particularly in the relatively cold weather. Next time I'll use more/better insulation, and just allow more time for it to pre-heat. NOTHING happens until the temp hits 200 degrees, so it's just a matter of making that happen as fast as possible.
ReplyDeleteOh, I almost forgot. The box needs to be level, or you get a temperature gradient inside the box. Heat rises, so the high end of the box will be hotter than the low end of the box. I discovered this the hard way. I forgot about this, but just revised the post to include this 'discovery'.
ReplyDeleteI built my (very rough )steam box out of a length of 6" pvc conduit, inclined at about 20º with the lower end sitting on the rim of an old pait tin. Wrapped this joint with canvas to sort of seal it. I hung the pieces of timber to be steamed in the conduit with string to stop them falling through & blocked up the top end of the tube with more rag. With this layout you get circulation - hot steam rises up past the timber & condenses & runs back down to the boiler. The circular shape of the box prevents the pieces stacking on top of each other & allowed steam access to all surfaces.
ReplyDeleteDon
Recirculating water in your steam system is an idea worth thinking about, for sure. Cool idea.
ReplyDeleteI like to use waxed paper under and round about my laminating/gluing projects.
ReplyDeletei admier yur tanasterdy
ReplyDelete73's from KD5-IUD,,,,(old Ham too lazy to upgrade to licesend Tech).....good show my man. I have built close to 50 "bent" laminated tillers, and I have to say that it looks like you have a "handle" on it ! (pun intended)... Bill T. at www.tcboats.com
ReplyDeleteJohn, an L shape is never going to be strong in timber the grain on one of the 2 sides is always going to be weak. Apart from switching to steel, other options would be to find wood that has naturally grown as an L (copiced trees for example) or to laminate several pieces of wood.
ReplyDeleteBill: okay, time for a 'geeks out of the closet' moment!
ReplyDeleteI had an Advanced license back in High School, but let it lapse when I went off to college. When I was planning my voyage up the coast, I thought it would be fun to have a little rig on board, so built a QRP-CW 5 watter, brushed up on my code, and took the General exam. Thank goodness they don't make you take a CW test anymore.
Anyway, it's kinda cool to drop the anchor and hoist my short 40M vertical up the mast. KC2VFT/MM. I try to catch QRP/CW contests from time to time.
Andy: Now you tell me ;-)
ReplyDeleteSeriously, I should have known they would break. I should have studied John Brooks' blocks a bit more, to figure out why he made them that way. Quite naturally, all boatbuilding books assume a basic level of woodworking knowledge -- who would try to build a boat without even a shred of woodworking experience?
Unfortunately, lots of people, including me! So we have to learn things the hard way.
I sure do enjoy your blog.
ReplyDeleteBob