Actually, the gunnels themselves were fine. Or were fine until I over-clamped one end, trying to force it into shape. There must have been a small defect in the oak, because I broke off a corner. Most frustrating.
My goal was still to refit Cabin Boy using wood I had on hand. I'm trying to preserve my limited building budget for the Blue Moon's cabin build. Unfortunately, I didn't have another 10' long piece of oak. This stymied me for awhile, until I realized I could simply scarf back on the 2 foot hunk I'd imprudently cut off a few days ago. A bit of a pain, but I'd get to practice my scarfing skills.
I'd been reading one of the best boatbuilding books I've ever found, Walter Simmons "Lapstrake Boatbuilding". This book has a very useful hint on how to easily find the right angles for a scarf.
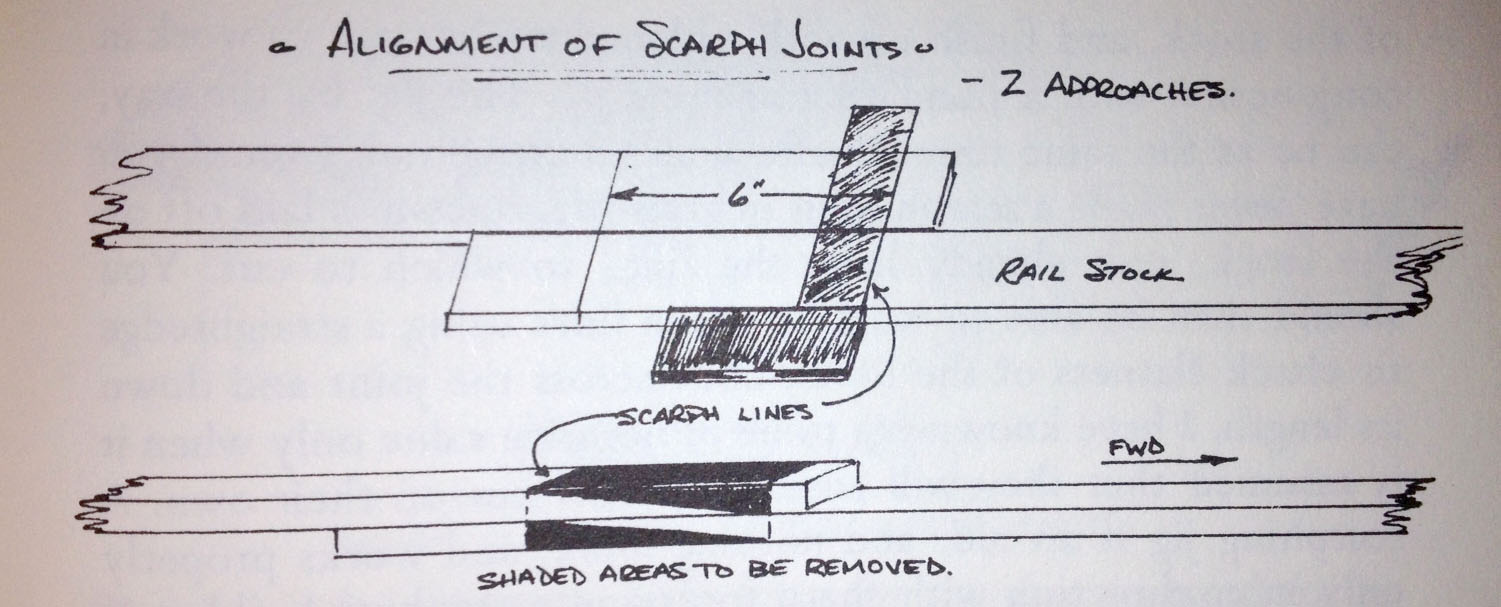 |
| Trick to Align Scarf Joints From Walter Simmons "Lapstrake Boat Building" |
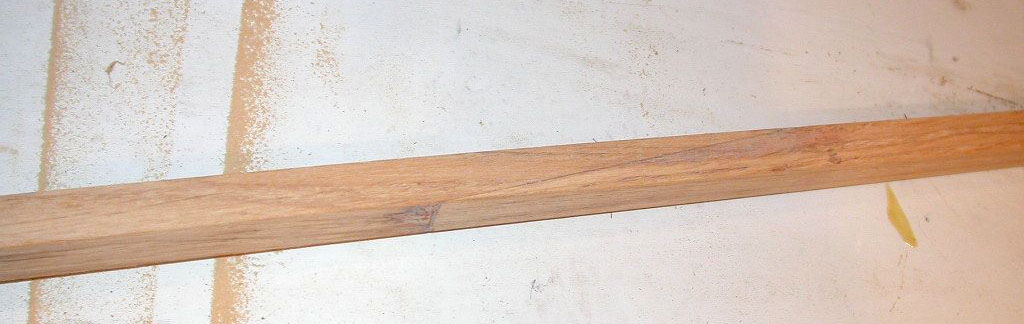
Here are those simple lines on my two pieces of oak. I started to cut and then realized I'd forgotten to take a photograph.
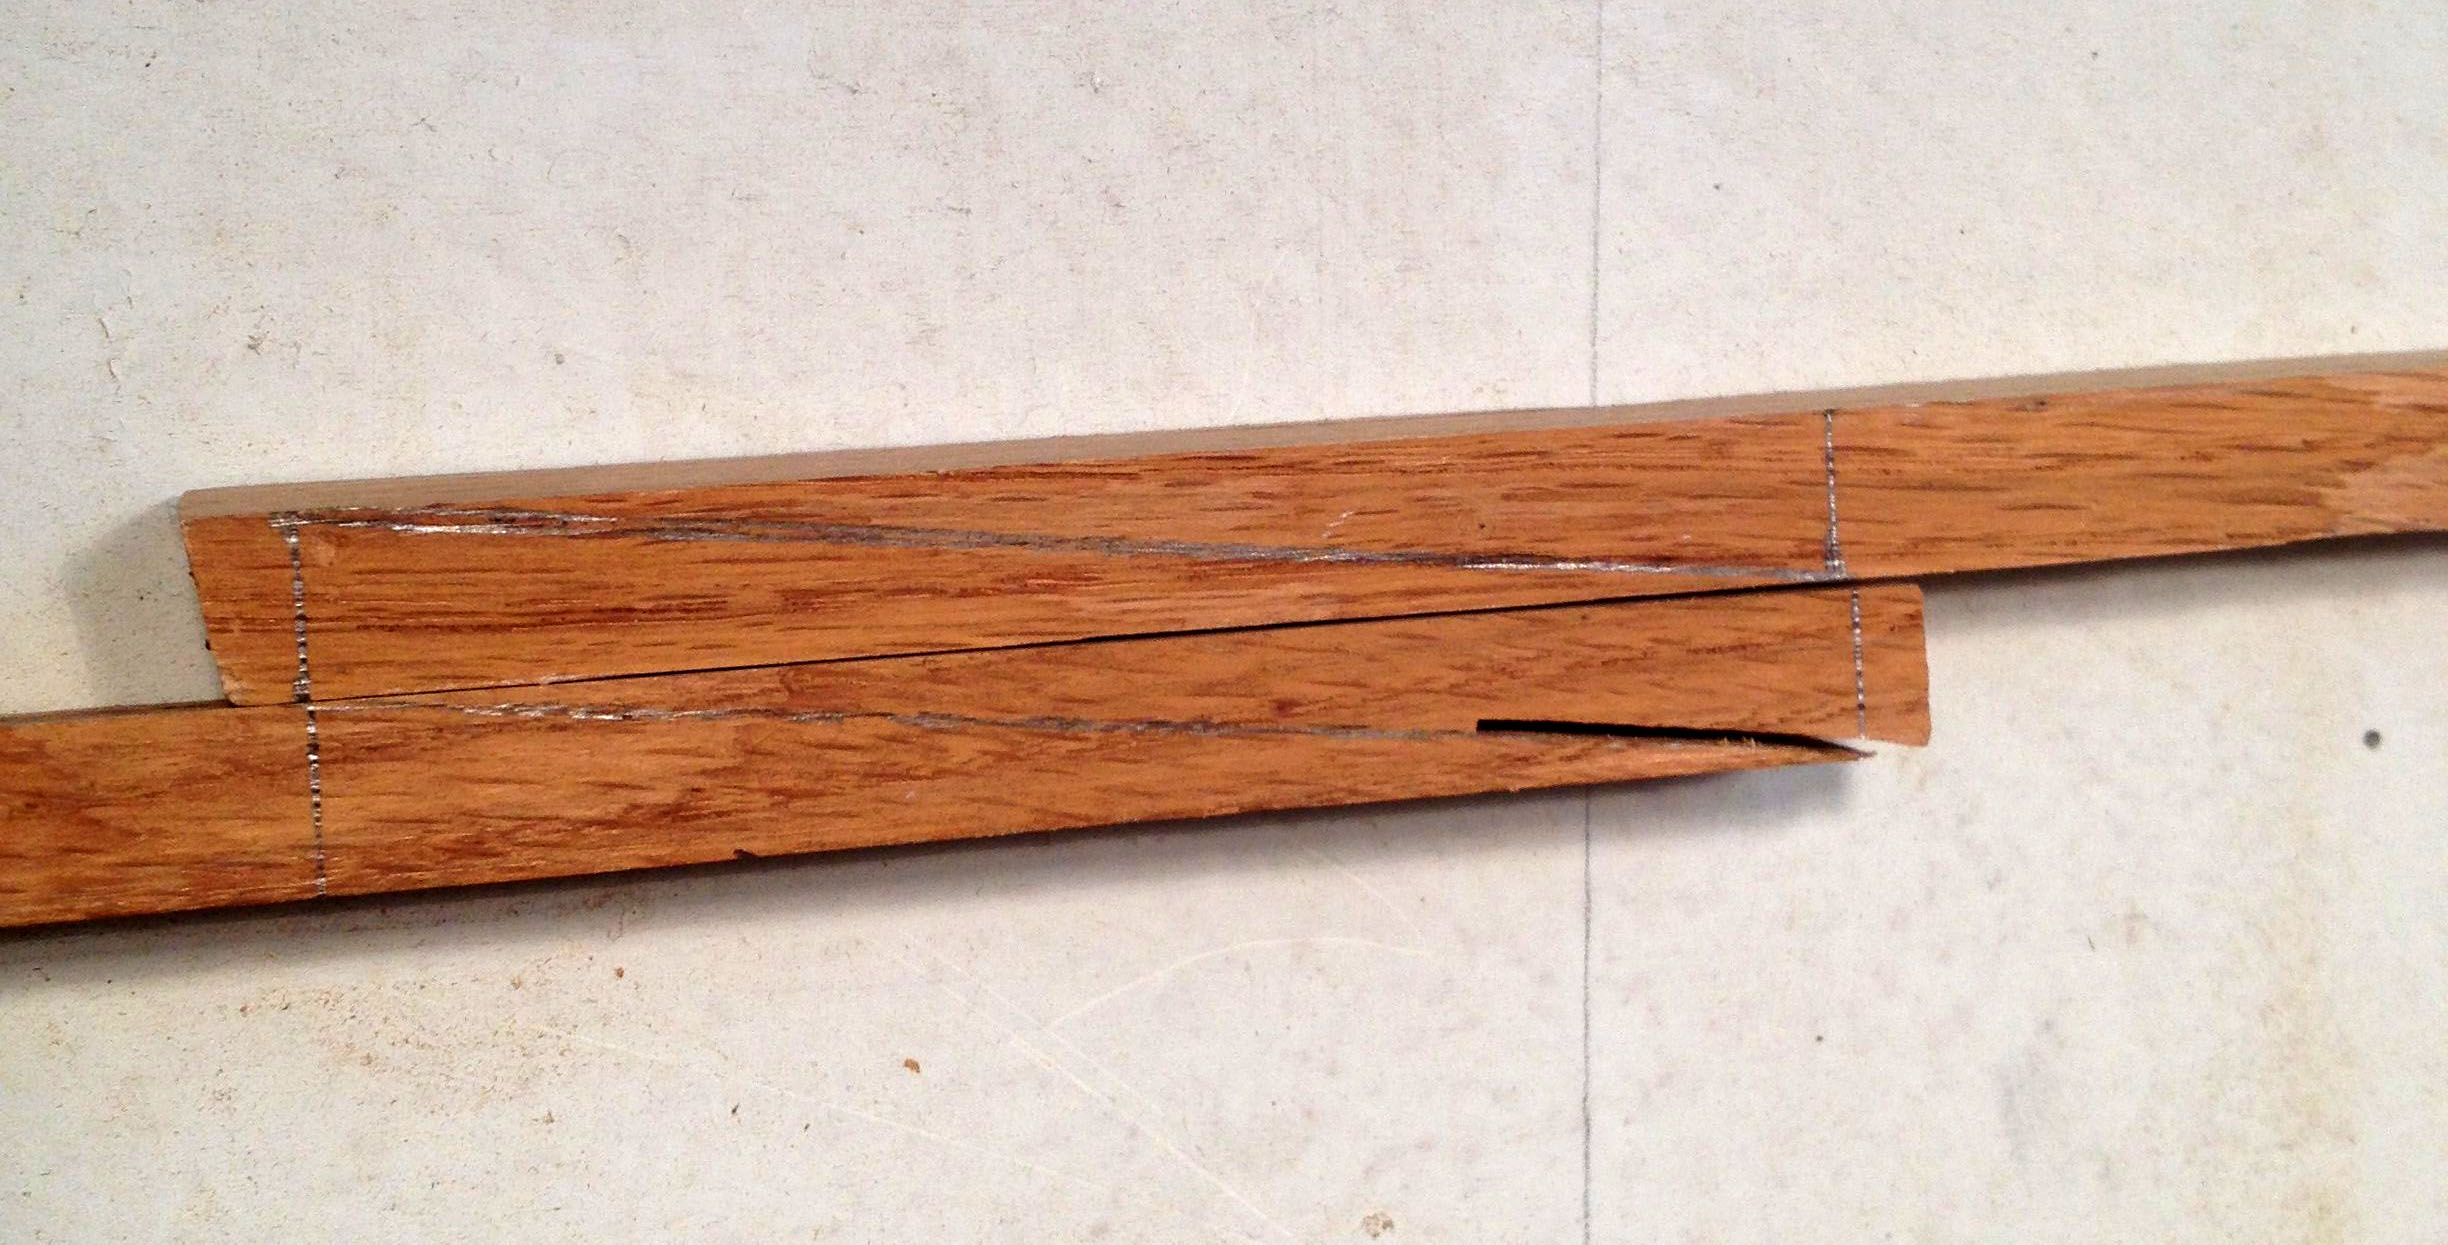 |
| Angles marked off on gunnel and extension |
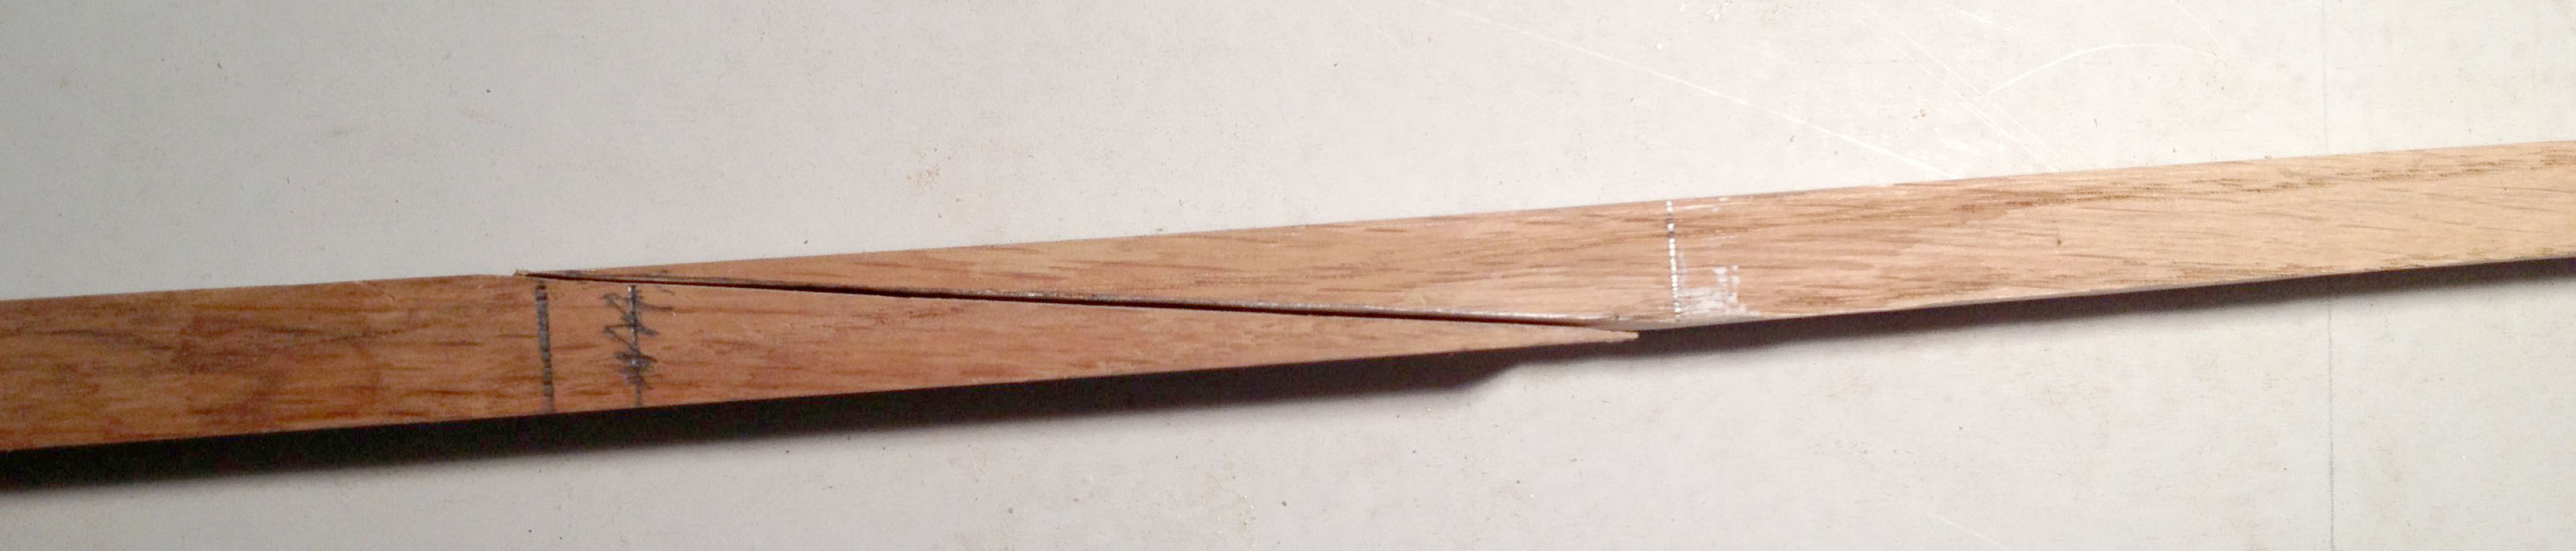 |
| Cut out and trimmed |
Although I complain about epoxy from time to time, there's no doubt epoxy is perfect for scarfing. Some will say epoxy doesn't work on white oak, but if you read the West System manual, you'll find this is not true. You just need to make sure the surfaces are roughed up a bit with sandpaper and, if you are the cautious type, wiped with alcohol.
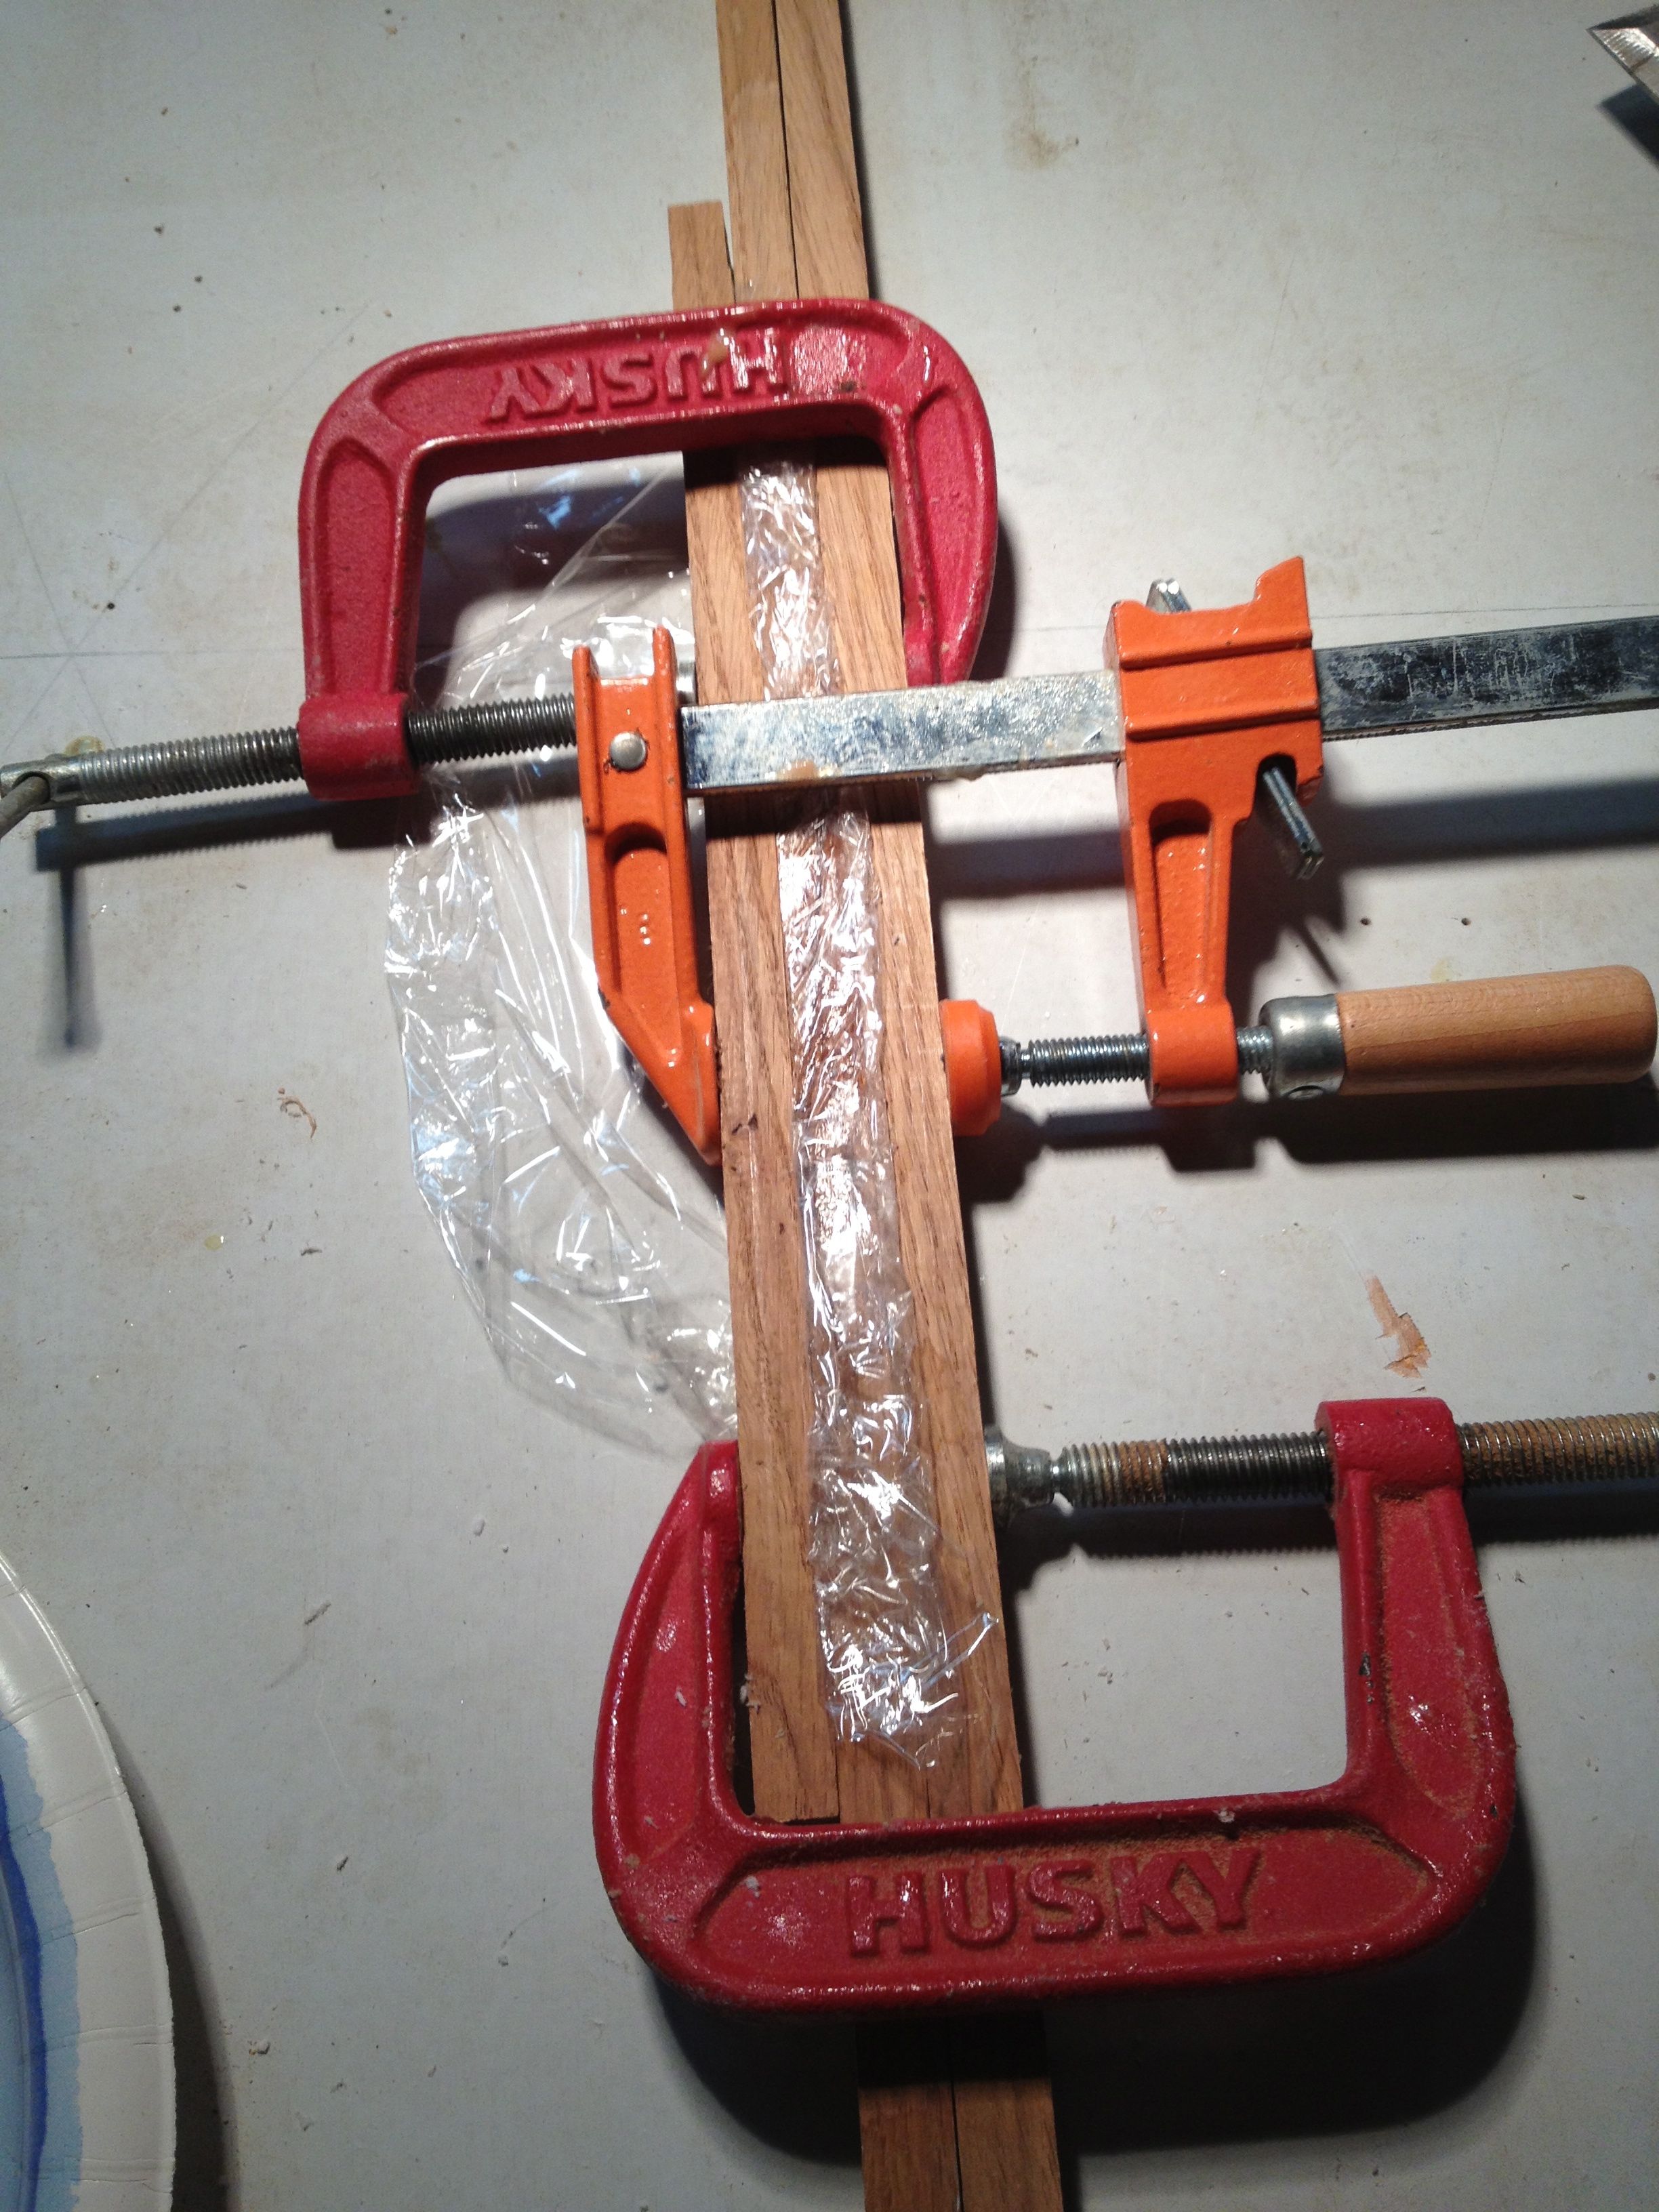 |
| Glued and clamped |
The next day, I just gave the gunnel a light sanding to remove the excess epoxy. The results were quite alright, I thought.
 |
| Finished scarf |
Next Episode: Bevels, Bevels, Bevels
For a scarphing sled, see:
ReplyDeletehttp://www.grantmaclaren.com/zac/index5.html
I had to study the pictures before I understood what I was looking at, but now I get it. Very interesting, particularly for wide planks that would be hard to push through a bandsaw vertically.
DeleteThanks for the tip.
nice job looks great
ReplyDeleteLet's see how the breasthook and knees come out. I am making this stuff up as I go along ;-)
DeleteJohn, Very interesting as usual. I was faced with this while building a 22' long Whitehall out of western red cedar and the longest I could get boards was 20'. I was building a stripper and had to scarf almost all of the first 30 thin 3/8" X 3/4" strips to ad on a couple of feet or so. Like everything necessity is the mother of invention. I had a good Radial Arm saw and a long infeed outfeed table on both sides. I built a box to lay the strips and later gunwale pieces in as well and set the angle. I used 12-1 since I thought longer scarfs would be better and pushed the strips through the blade. Worked like a charm. Just used Titebond III for the glue.
ReplyDeleteIt was simple and straight forward.
Tom...
Yes, it's all pretty simple, really. That's why I try not to let the fact that I don't know what I'm doing half the time stop me. I figure I'll know how to do it when I'm done.
Delete