 |
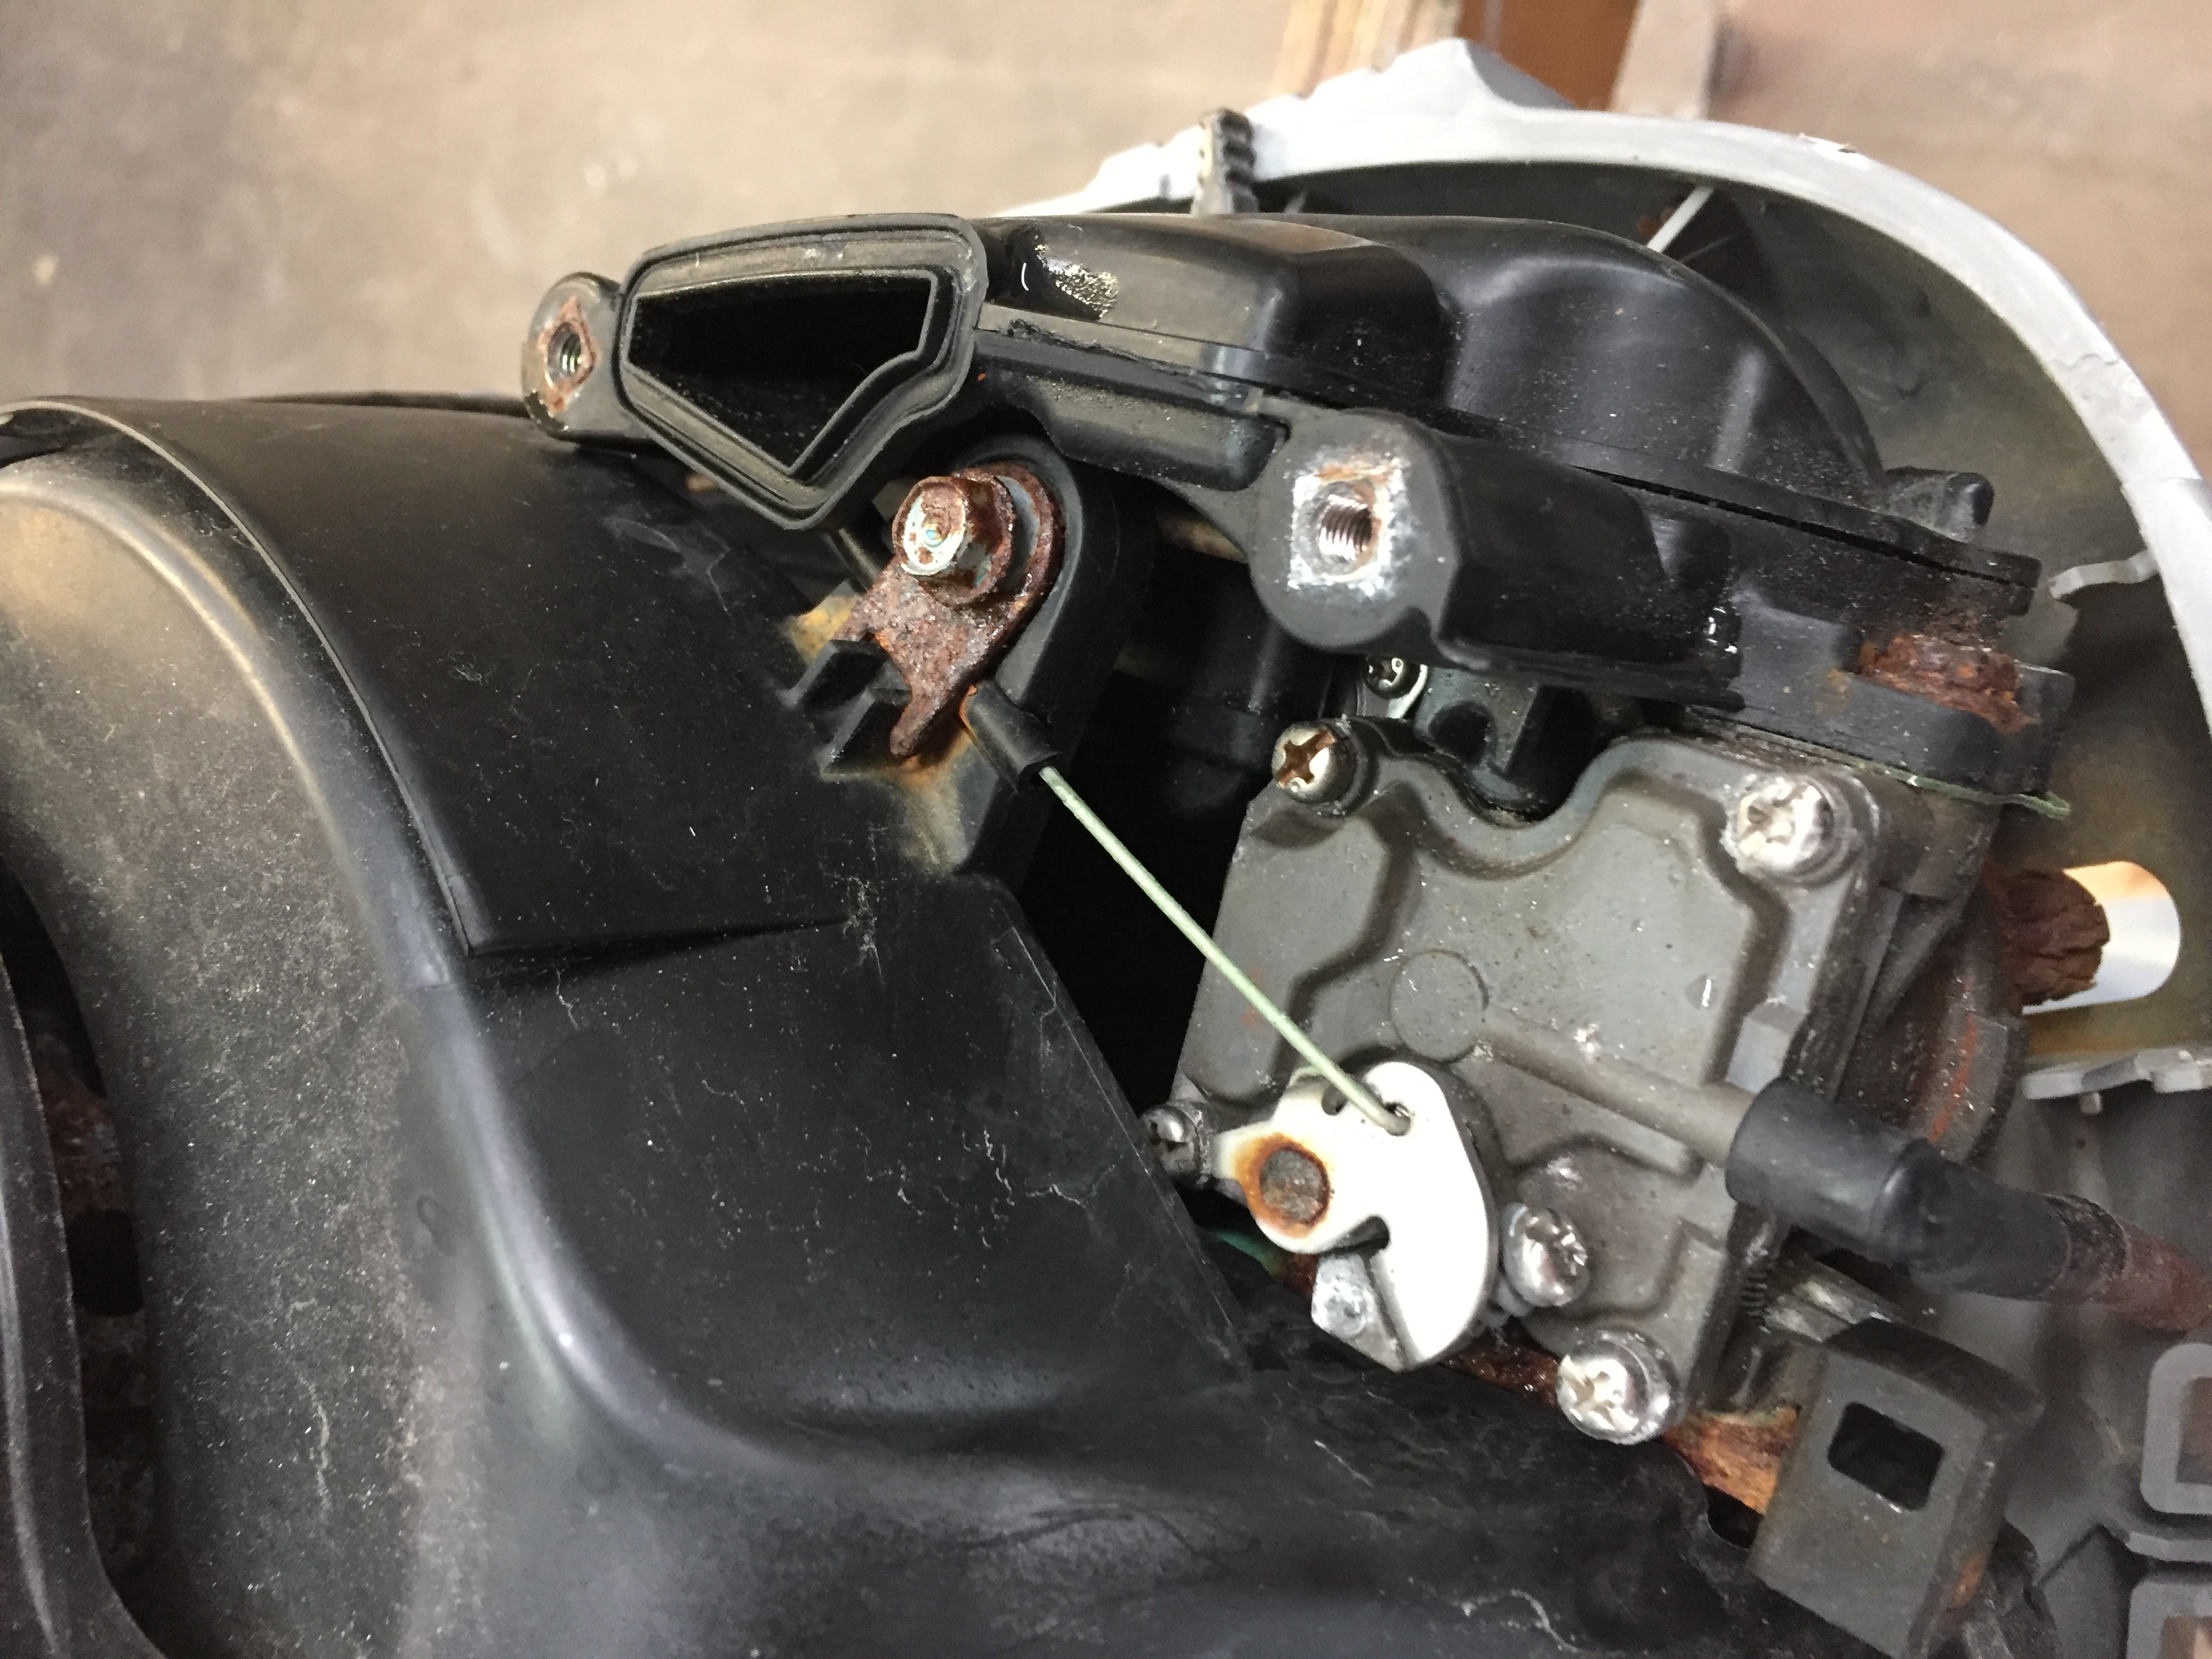
| Inside the old Honda 2.3... rust |
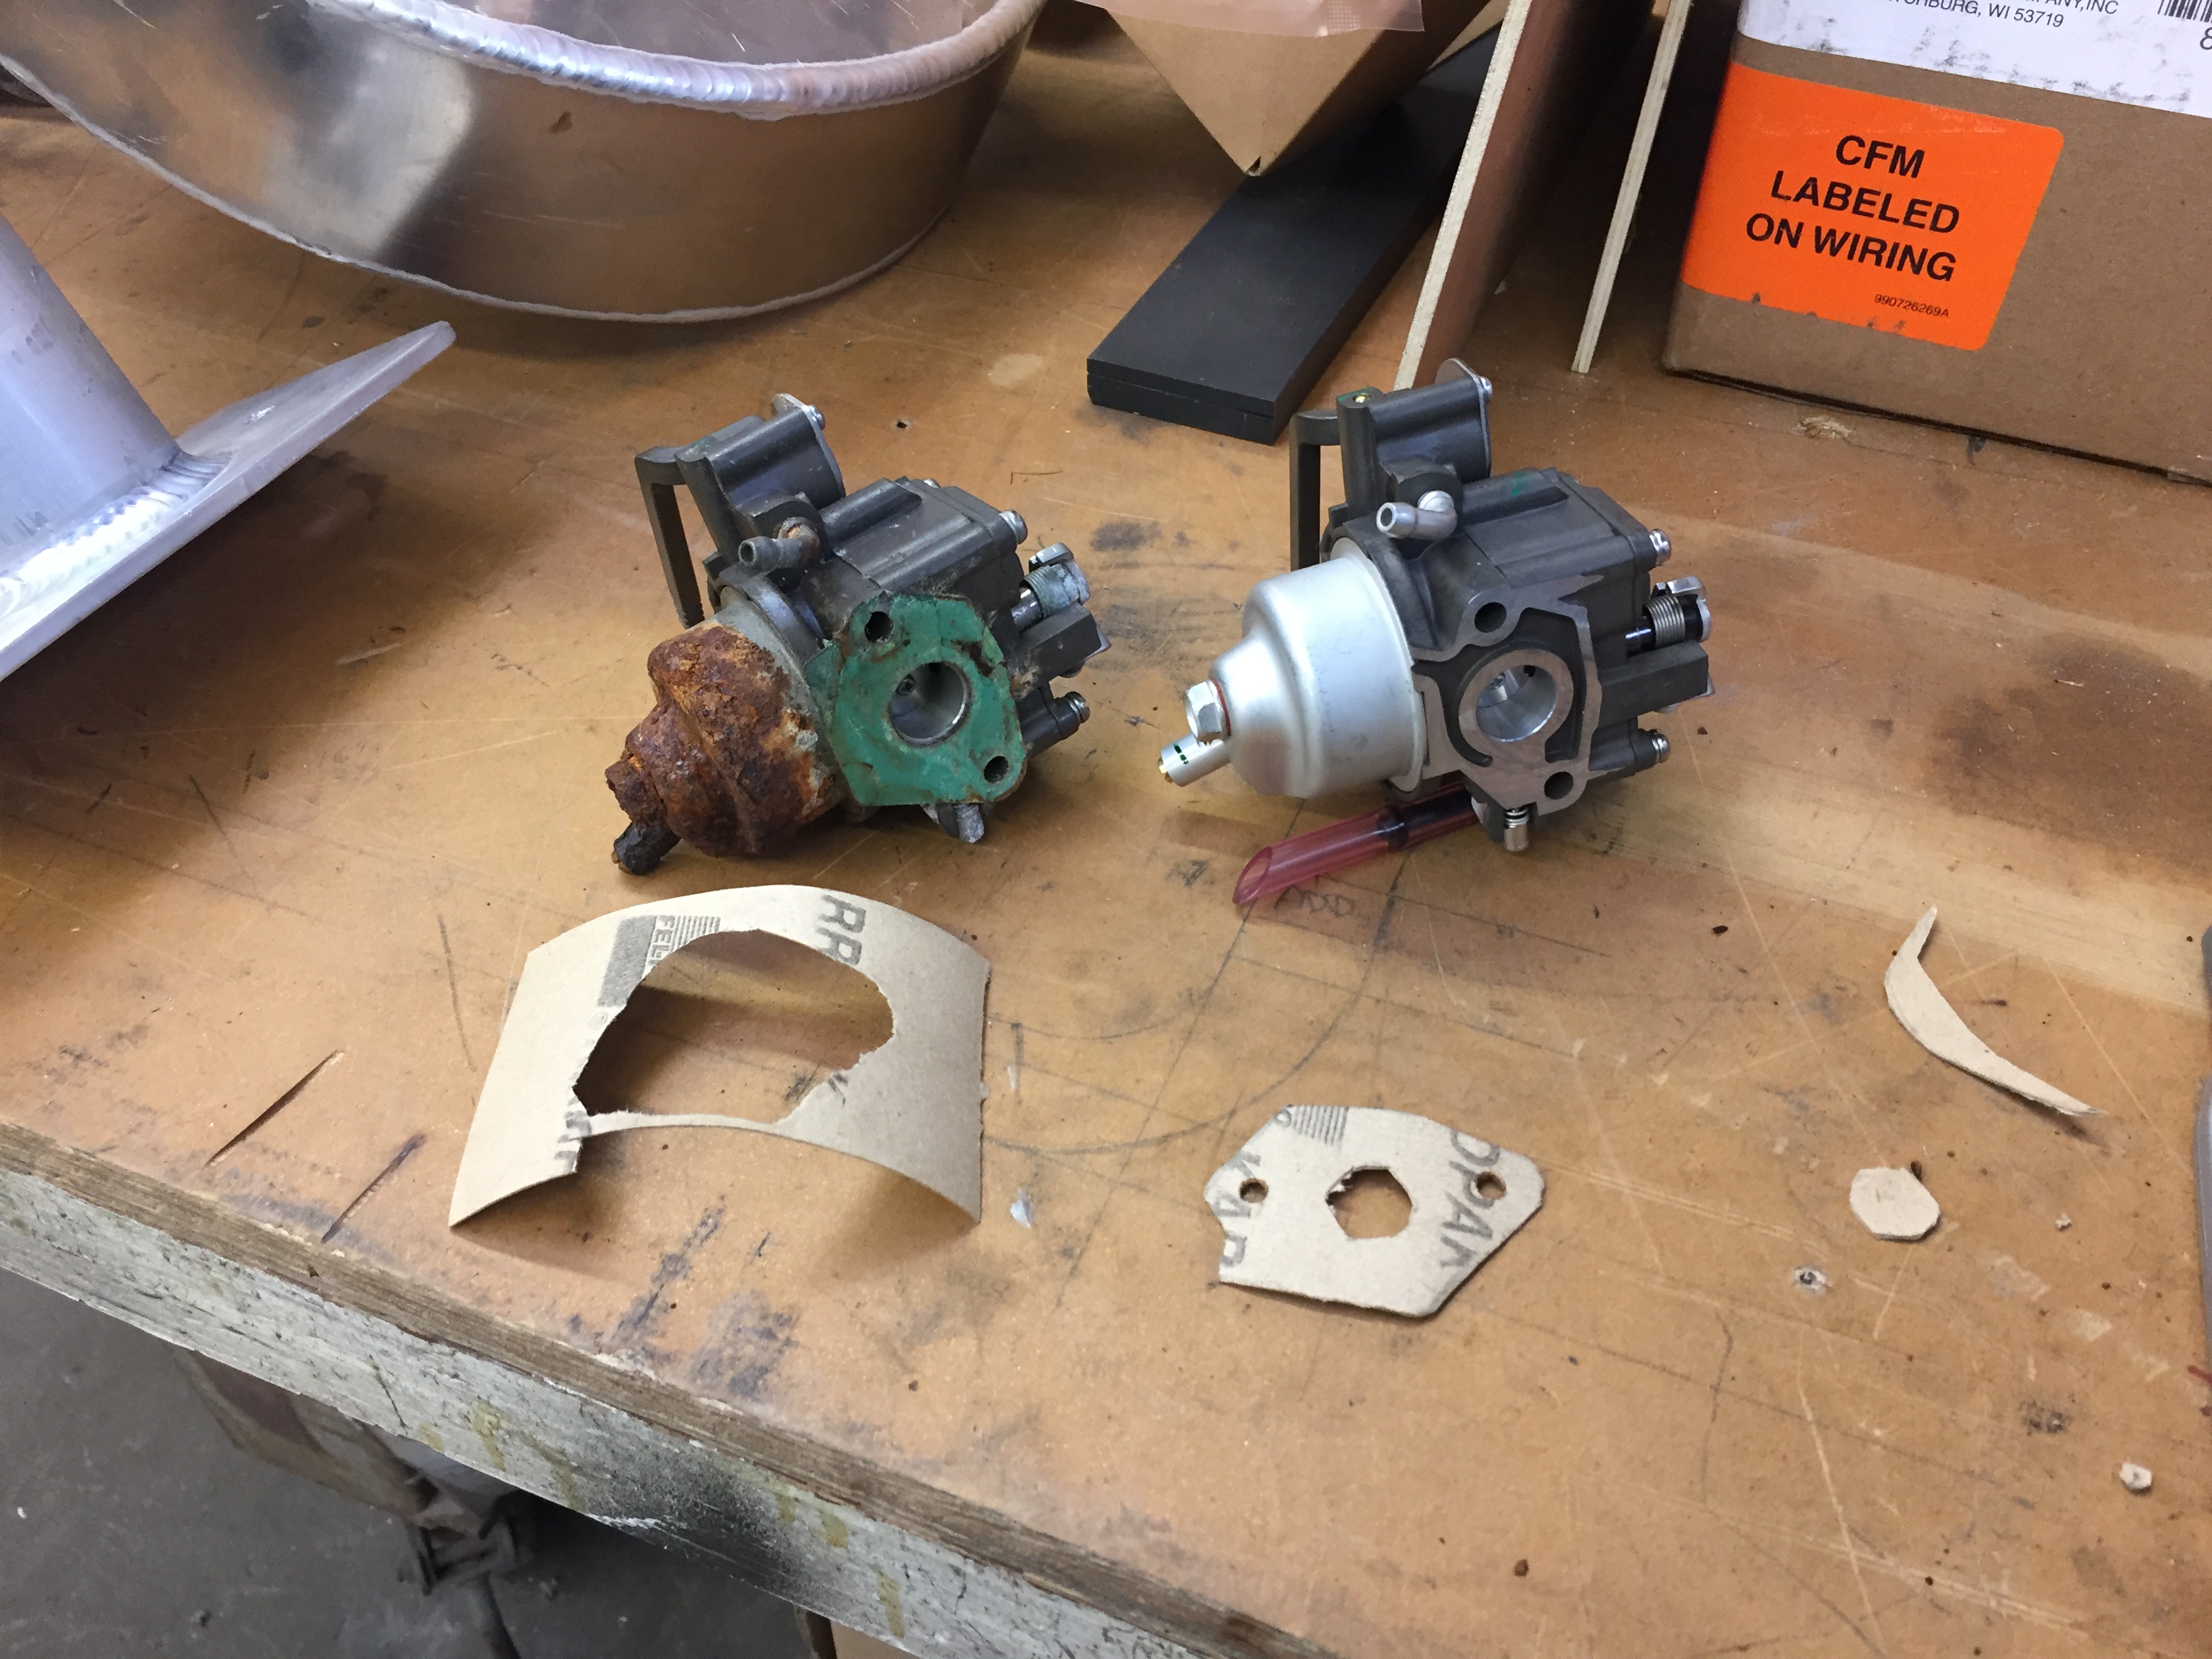 |
| Rusty old carburetor, and its replacement |
When it refused to start again in Beaufort, NC, we had enough. I didn't want to get stuck in the Bahamas with a non-working outboard. It was time for a new one.
The 2.3 hp engine was enough to move the PortaBote along with two people at a stately pace of 4 or 5 knots, but I'd read that a 4 hp engine would get the boat up on a plane, which would greatly increase our speed and range of exploration. Yamaha -- my preferred brand -- makes an excellent, 37 lb. 2.5 hp engine, but I was really tempted by the 59 lb. 4 hp model.
Weight vs. speed... Weight vs. range...
After agonizing over this decision for at least 10 minutes, I went with my gut and sent Helena off for the 4 hp model. Surely I could figure out some way to lift the beast on and off the dingy, right? All I'd need was some sort of crane... a DIY lifting crane. Yeah, that was it! No problem!
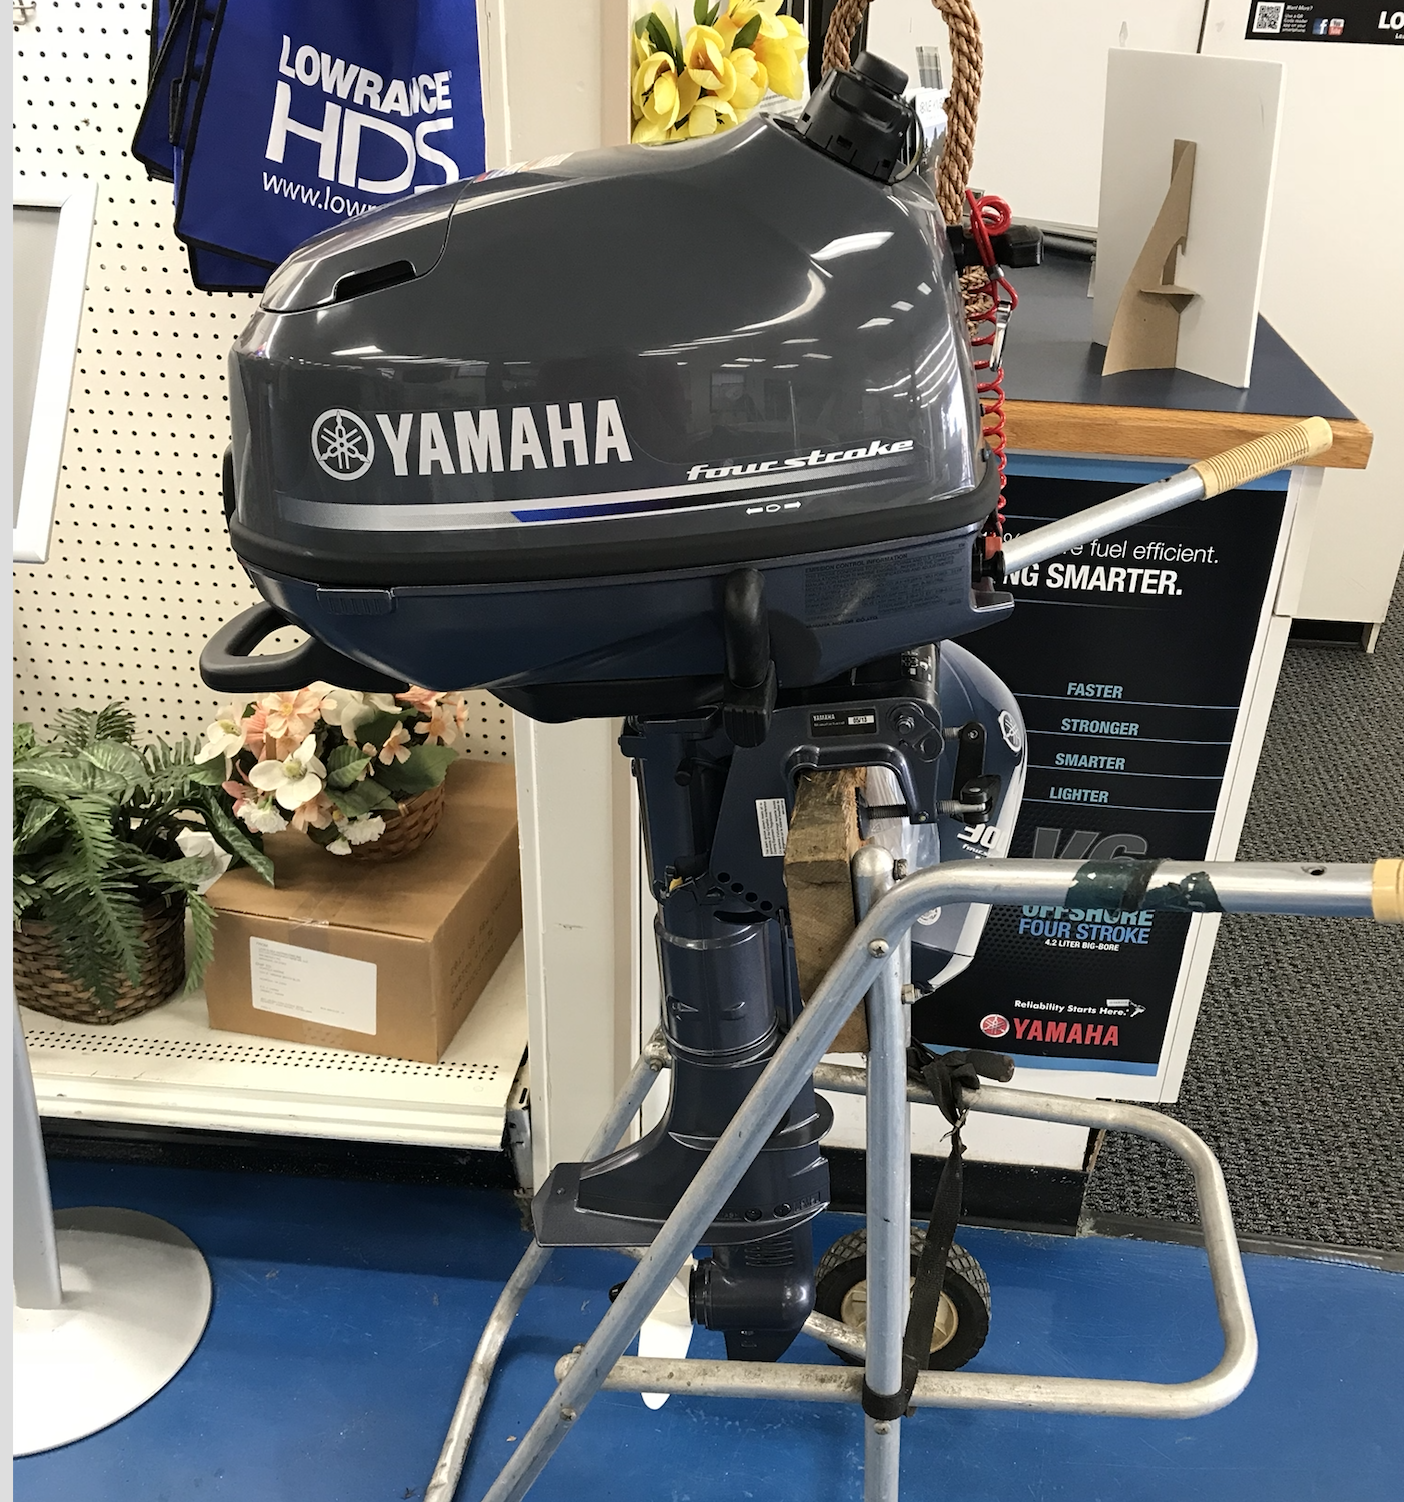 |
| Our 60 lb. Yamaha |
Yet, we didn't have room for a dedicated crane like you see on some boats. No, our crane had to be removable, and preferably made out of parts that could be used for other purposes on the boat. We didn't have room to store things that were dedicated to just lifting the outboard.
With those two criteria, I sat down to design a simple, but sturdy lifting crane, made mainly from things we already had on the boat. The video below shows the result.
We are currently in Sister's Creek, just north of Jacksonville, FL, waiting for some heavy fog to lift. We're aiming to spend a few days in St. Augustine.
Next Up: The Restoration Continues
Nice. I support the whole philosophy of never having single purpose equipment. The problem is that it can take so much time to set up that you only rarely use it, and so miss out on those spur-of-the-moment adventure opportunities.
ReplyDeleteI'd suggest a couple of improvements that might make it faster to set up, stronger, and easier to use.
1. Tying a permanent jury rig masthead knot at the end of the boathook (aka "crane jib"), and frapping it on. That would give you four permament loops you can simply clip on to, AND gives that extra something to stop the boathook sliding out of your hands when you're trying to pick up a mooring at full stretch in a tidal stream... One top loop for halliard, 2 loops for the fore and aft guys, and the fourth bottom to clip on the handy-billy lifting tackle for the outboard itself (see below).
2. I'd move the lifting tackle to the end of the "crane jib"/boathook so it is purely in compression, not having to cope with a bending force. Imagine getting hit by a large powerboat wake while the outboard was suspended over Helena. If Petronella suddenly rolls violently, the static bending forces on the boathook in your scheme could quadruple instantly. If the boathook snaps, the outboard will drop violently, and smash into the pretty painted side, but might well do serious damage to Helena on the way. By transferring the weight to the end of the pole, it removes that risk, as the pole is in compression only, and the weight is taken by the halliard, the strongest part of the system.
3. Use the halliard to control the luffing of your crane. When lifting the motor, raise the end of the crane/boathook with the halliard so it is directly above the motor on the rail. Use the handy-billy tackle to lift the motor vertically, so it isn't being pulled sideways and trying to catch on the bracket. Then lower the halliard so the end of the crane luffs outward, taking the motor with it, until it is directly over the bracket on the dinghy. Adjust guys as necessary. Lower motor with handy-billy, so Helena simply has to guide it in place, without any pulling. Tighten motor clamps to transom, unclip motor, hoist halliard clear, and it's ready for when you return.
Simples!
PS. I'd also consider shortening the snotter for better control, or ideally screwing a simple tubular socket to the mast.
Hi Michael, all excellent suggestions and improvements. One question: where/how would the frapping turns be applied? I can see how frapping could tighten the masthead knot, and prevent it from slipping, but can’t visualize where to best apply them. On the loops, perhaps?
DeleteAh! I could frap the two sides of the knot through the hole at the end of the pole. That would tighten it up and prevent it from slipping up or down.
Delete