With Helena's help, I'd fastened the galley's sides to frames with bronze screws. After all the work I'd put into them, I was glad to see them slip neatly into place. They fit snuggly against the Blue Moon's curves and were a bright and clean start to my remodeling job.
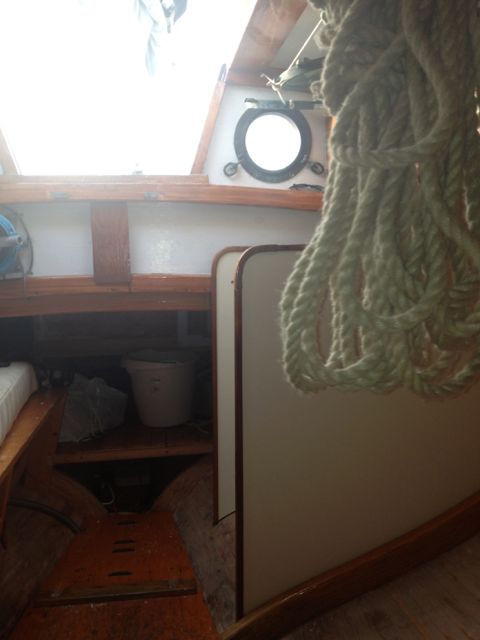 |
| The galley sides, or half-bulkheads. |
"Won't take more than an hour," I confidently told Helena. Discreetly, she made no comment.
I started by laying out the shelves on the forward bulkhead. You can see my pencil markings on the photo below.
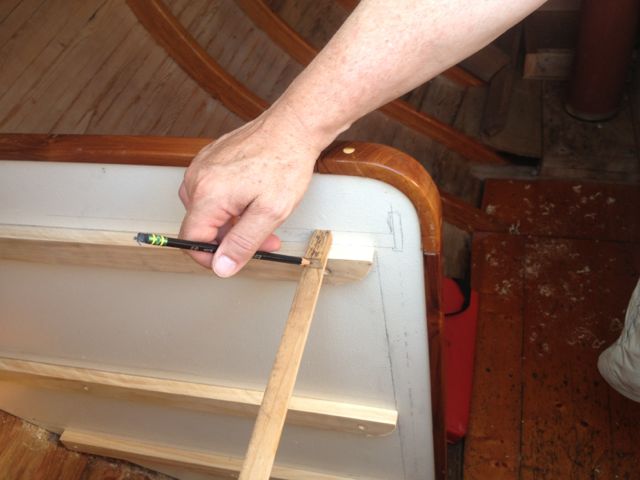 |
| Plans drawn on bulkhead Click for larger image |
Once I had the shelves drawn on the forward (right) bulkhead, it was a fairly easy task to transfer the measurements over to the aft (left) bulkhead -- or so it seemed.
That done, I took measurements for the shelf cleats (the frames that would hold up the shelves) and went back to the shop to rip them out of clear white pine. I curved the forward edge of the cleats so they would 'disappear' under the shelves. I made no attempt to finish the cleats. Once all the cleats, shelves, etc., were roughed out and fitted, I'd take them all back to the shop for finishing all at once. No serial-building this time. I'd paint and varnish everything in one big batch and thereby save loads of time.
Back on the boat early the next day, I installed the cleats temporarily with screws and prepared to measure the top self. I asked Helena to take a picture of the cleats, and stood back to mop the sweat from my brow.
"Are those cleats lined up right?" Helena asked.
"Of course they are," I said proudly. "I measured them to within 1/32 of an inch. Each pair of cleats is exactly the same hight and parallel to each other so the shelf will lie straight on them."
"They don't look right."
I stood back and looked. Odd... they didn't look right. If I didn't know better, I'd say the left cleats were a bit higher than the right cleats.
"That one," Helena pointed to the top left cleat -- the one the top shelf would rest on. "That one seems to point up higher than the one on the right."
"Impossible," I said. "It must be an optical illusion."
There are no straight lines in the Blue Moon. Behind the bulkheads, the plank lines curved down and to the left, making it hard to judge whether the cleats were at the same level or parallel to each other. The more I looked at them, the less sure I was.
Dang... maybe they were off. But how?
I laid a spirit level across the two bulkheads. It was 6 a.m. We'd rowed out early to avoid the heat, and the harbor was still flat enough to use a spirit level. The two top rails were perfectly level with each other.
Then I laid a stick across the two top shelf cleats and put a smaller spirit level on top of the stick. The bubble floated off to the left. The left cleat was a bit higher.
"Try back farther," Helena said. "It looks worse back there."
I moved the stick to the ends of the cleats closet to the hull and stood back to look at the level.
"It is worse. A lot worse."
Helena's eyes had been right: the cleats were not at the same level, and they were not even parallel. The shelf would not lay flat on them. I'd done something drastically wrong.
But what?
When I'd laid out the shelves the first time, I'd used a tape measure and a big framing square: the tape to measure down from the top rail of the bulkhead, and the square to make sure the shelves were perpendicular to the front rails. I trusted the rails. They were lined up perfectly. Just look at the photo below. If the shelves were lined up with the forward bulkhead, they had to be lined up with the aft bulkhead. Logic dictated!
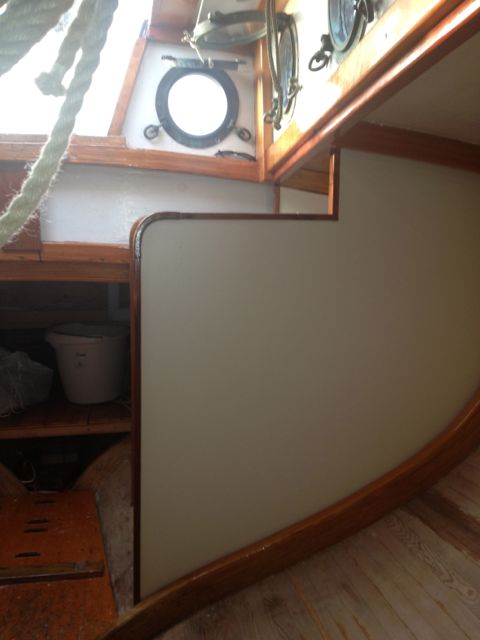 |
| Perfectly lined up bulkheads |
On the other hand, tape measures are notoriously fickle things. It is so easy to jot down the wrong number and thereby ruin a day's work. Real boat builders, I knew, used them as little as possible, preferring to use the more reliable tick strip. When transferring the measurements from the forward (right) bulkhead to the aft bulkhead, I must have measured wrong. The cleats on the right looked fine. It was the cleats on the left that were askew.
Therefore, I removed the left cleats, erased the lines I'd drawn, and got out my tick strips.
Tick strips are just pieces of adding machine paper. I taped a strip vertically next to the cleats on the right side, and 'ticked' off the locations of the top of the rail, and the four shelves. Then I moved the tick strip over to the left side and taped it on, being careful to line up the top-of-the-rail mark. Then I marked the location of the four shelves. Then I used my framing square to draw the shelves perpendicular to the front rail. I then re-installed the left hand cleats.
"Still wrong," Helena said, with the appropriate amount of sadness in her voice.
My remarks were rather more salty. They boiled down to something like this: "How the blickety-blank could they be off?!?! I measured perfectly!!!"
Helena could not help me with that question. After shaking my fists at the evil sprites who love to laugh at boat builders, I packed up my tools, and rowed Helena home.
I needed a day in my moaning chair to find a solution...
(To be continued...)
Next Episode: Part 2
Dear John,
ReplyDeleteNot that you should rely on my tiny experience in the field of complex carpentry, but to add my two pence:
- would the old lofters and mould makers tric work here to copy the correct measures with spikes on the one side and gently pressing on the other one?
- would it be possible to first make the one side cleats and the shelves and at last finish with the other cleats?
Hope to advance your thinking a bit.
Regards, Erwin.
Erwin: I think your first suggestion would be similar to using the tick strip. Same idea, just different way of making the ticks.
DeleteYour second idea is very close to what I actually did! See the next post for my solution.