When I started working on Cabin Boy, more than 6 years ago, I had a small collection of rusty and battered hand-me-down tools. The exception were a set of files and rasps that Helena had gotten somewhere. They were in a nice old wooden box and looked to be in pretty good shape.
I used them all through Cabin Boy's build and ever since. All the way up to about 4 months ago, when it finally dawned on me that maybe the reason they didn't work very well was that they were dull. To test this dim theory, I plunked down a few dollars for a new rasp. The very first stroke I took with it took off more wood than fifty stroke of the old one.
Boy, did I feel dumb. But in my defense, no one ever told me such simple tools could get dull, and in the months since, every time I tell someone this fact, they give me a dumfounded look and say something like, "Huh! I didn't know that."
But now you do. If you have any files or rasps in your workshop, throw them away. They're probably about as useless as an old worn out piece of sandpaper.
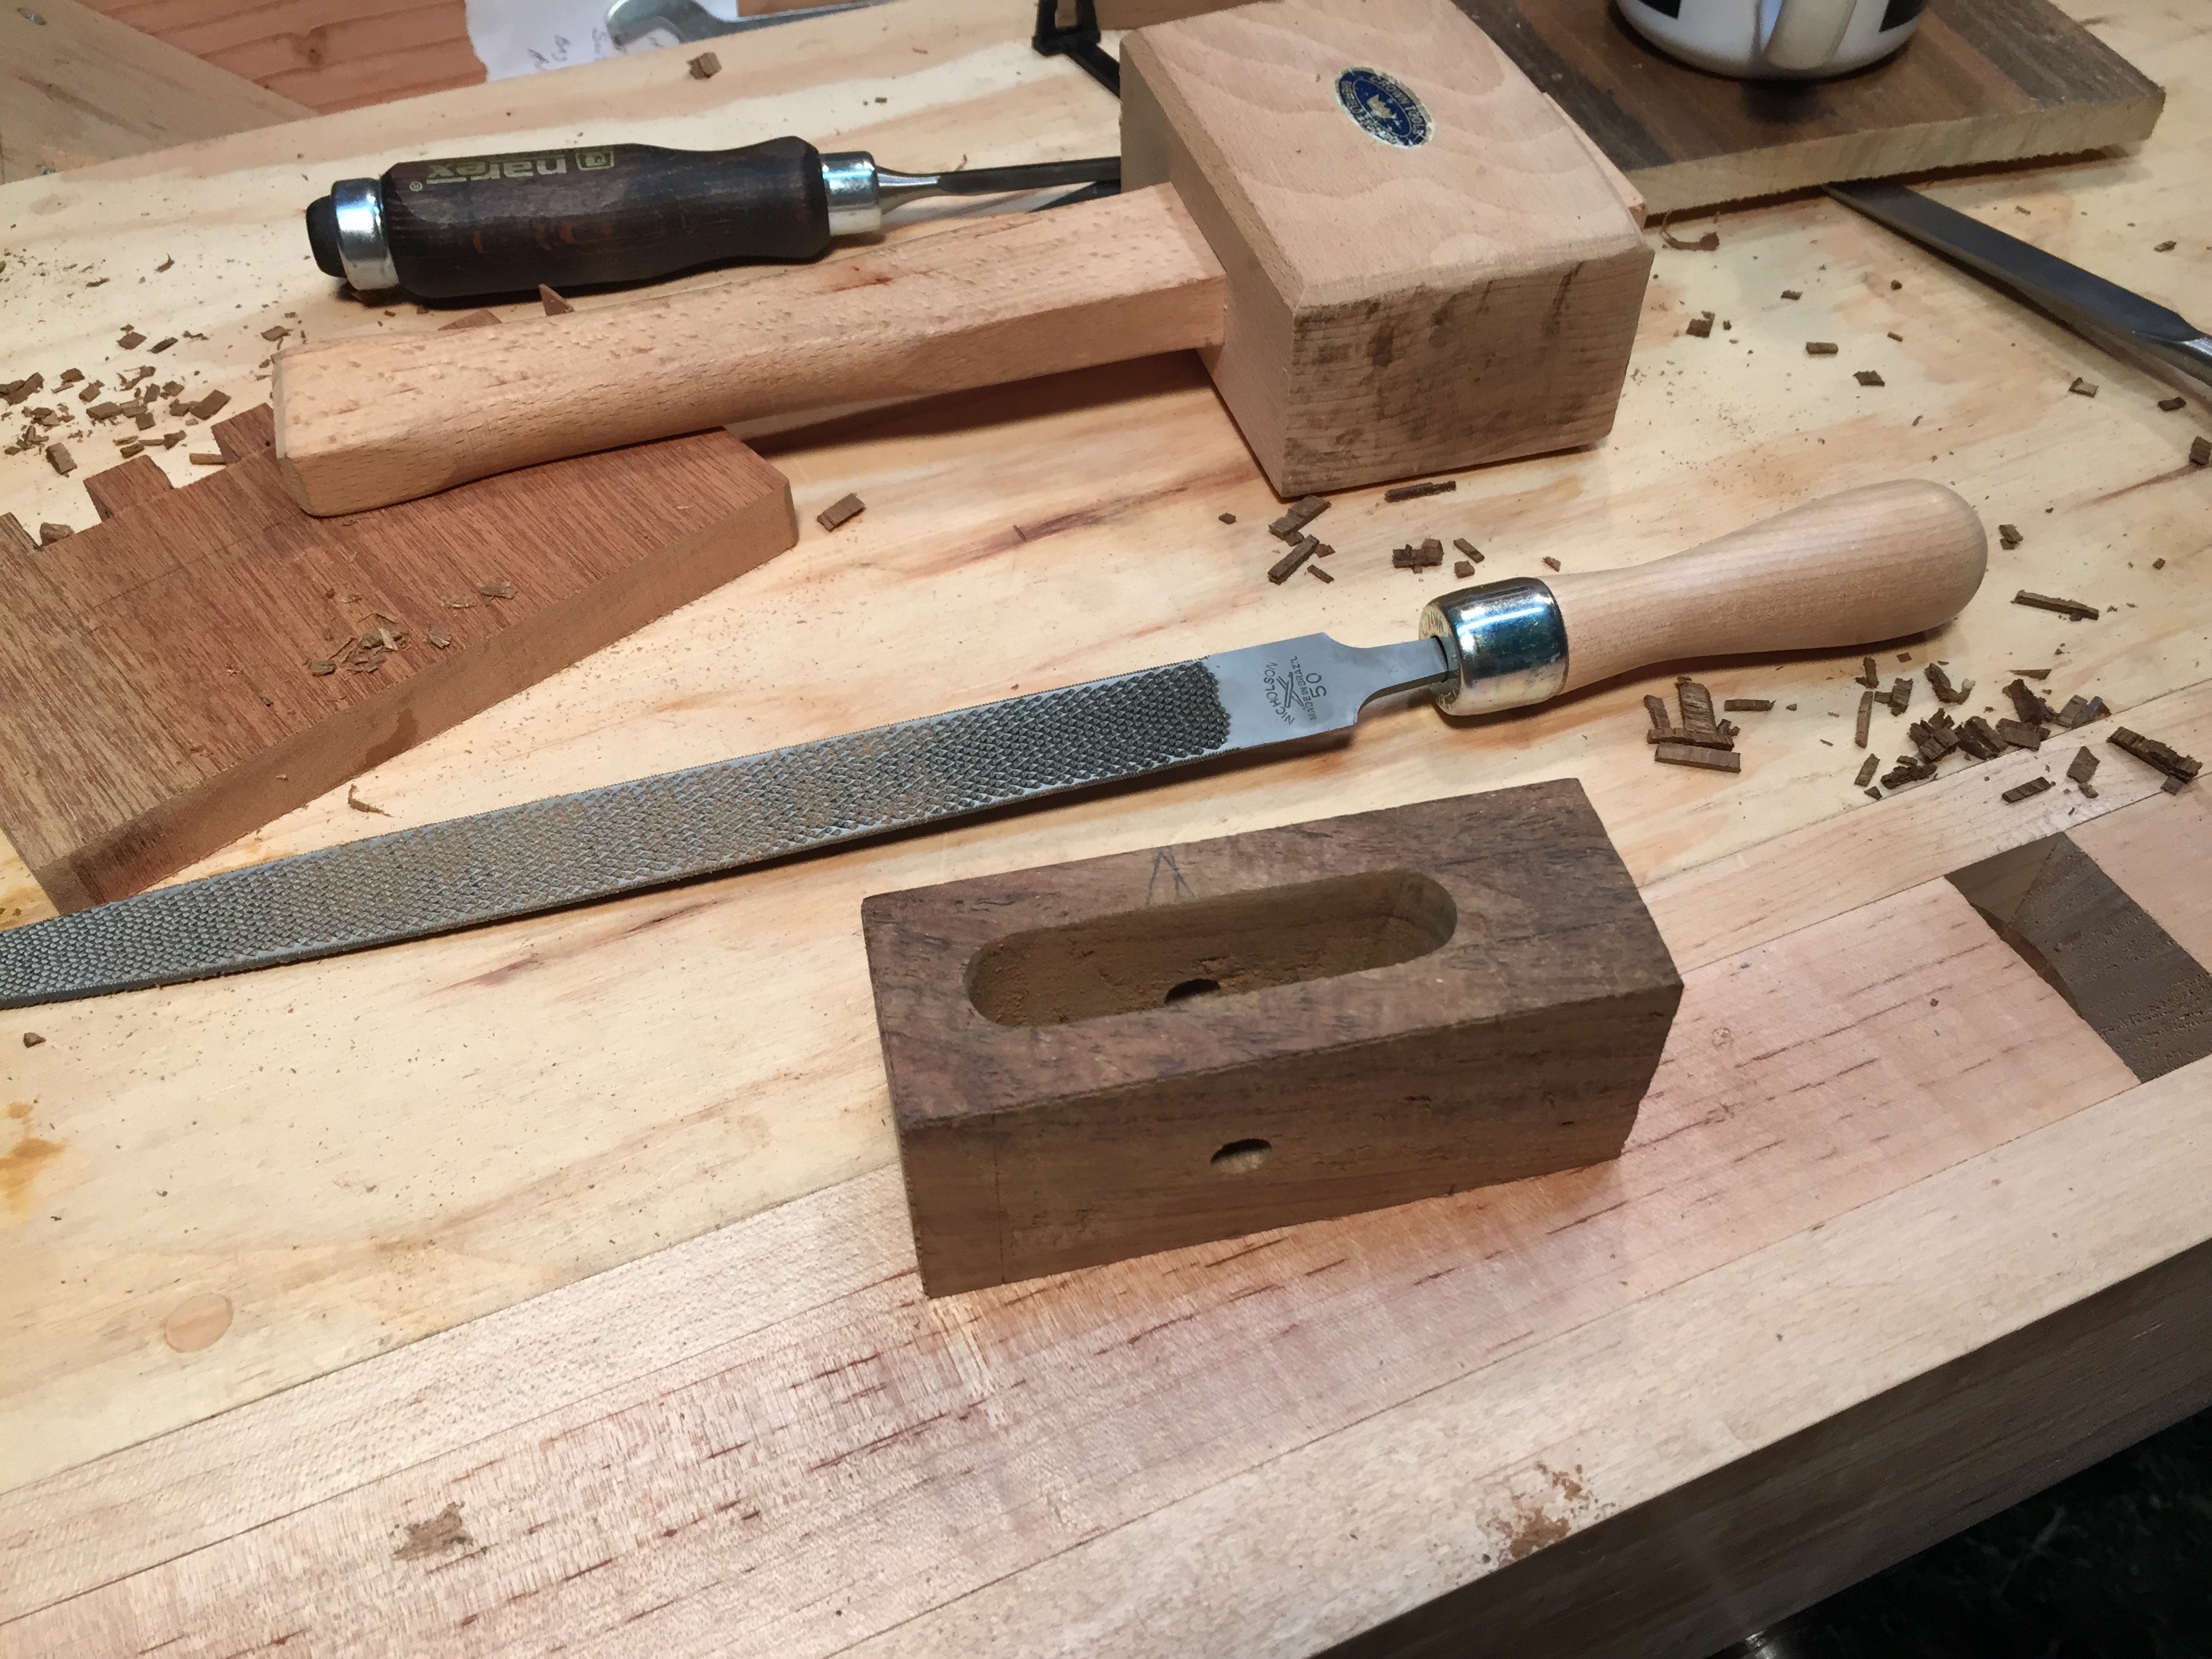
Equipped with two sharp rasps, I was ready to shape a block of wood into, well, a block!
 |
| Block with axle hole drilled |
The straighter you drill the hole, the better the sheave will run, so if you don't have a drill press, try to borrow a few minutes on a friend's. Otherwise, be as careful as you can.
h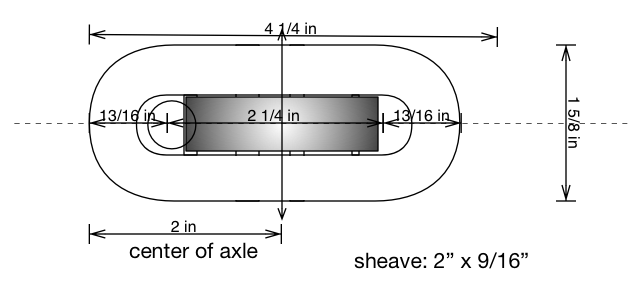 |
| The location of the axle |
 |
| Only tools required |
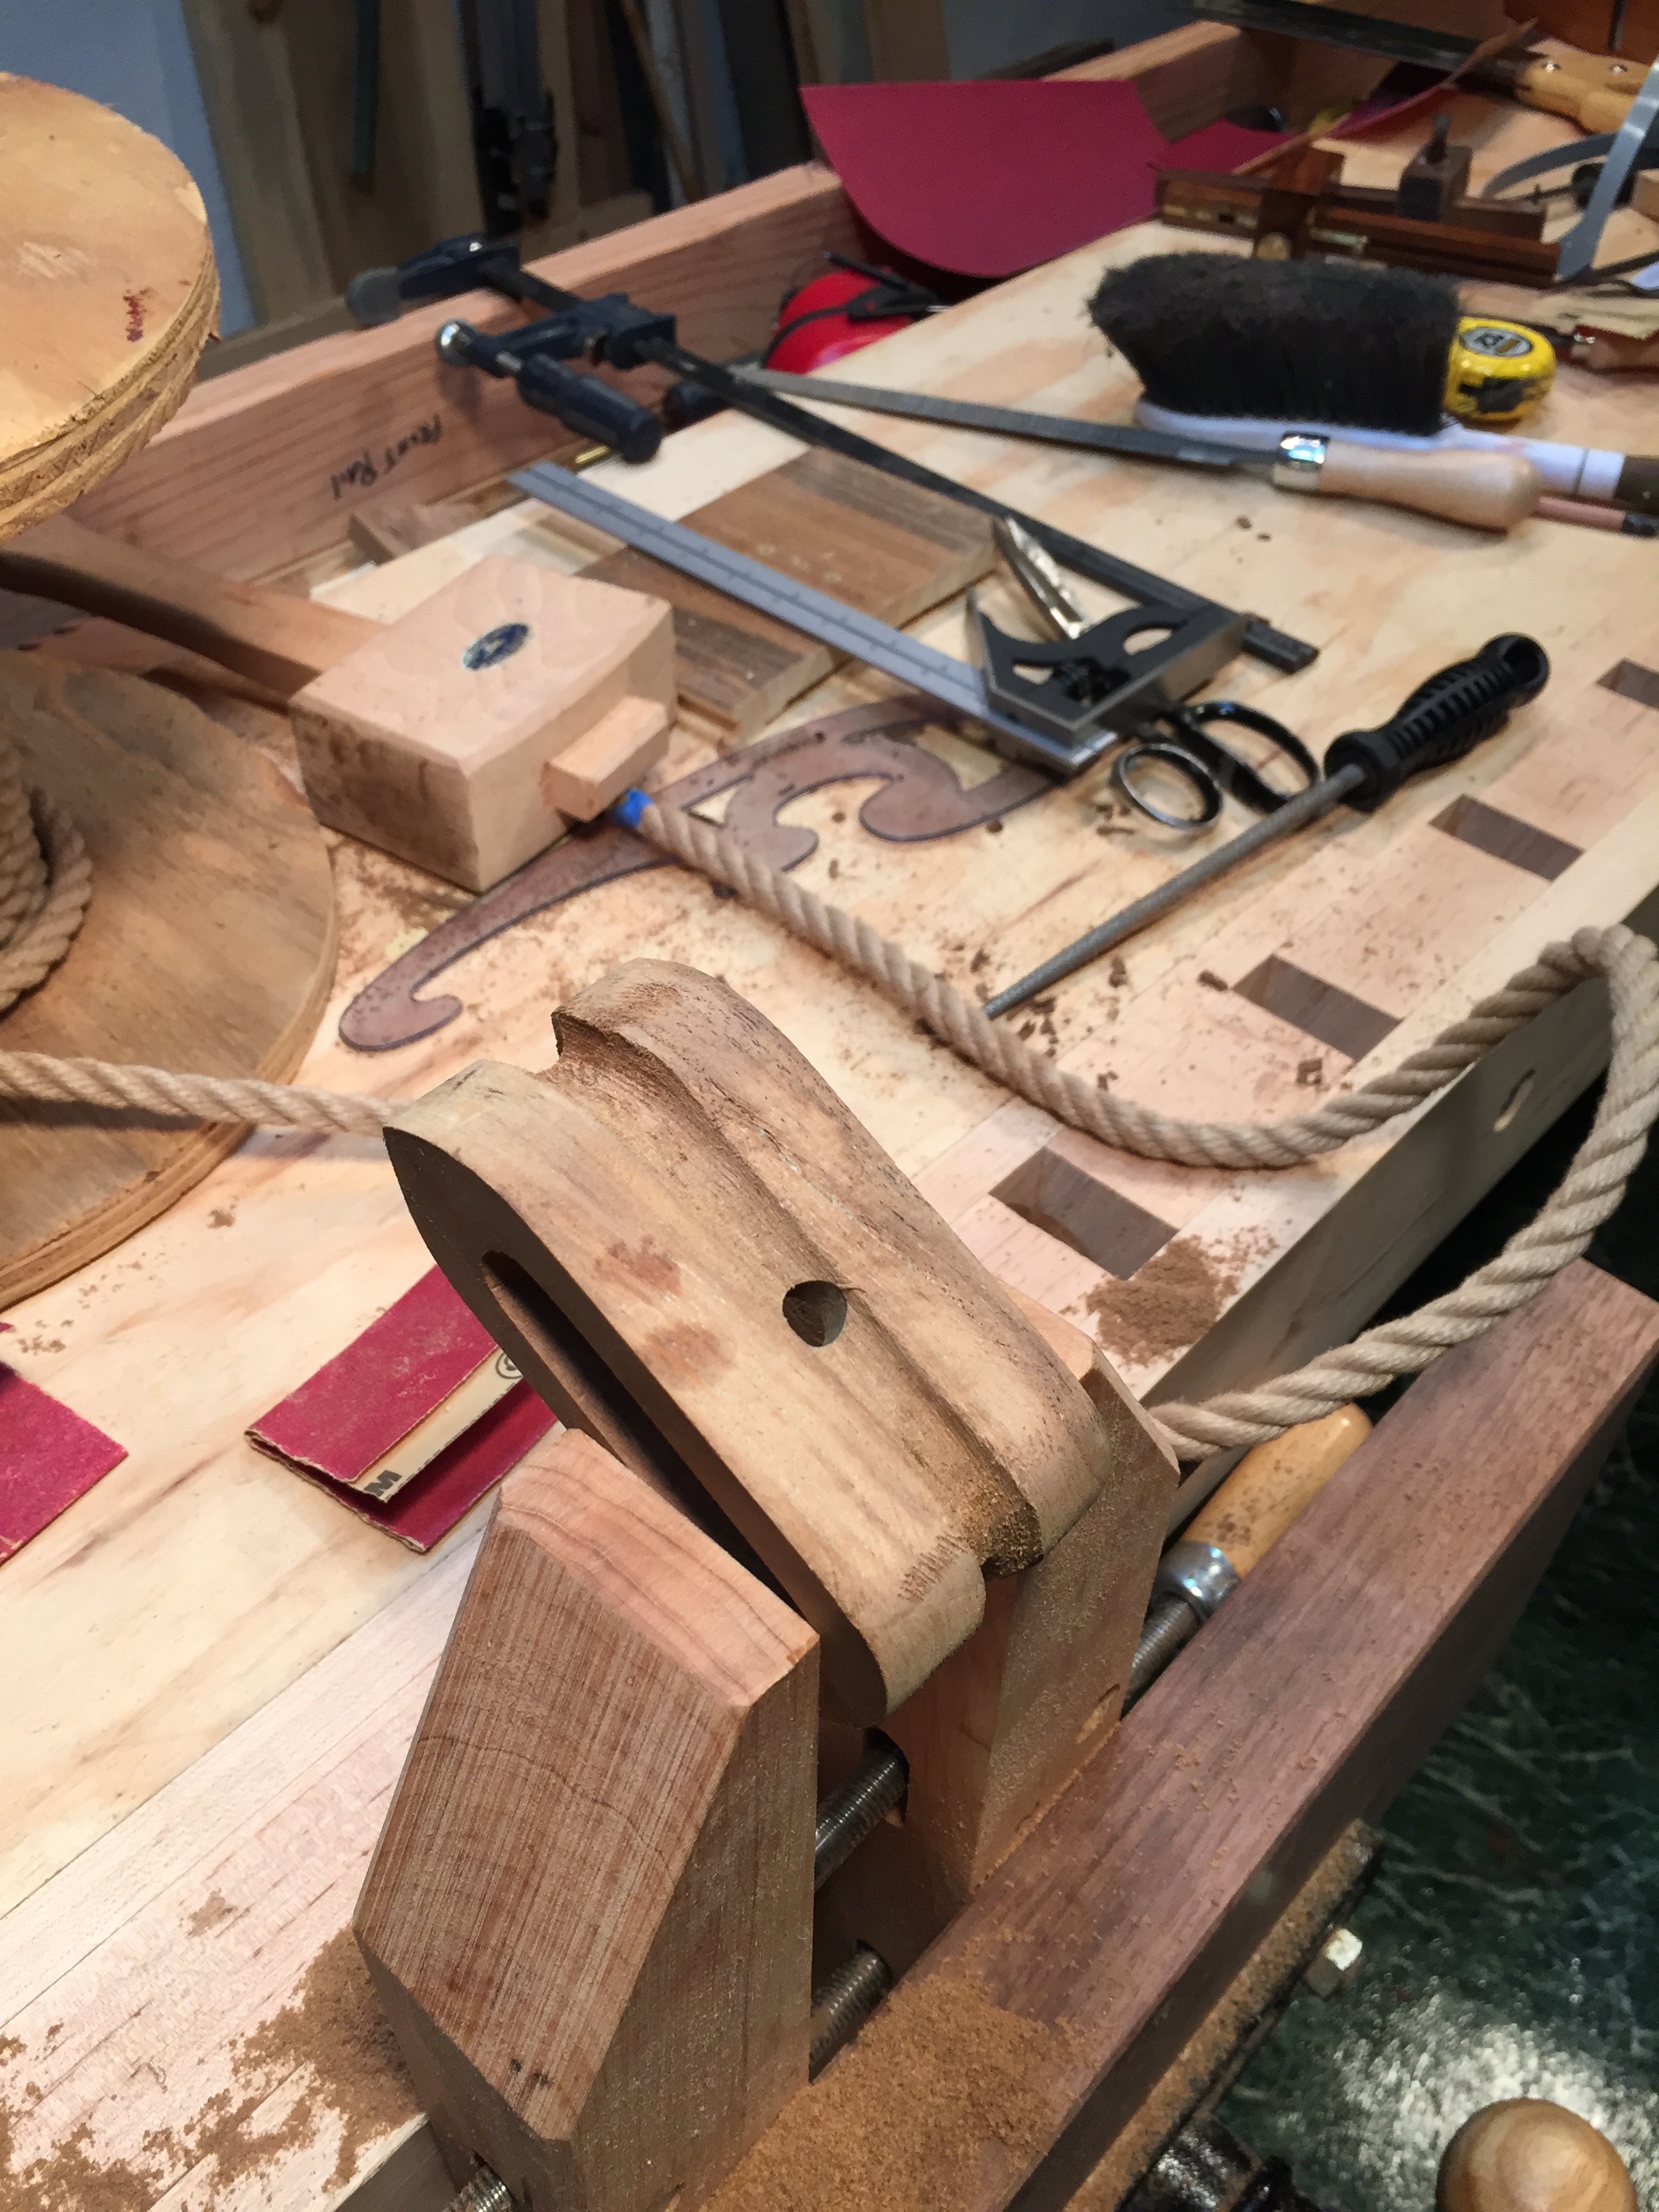
Another tool that's handy is a Jorgensen clamp, like the one below. This lets you elevate the piece above the bench, and position the piece at whatever angle is handy.
I traced the plan (above) onto both sides of the block and then roughly cut off the bulk of the waste with a small saw. Then I just went at it with the rasp, quickly taking the block down to the lines I'd drawn. With a sharp rasp, this only took a few minutes, even being careful.
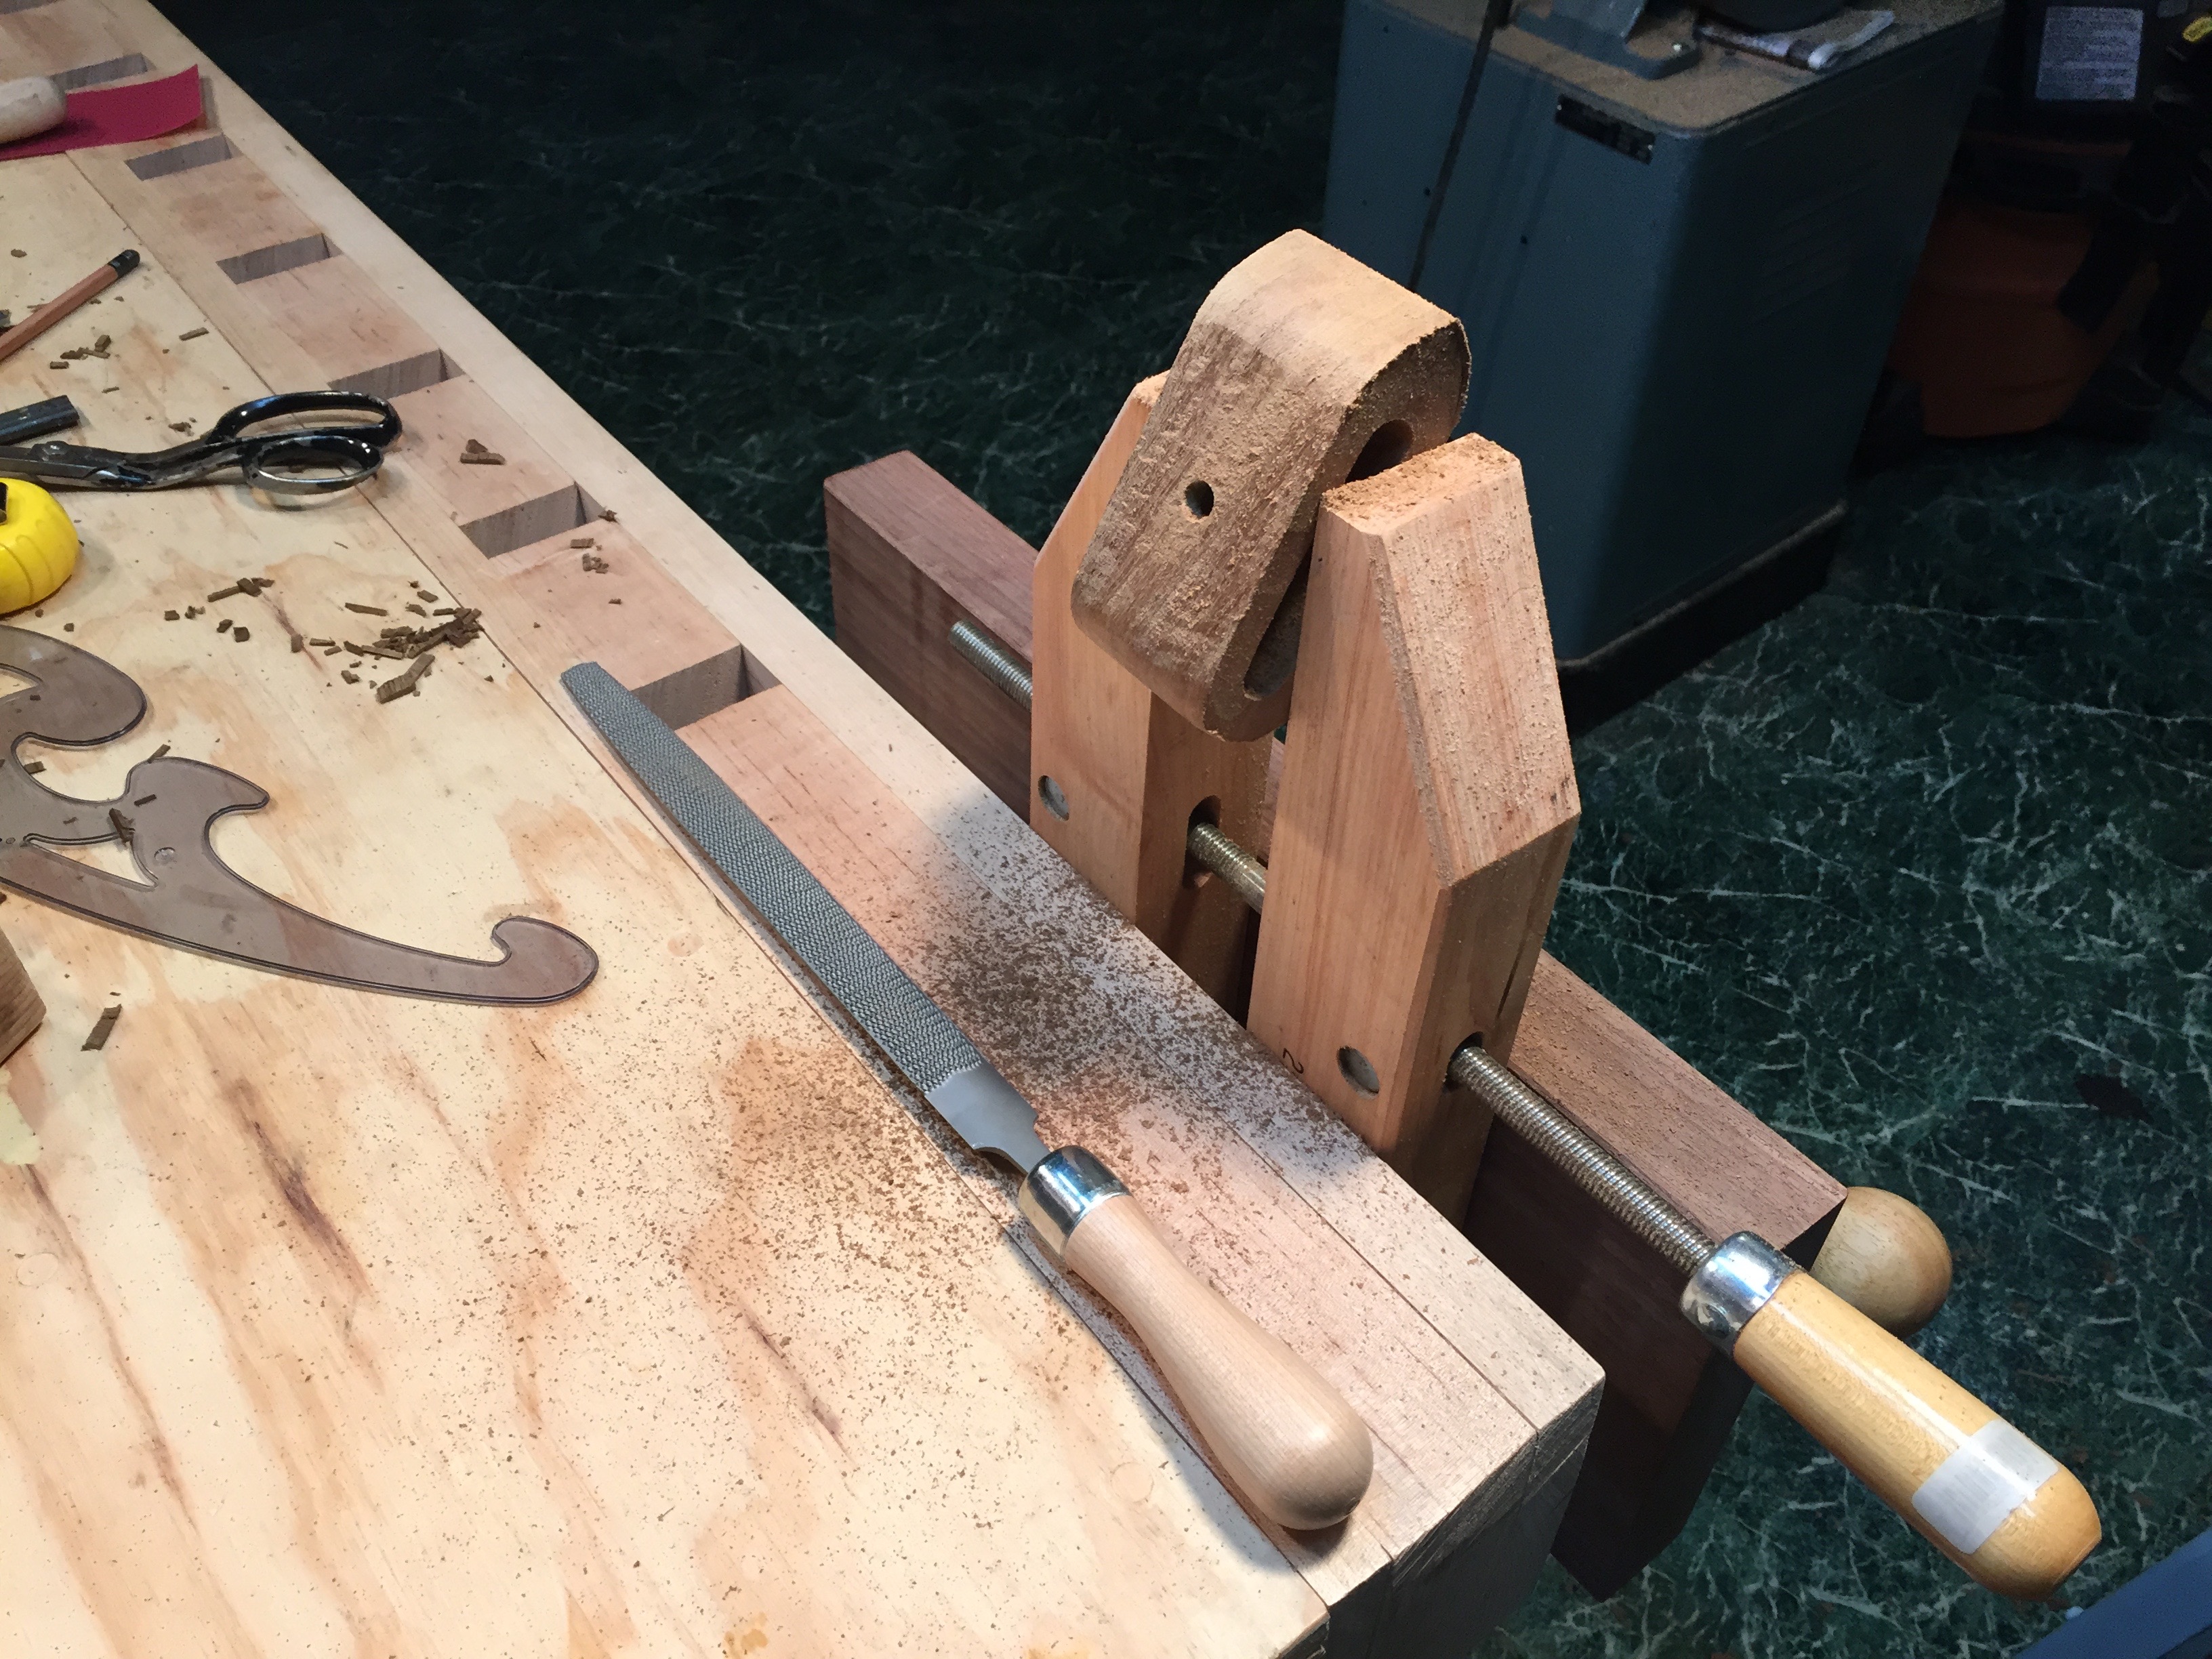 |
| Getting a grip |
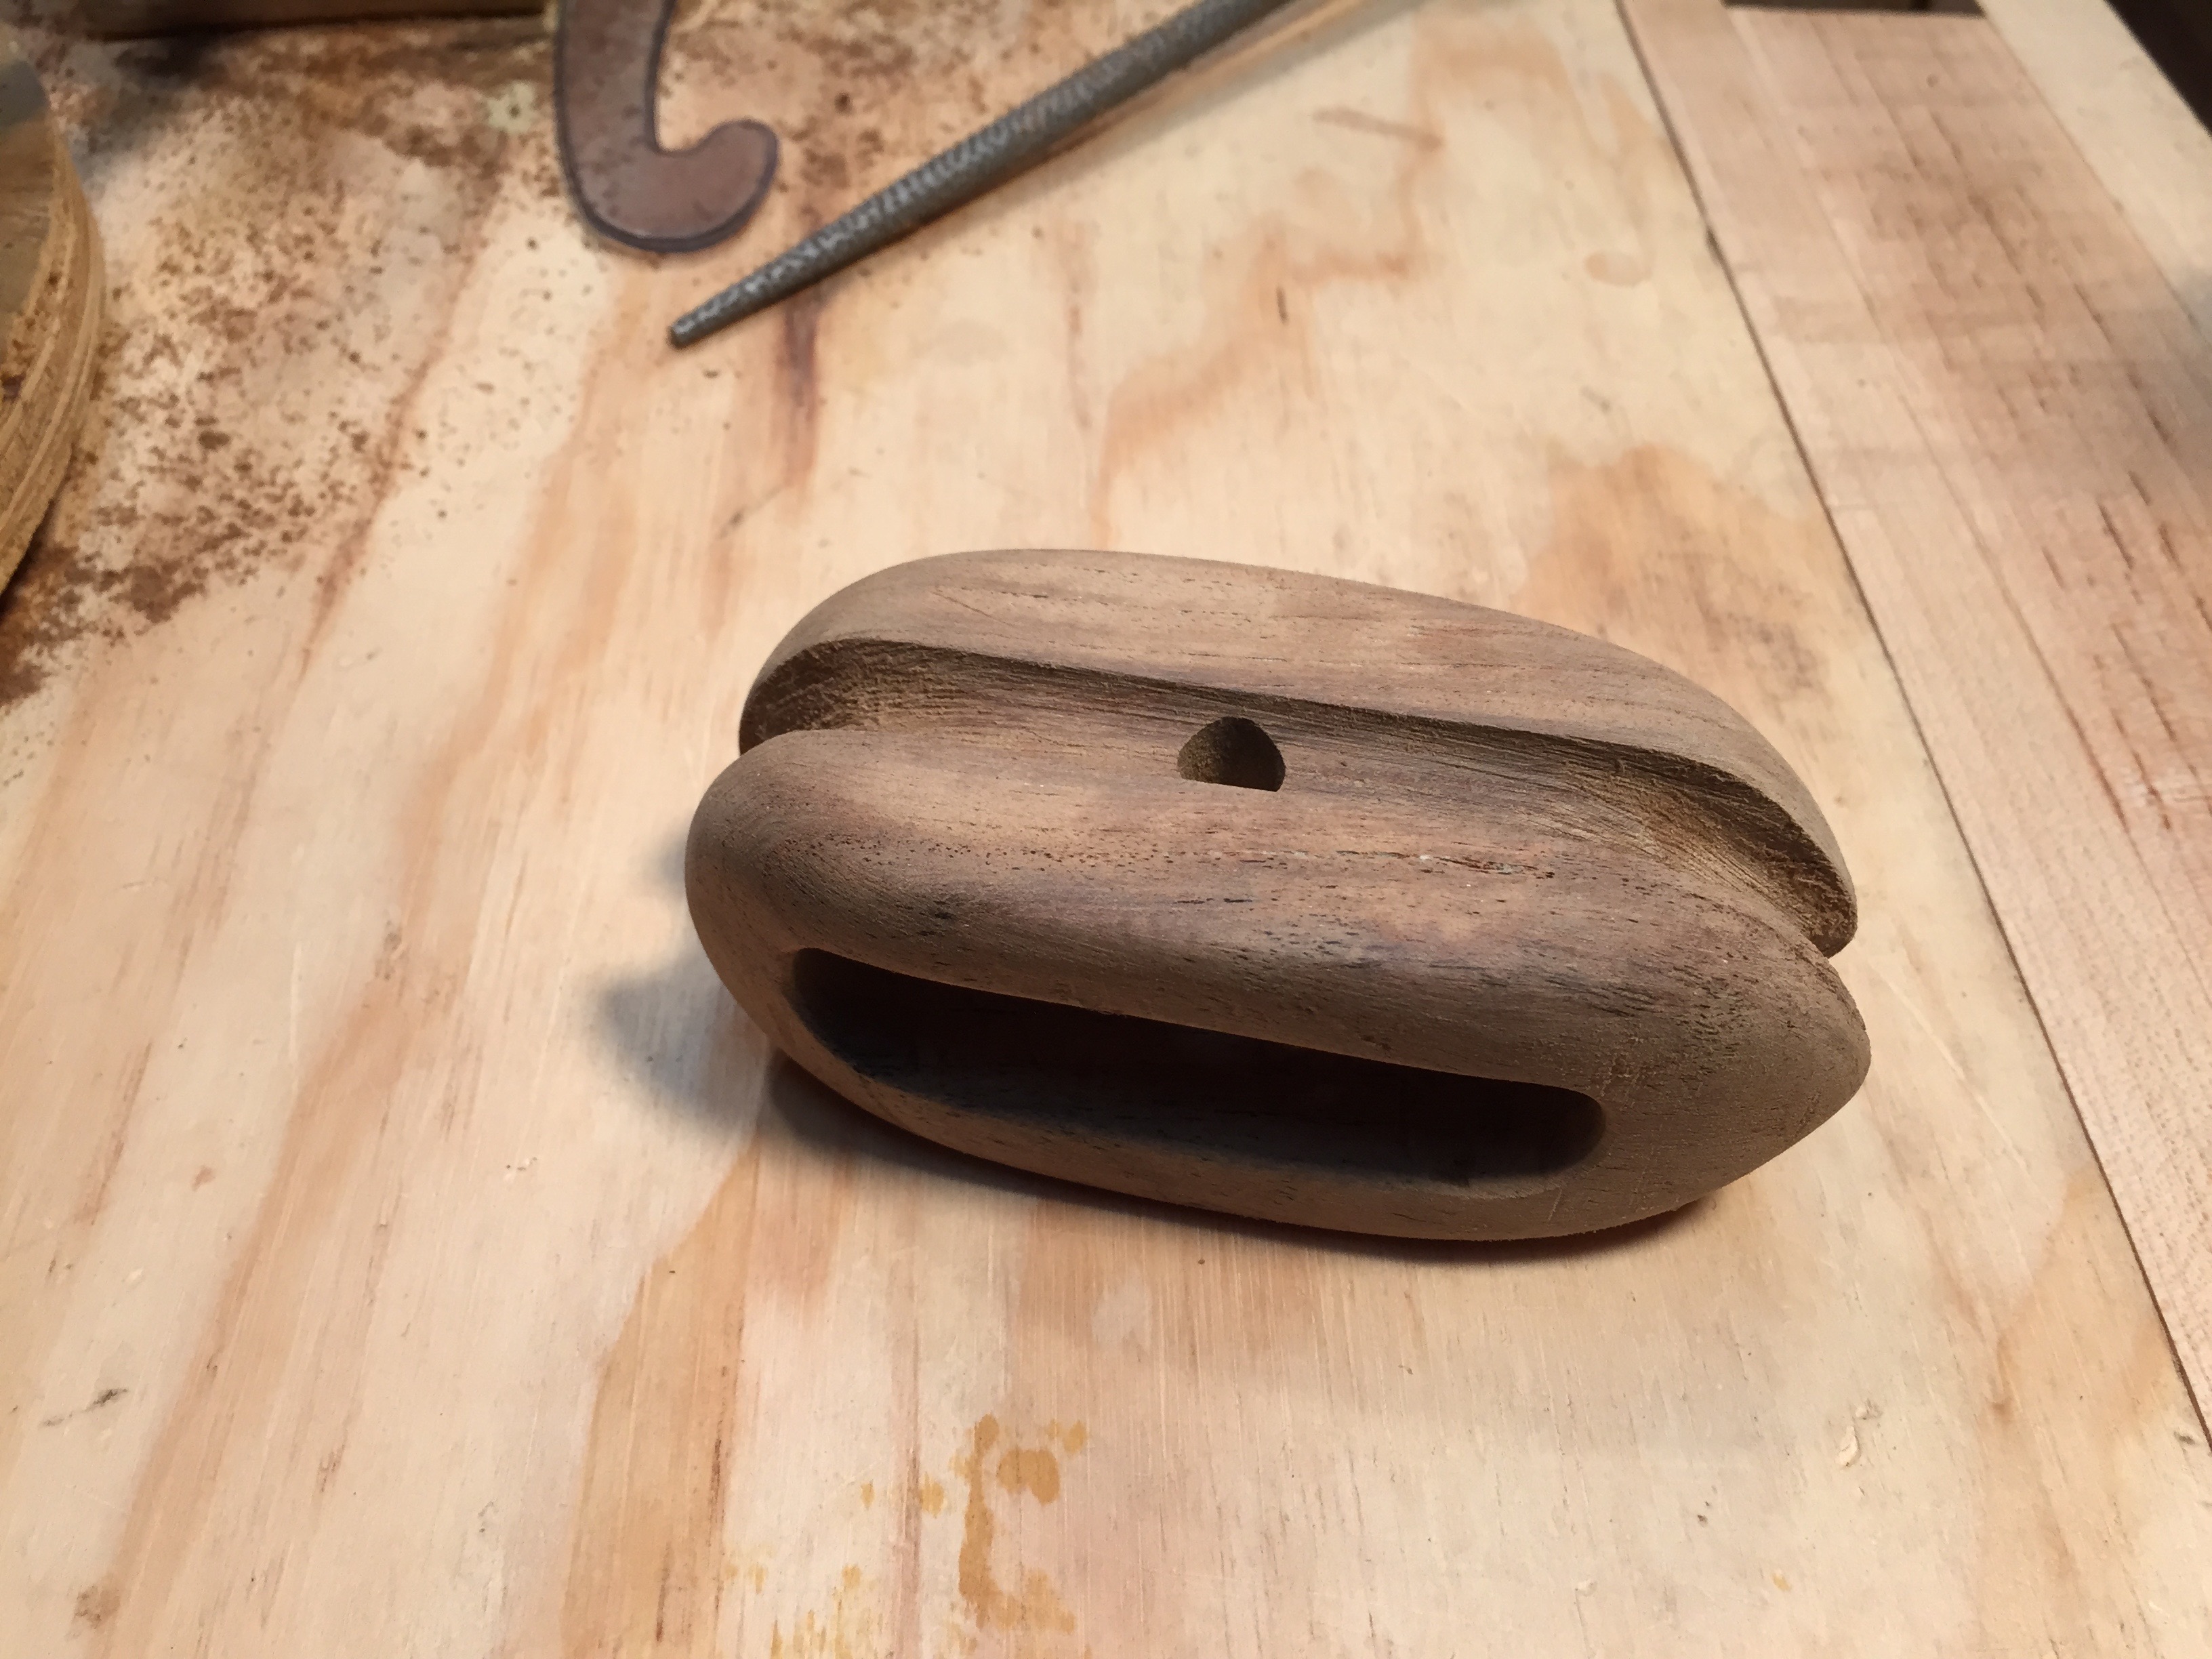
A bit of sanding removed the tooth marks and it was already looking pretty good.
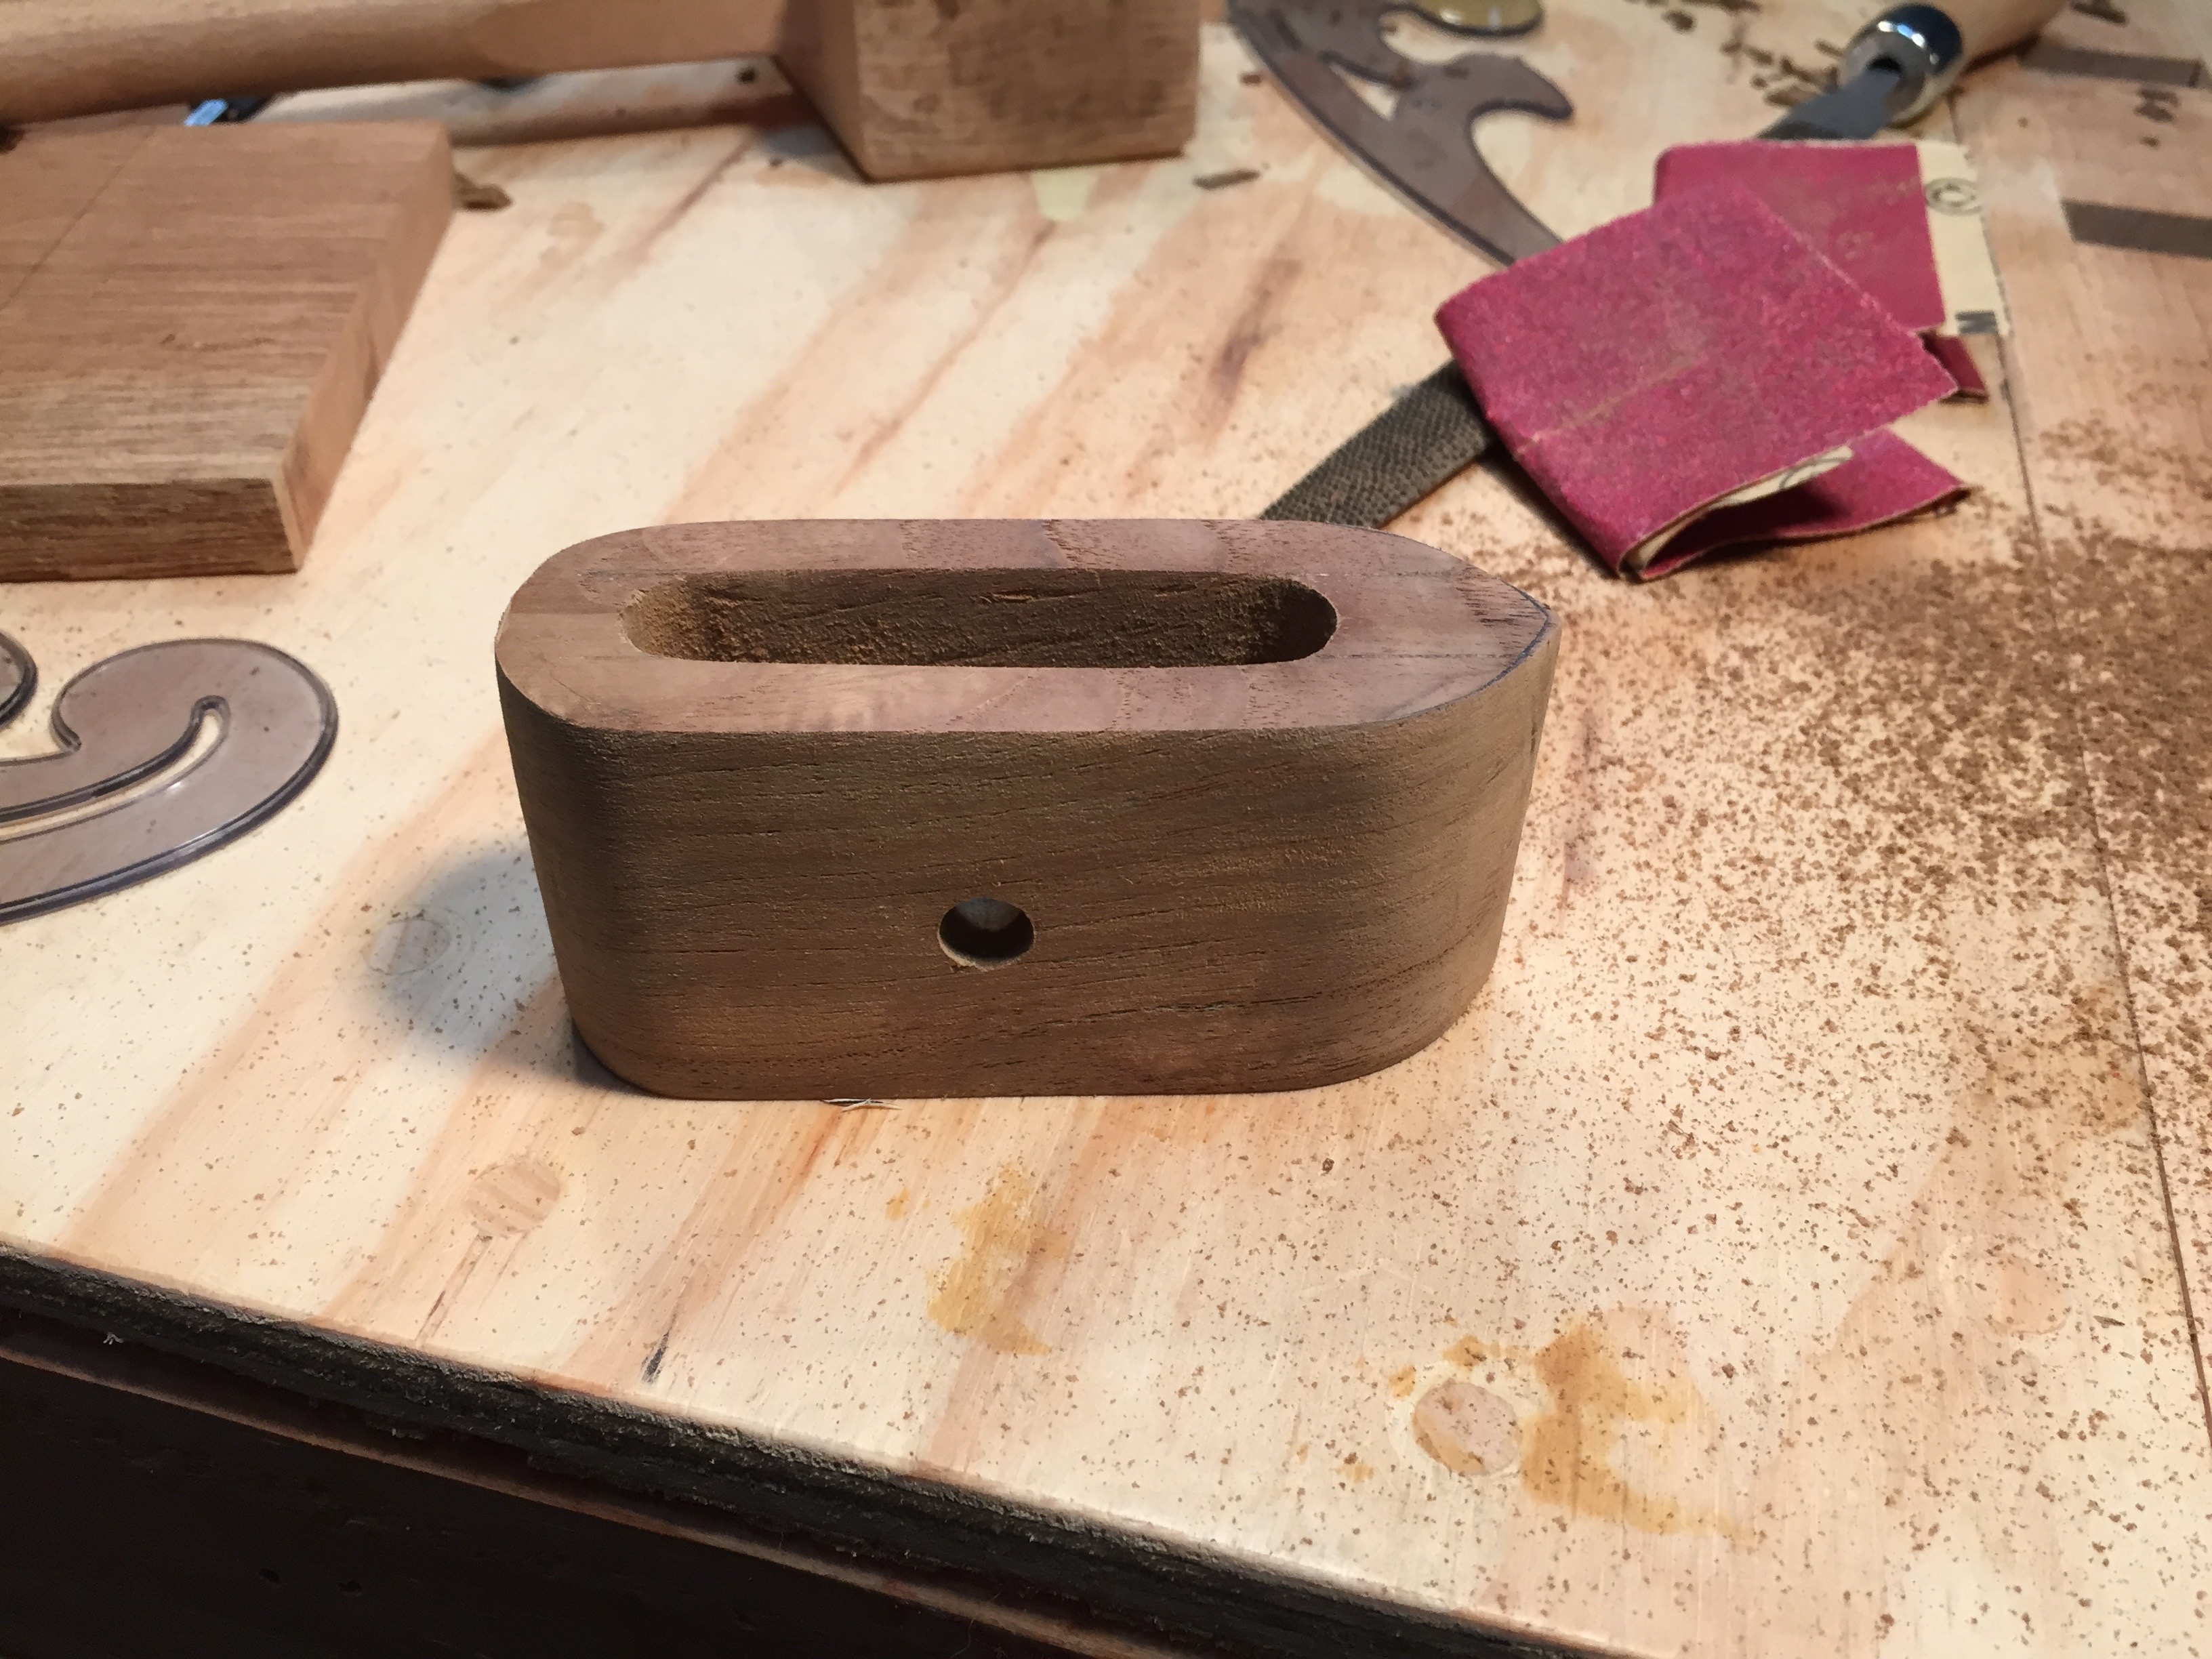 |
| Shaped in one dimension |
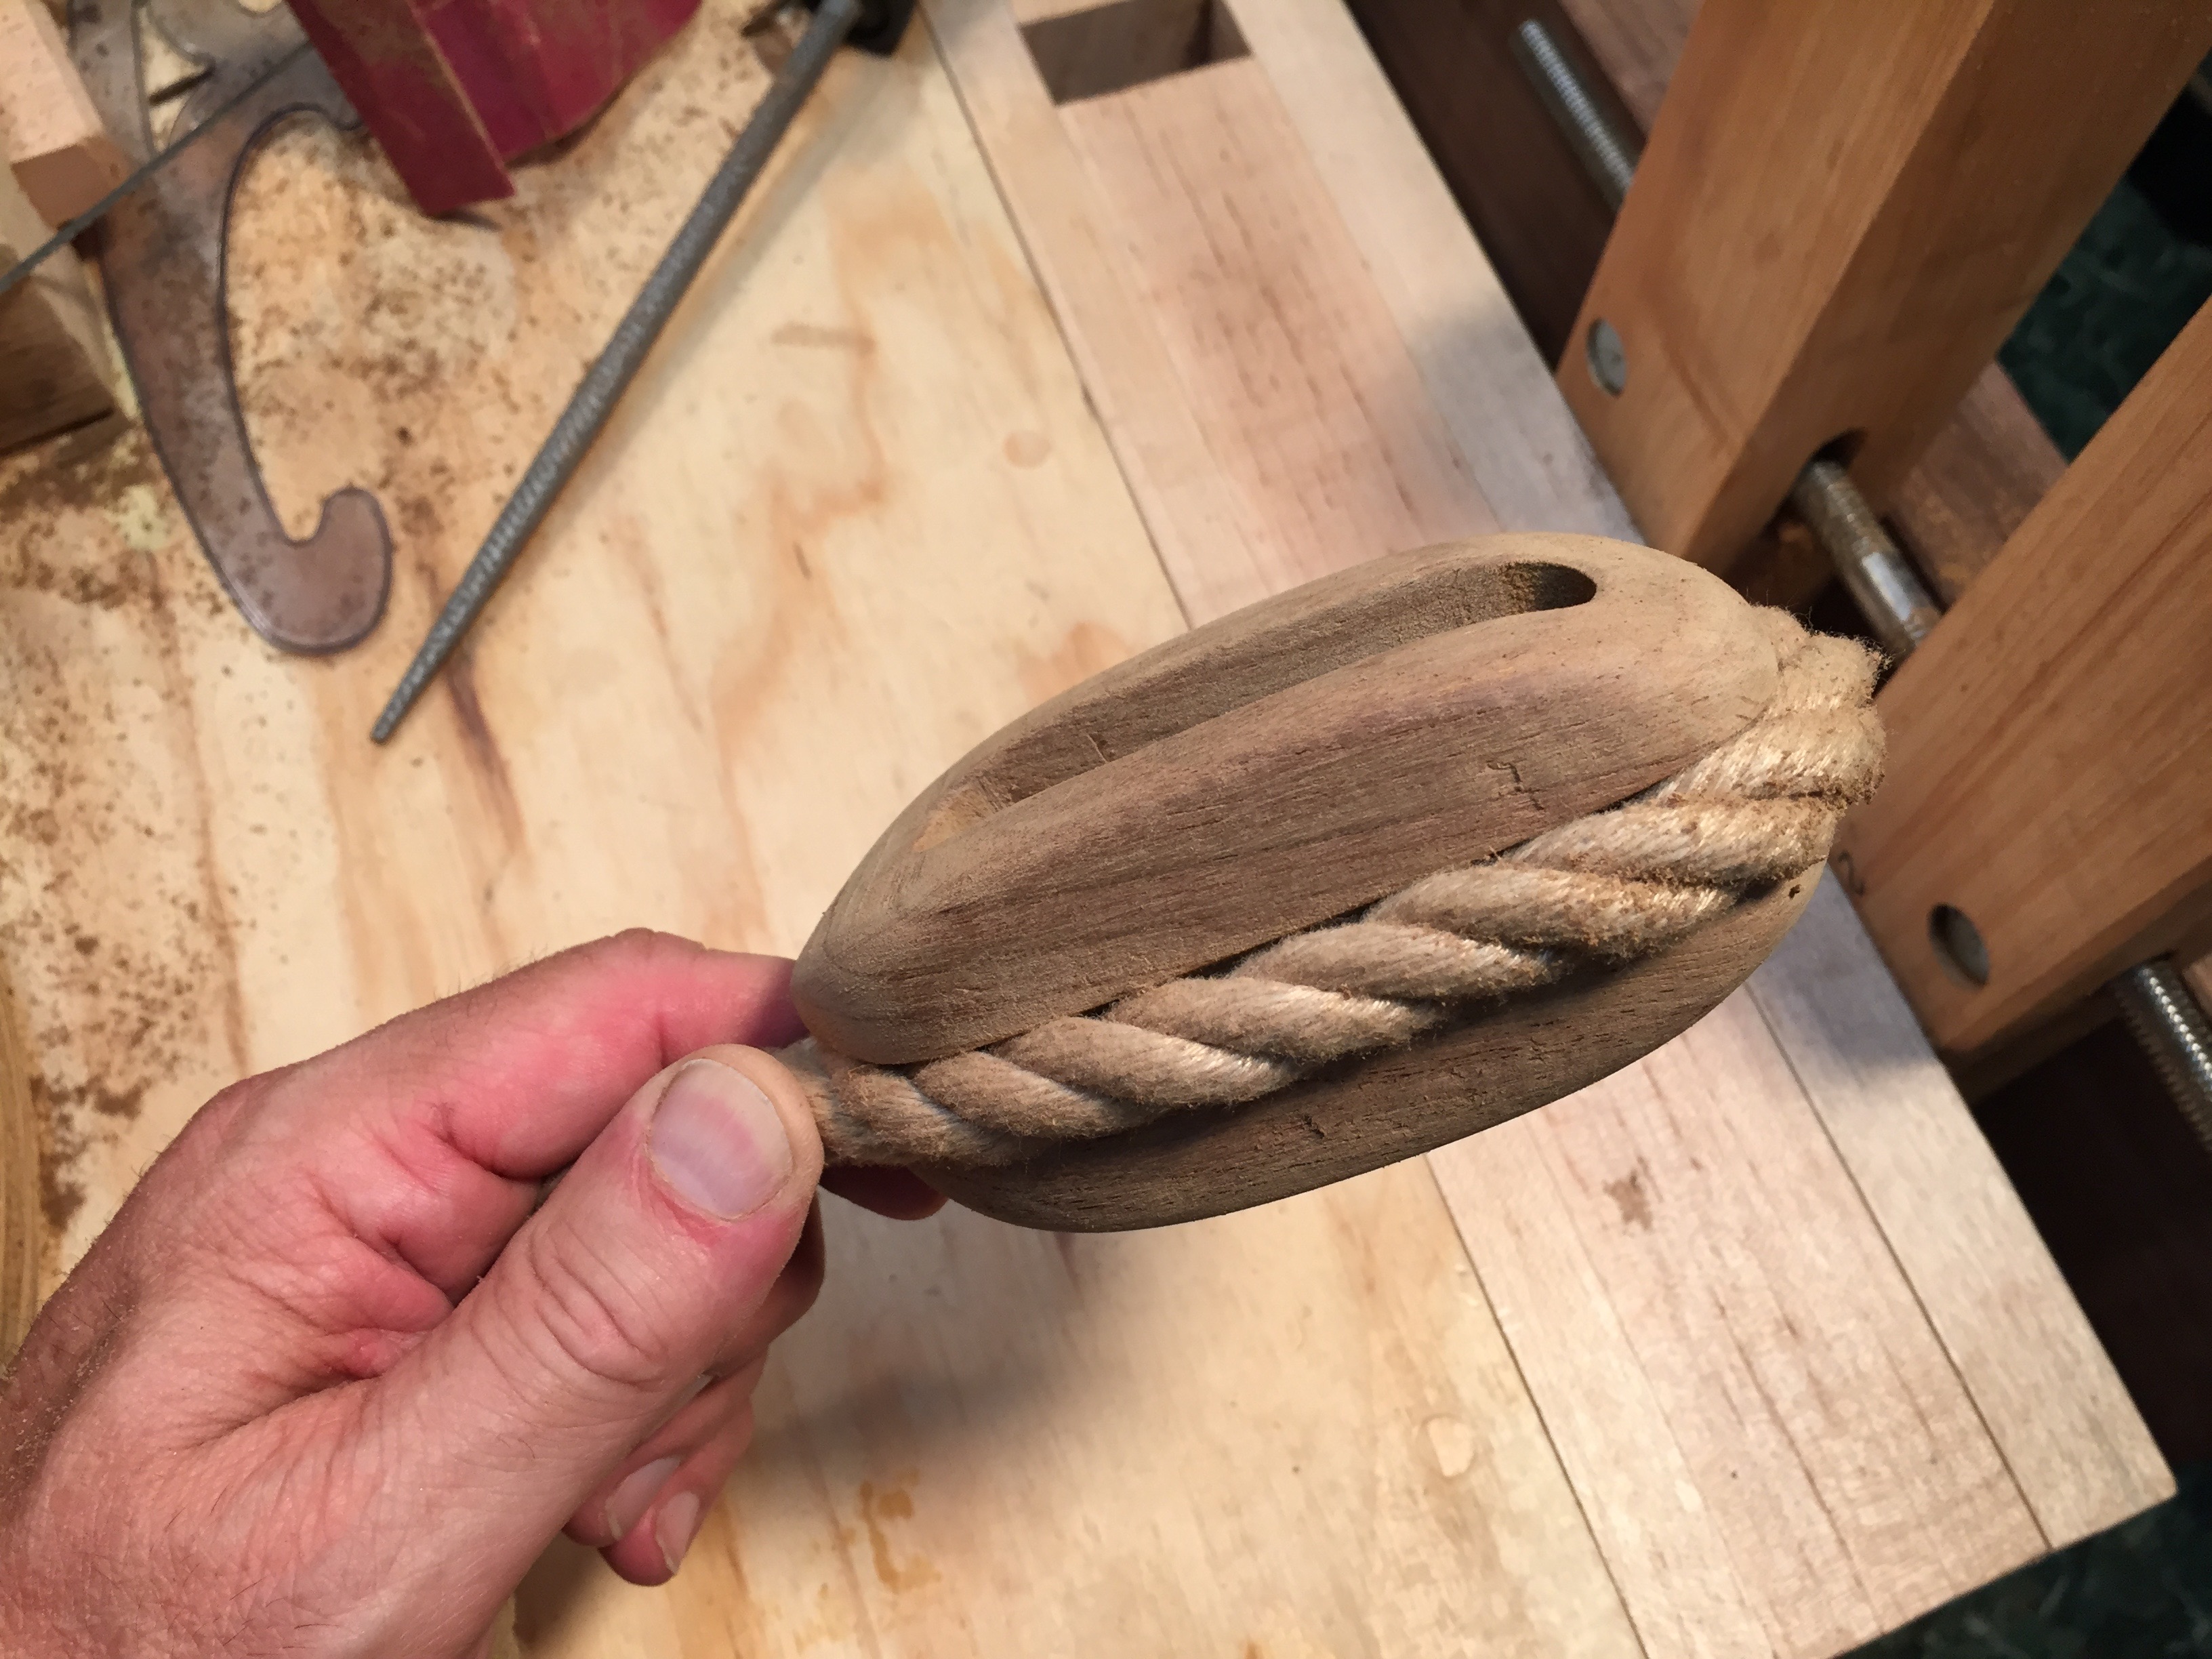
Then it was time to cut a groove all the way around for the rope strop. With the goal of keeping the axle hole in the middle of the groove, it was pretty easy to cut the groove by eye. You want it deep enough to retain the strop. I just kept trying the rope in the groove until it looked about right.
 |
| Cutting the groove |
Then it was easy to work on the other dimension. I did this part of the shaping completely by eye, basically just knocking off the corners with the rasp, and trying to stay out of the groove. You also need to work a curve into the side so the line doesn't rub on the body of the block as it runs through.
It was pretty easy, but engrossing, so I forgot to take any photos.
 |
| Repeat for other dimension |
As I look at these photos now, I find myself thinking, "No one will believe this was easy!", but it was, mainly because I wasn't too concerned about making the shape as perfectly symmetrical as a machine would make it. It just doesn't need to be that perfect, so relax a bit and enjoy it.
Finally, you've probably been wondering why the block is longer on one end than the other. This is something I thought of a couple years ago when stropping my Mark III block: if you make both ends blunt, you can't get the strop tight enough to close up the gap between the strop and the block. This means one end of the block is not supported by the strop.
Solution? Make the block taper off so the strop can follow the taper.
 |
| Longer end gives more support to the strop |
Okay, next time, the fun part!
Yes, I'm being ironic.
Next Up: Too Hard
John, I've been following your adventures for a couple of years. First, thanks for all the articles. They are a thrill to a vicarious sailor.
ReplyDeleteSecond, I am a woodworker, primarily turning, so it has also been fun to read about your progress as a woodworker. Thus to the point of this response: http://www.boggstool.com/ sharpens files. You fill a flat rate box and send it off to them and back they come like new. Merry Christmas, Tom
Ah, interesting. Thanks for the link!
DeleteLovely work! Who's rasps did you buy? We in the UK are not well served with good rasps these days. The cheap Chinese imports have killed the trade, and the new rasp does not seem much better than an old blunt one . . .
ReplyDeleteThe half-round is just a plain old Nicholson #50, and the rattail is an Ajax hand-cut, from Lee Valley.
Delete