At some point in the Blue Moon's past, someone drilled two small holes in the mizzen mast partner (the piece of wood that helps hold up the mast.) These holes were for two stainless steel belaying pins. You can see one of the pins on the right side of the mast parter in the photo below (which was taken back on the west coast of Florida, two years ago.)
The pin that had been on the left side of the mast is already missing. The rot caused by the hole is already visible. The rot is actually worse than it looks. It spread like a cone from top to bottom. If you put your hand under the partner and felt around, much of the left-hand side is soft and punky, and the hole is no longer tight enough to hold the pin.
Oddly enough, the partner was still strong enough to support the mast, but this was mainly because of the 2 threaded stainless steel rods through the partner, the stainless steel mast step, and the SS plate bolted across the front. Steel holds up the mast. The wood is basically a spacer.
 |
| Rotting Partner |
Before cutting it off, I made a template of the original shape. (See Helena, I can learn from my mistakes!)
From looking at the photo below, you might wonder why I didn't just replace the whole mast step. That was Plan A, but those 4 steel rods proved very difficult to remove. The wood is epoxied to the transom, and the rod threads are epoxied into the wood. The wood is hemmed in above and below by the cap rail and cross beam on the transom. I actually tried to chisel the mast partner off the transom, but chickened out... I was afraid I'd end up with a big mess.
Plan B was to remove the rot and glue in what amounts to a very large patch. I did this on the mooring with a hand saw, chisel, and hammer...
I couldn't just saw it off because inside the wood was embedded 2 more steel rods as well as a number of copper nails. Most of the smoothing was done slowly and laboriously with the chisel, which had to be reground when I was done because of all the embedded metal. But with enough patience, anything can be done...
 |
| Major Surgery |
After using it for a few projects, now I can't figure out how I did without it!
 |
| New King of My Shop |
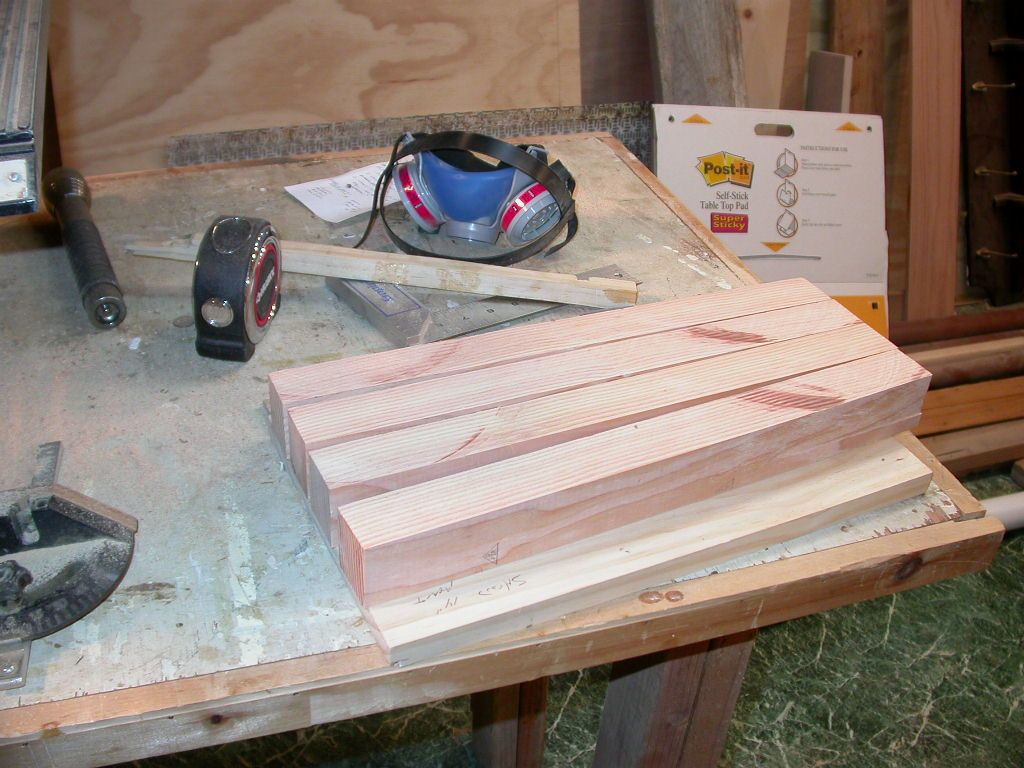 |
| Douglas Fir laminations |
Always scrape away the squeeze out!
 |
| Glued up laminations |
Back on the mooring, I used my old brace and a vice clamped to the rail to drill the 4 holes slowly and carefully, first a bit of one, then a bit of the other, and so on, until I had 4 holes that lined up more or less perfectly with the 4 rods.
In the photo below, I've got the piece installed upside down (duh!) so it doesn't actually line up properly. I must have been getting tired at that point...
 |
| Slowly drilling the holes |
The piece now has the hole, and is the correct width and depth. You can just about make out the curve drawn on the top where I need to cut next.
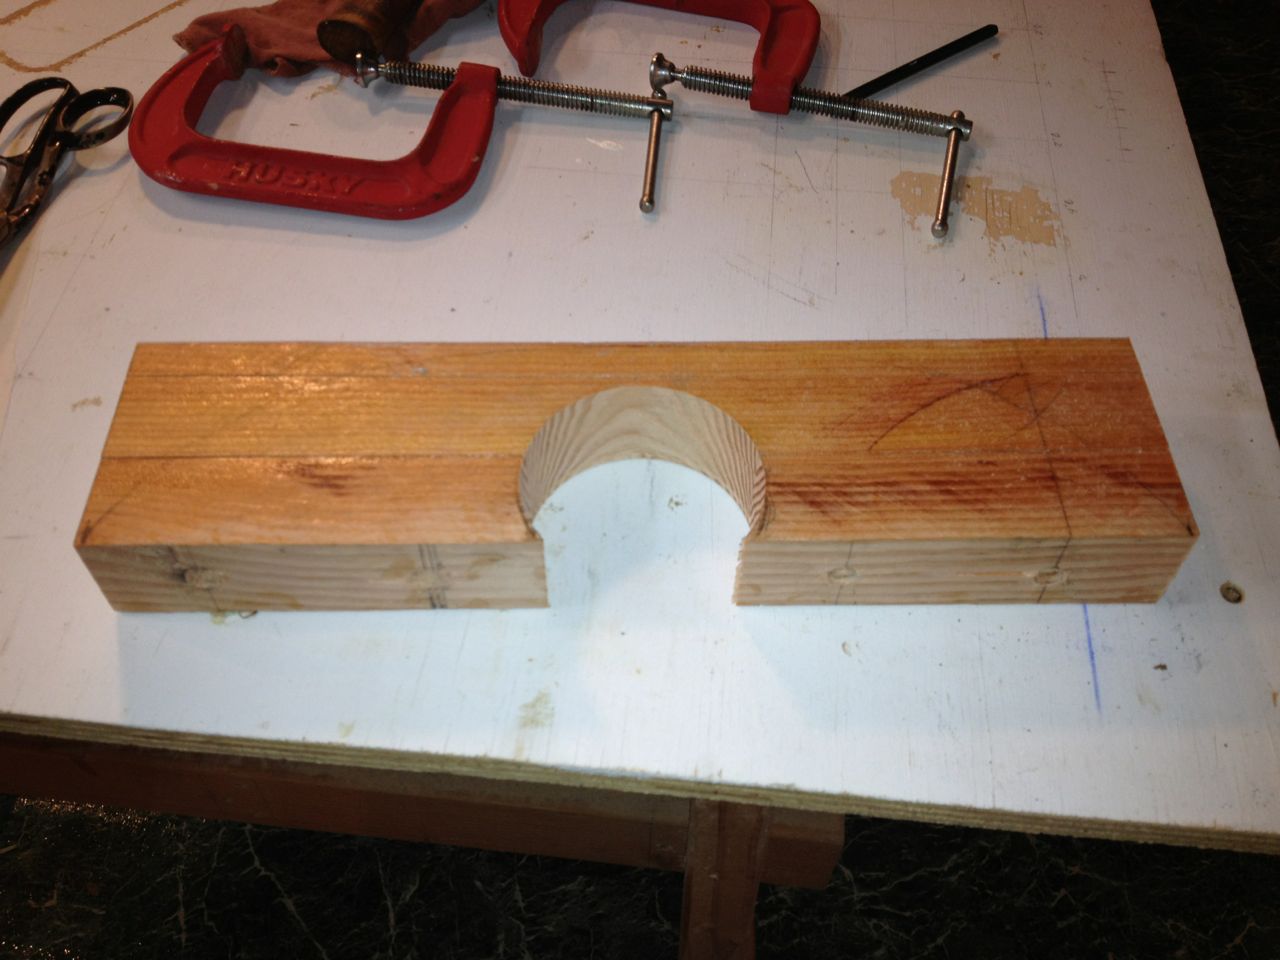 |
| Trimmed roughly to size |
Anyway, I don't need no stinkin' bandsaw. I had a coping saw (and an hour of spare time!)
Actually, with a new coarse blade installed, it cut fairly easily. It did take an hour, though. Ah well...
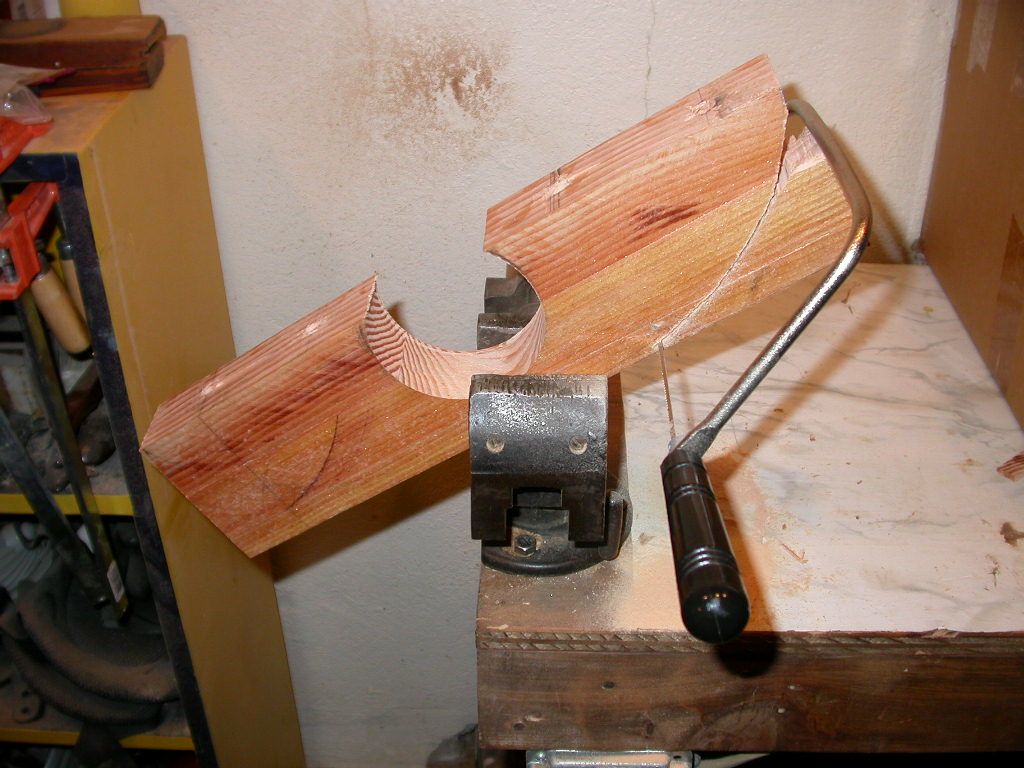 |
| The original curve cutter |
The next day, I epoxied it in place. Surprise, surprise... almost a perfect fit.
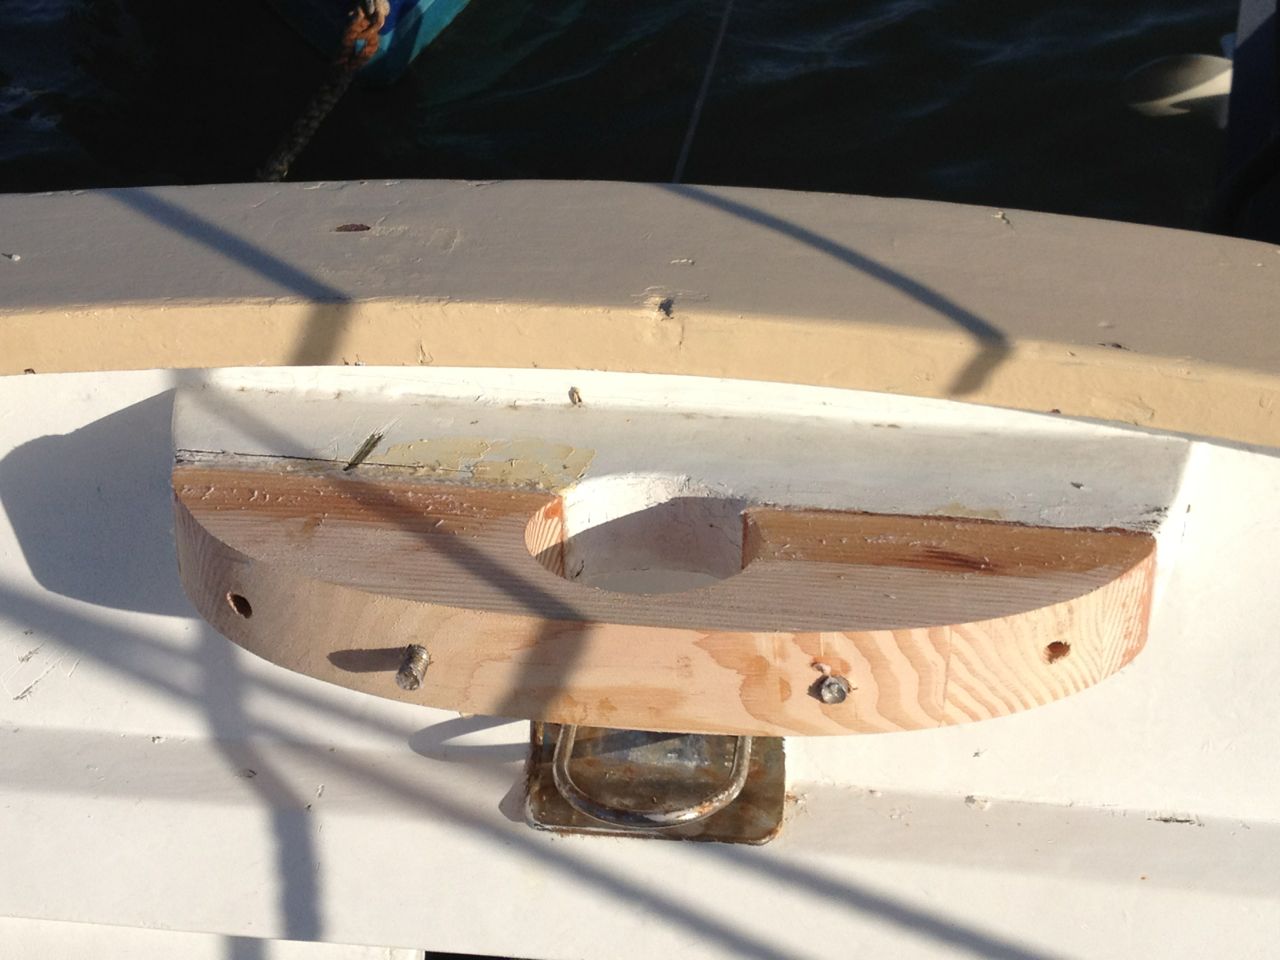 |
| Trimmed and glued |
Good question, and one that caused me infinite pain... the last half-inch of the right rod had gotten bent at a good 30 degree angle sometime in the distant past. It was impossible to straighten it, and impossible to drill the 4 holes with the bend in the rod, so while I was drilling my holes, I cut off the bent part.
Now I was faced with the consequences of that (rash?) decision. With the steel plate installed, there wasn't enough exposed thread to hold the nut.
I still couldn't remove the rod to replace it (the obvious thing to do) -- it was still epoxied firmly into the mast partner. After a whole lot of thinking, I remembered my old engineering professor at RPI telling us: "Perfection is the enemy of 'good enough'".
I took out my chisel and cut away just enough to allow for the installation of the plate.
Problem solved. No perfect, but 'good enough'.
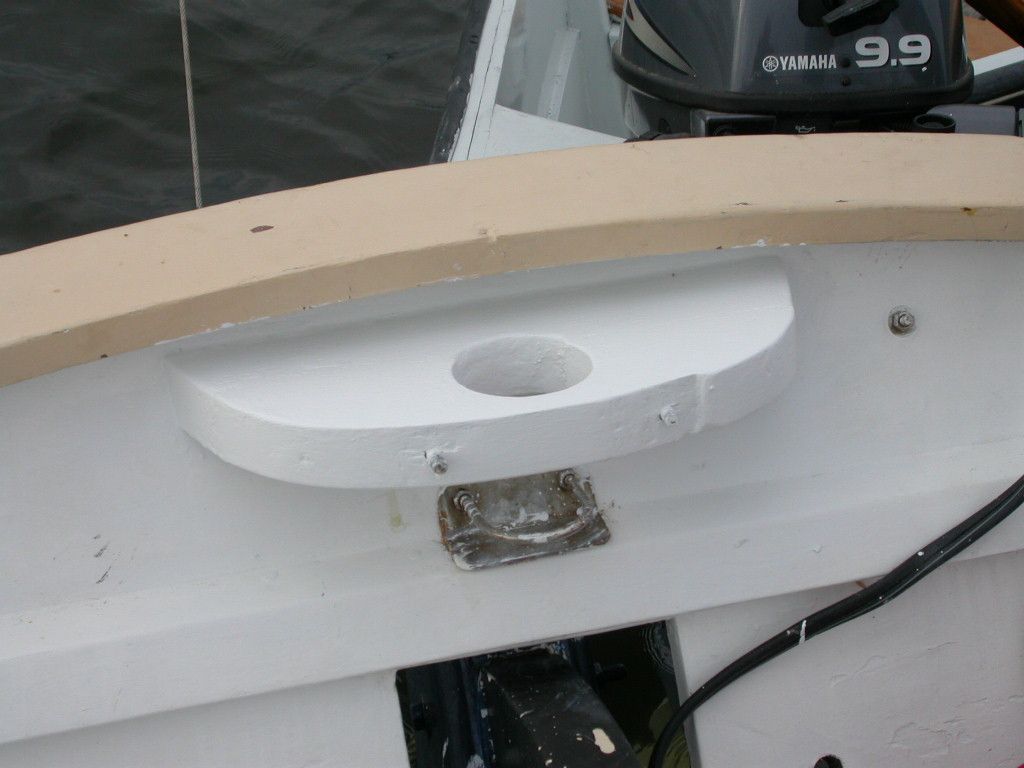 |
| Painful 'adjustments' made |
Where does the time go???
>>> Next Episode: Mizzen Up!
Looks good to me John. Hope the weather clears soon.
ReplyDeleteIf you need to remove epoxied in steel apply heat. The epoxy will soften at a temperature around 70ºC & then you can unscrew the thread. In this case I'd have put up a temporary shield over the timber & used a small gas torch on the exposed rod end.
ReplyDeleteDon
H'mmm. Now that's a good trick to remember. Thanks!
DeleteI like the repair.
ReplyDeleteNice job. I was gonna say what Anon said about heating those epoxied-in rods with a torch .. but he already said that.
ReplyDelete