But how?
As usual, we are delving into matters that are practically trivial to trained or experienced woodworkers. While experts might get a chuckle out of watching me rediscover things they learned in high school, my real goal is to encourage the one or two people out there who are behind even me on the woodworking learning curve. If you are one of those people, this post, especially, is for you.
I say this, because when I first contemplated jointing two boards together, I considered it practically impossible. Why? Because to glue two boards together at their edges, both edges need to be perfectly straight and perfectly vertical -- i.e., 90 degrees from the wide faces of the boards.
I'd done just enough planing of edges to know that this is not an easy thing to do with a hand plane. If you don't hold the plane exactly vertical, you'll cut the edge at an angle. And since there is only one correct angle (90 degrees) and lots of incorrect ones (89, -89, 88, -88...), well you get the idea.
Also, it is oh so easy to take off a bit too much at the ends of the boards, so you end up with an edge that is high in the middle... more like a hill or mountain than a flat prairie.
I don't have a jointing machine, which really would make the job trivial, but for a few days, I actually checked craigslist, to see if I could get one on the cheap.

Deluxe Jointer
I was sorely tempted by a $500 Delta jointer, but in the end, came to my senses. I didn't have the money or the room for such a luxury.
I talked to one of the guys at the lumber place (who had one of the above jointers in his shop). When I talked about jointing the boards with a hand plane, he sort of sucked in a breath, shook his head, and said something like, "That takes some skill, brother..."
Oddly enough, that sounded like a challenge to me, so I decided to suck it up and figure out how to do it with one of the first tools I ever bought, my old wooden jointer plane.
The first thing I did was to sharpen the blade. I'm still not very good at sharpening, but I'd recently read that you could sharpen any blade with an oilstone, if you spent enough time with it. I decided to spend as much time as needed to get that plane blade good and sharp.
I won't get into the details, since I don't consider the method I used to be recommendable, but after spending about 45 minutes with my hand grinder, and double-sided oil stone, I finally had a sharp edge on my plane.
I then tried an old jointers trick, which is to clamp the two boards together, and plane them at the same time. Supposedly, this eliminates the need to plane exactly at 90 degrees. As long as both boards are planed at the same angle, they will join together. Scarfing is an extreme example of this idea.
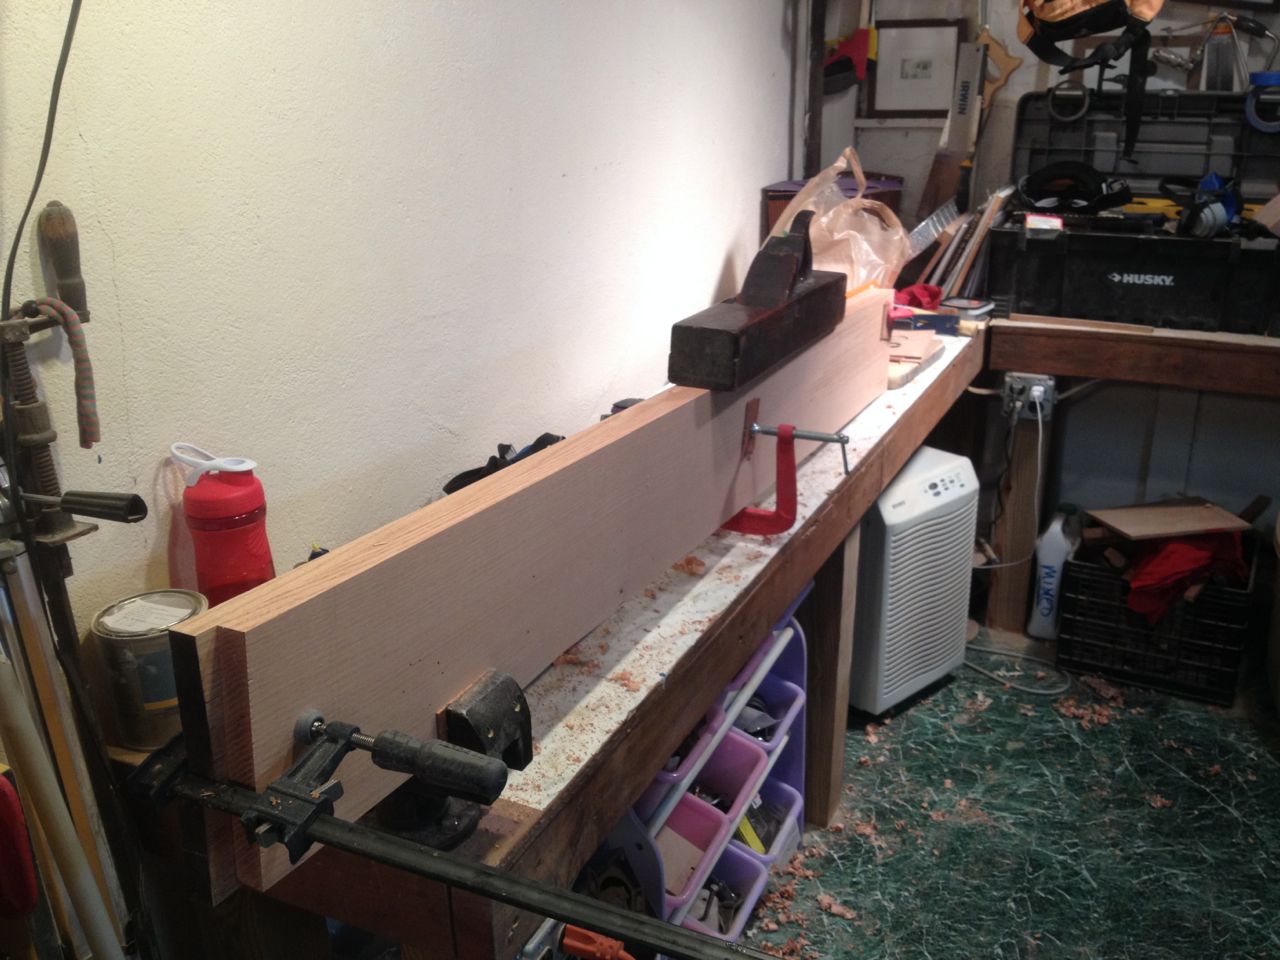 |
| Trying to joint two boards at once -- fail! |
However, I found it impossible to plane two fairly thick oak boards together... I'm not sure why, but it just didn't feel right. So I tackled them one at a time.
To make a long story short, with a whole lot of trial and error (also called 'practice') I found that I was able to plane the edge both flat and at a 90 degree angle. At first, I had to use a square constantly to check the angle, but with a certain amount of practice, I found I didn't. Somehow, my body or eyes just figured it out, and I started planing at 90 degrees. Unexpected, to say the least.
Keeping the edge flat was a different story. I think planing the ends too much is so common that there's a word for it, but I can't remember what it is. Suffice to say that if you check for flatness frequently with a long straight edge, don't over-plane the ends, and focus on the high points, you can quickly get the edge flat. Again, with practice, this becomes quick and easy. Again, unexpected!
Anyway, here's the result of my very first attempt at edge jointing. These boards are just laid side-by-side... a perfect fit. Amazing.
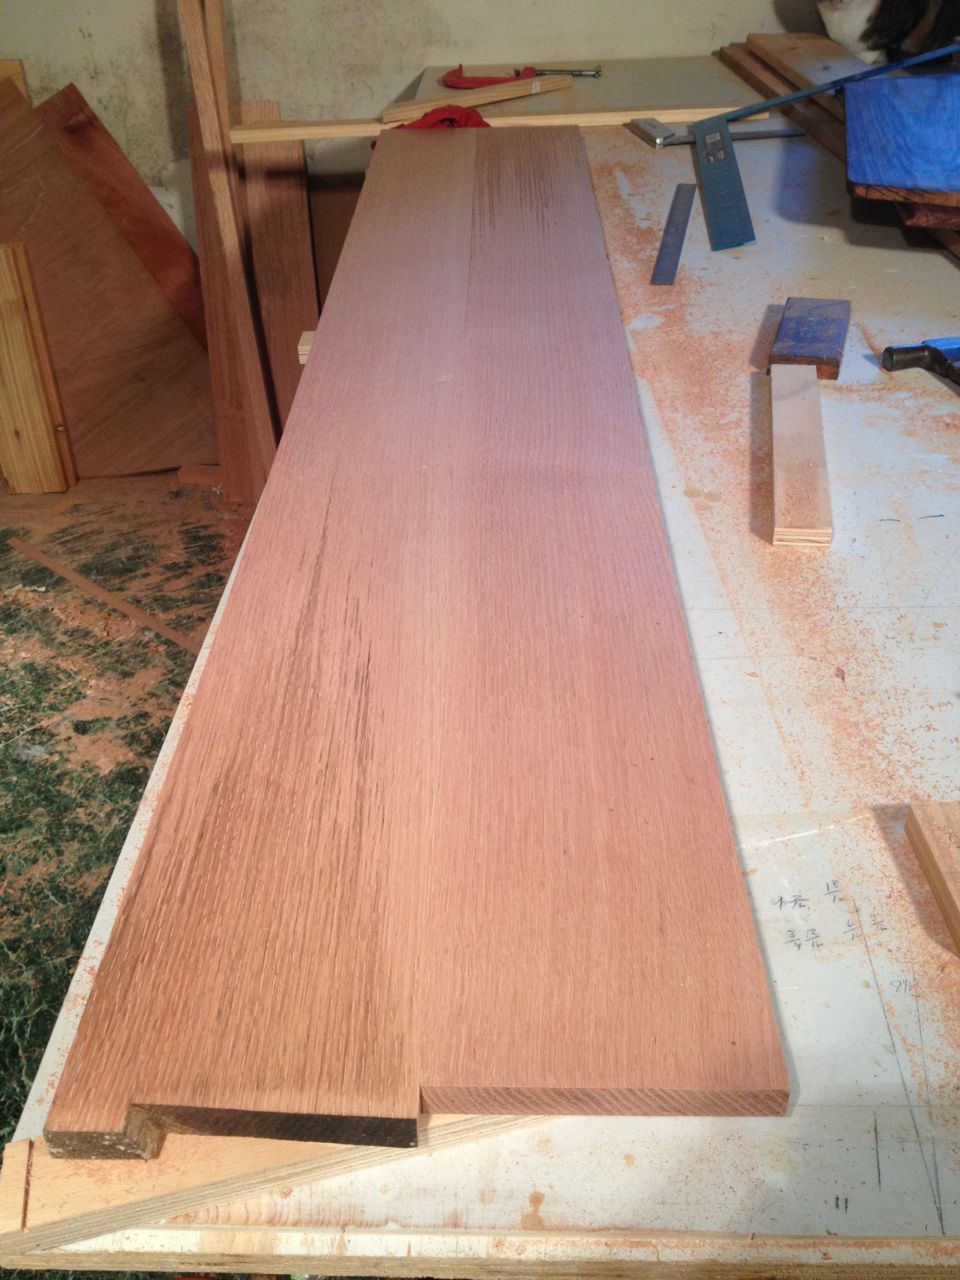 |
| A minor miracle |
To glue the boards together, I needed some bigger clamps than I had, so I made up a bunch of pipe clamps. You can make these as long as you need just by using longer 3/4" pipe. They are really handy and are designed for just this sort of work. You can press the wood down on the straight pipes, which helps align the boards perfectly.
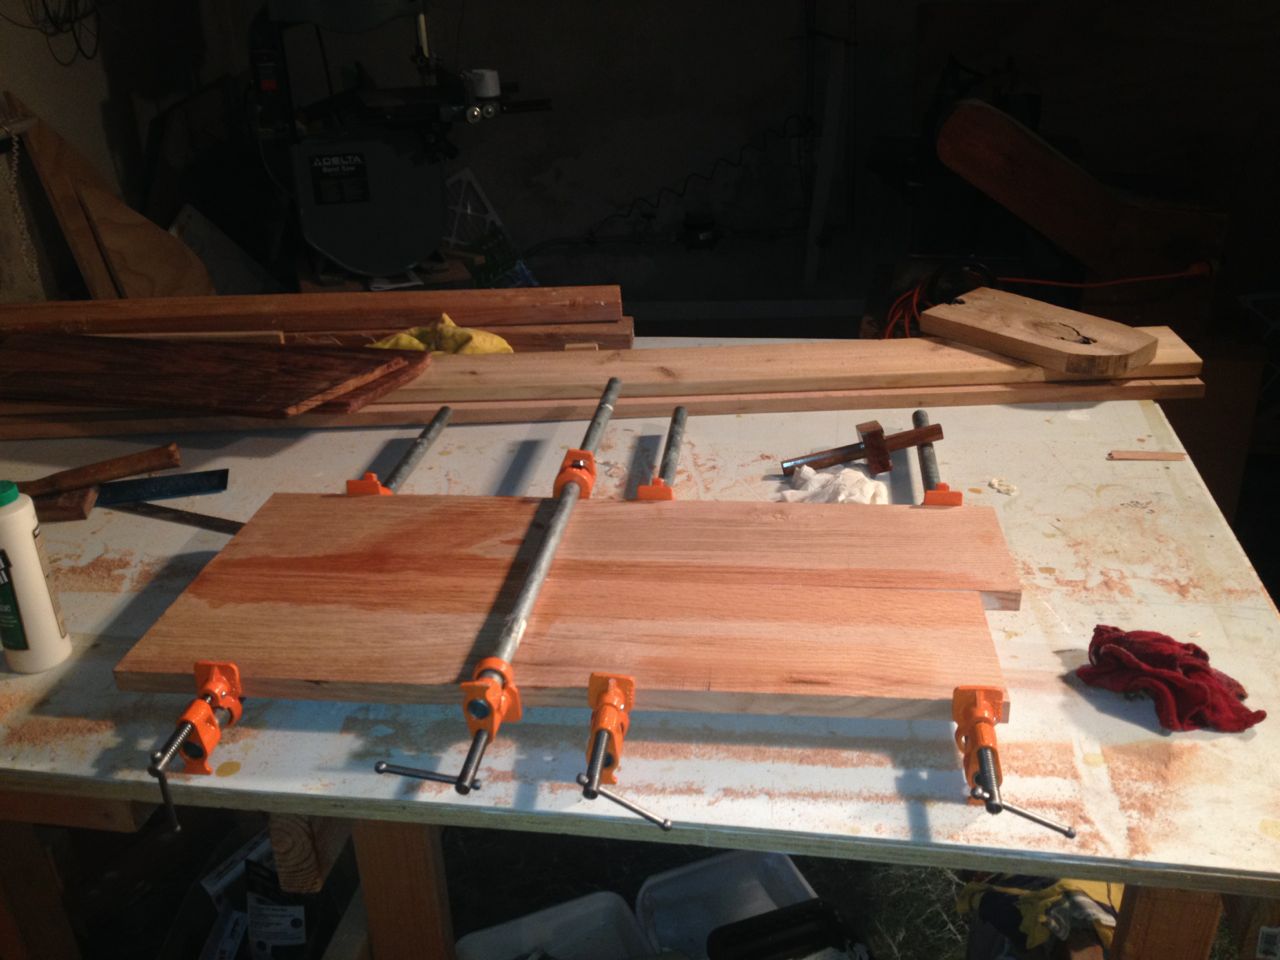 |
| Glueing up one of the end pieces |
These are the kind of things I mean:
With longer pipes, they were just the thing for gluing the sides to the top (backed up by a big cleat screwed in the corner.
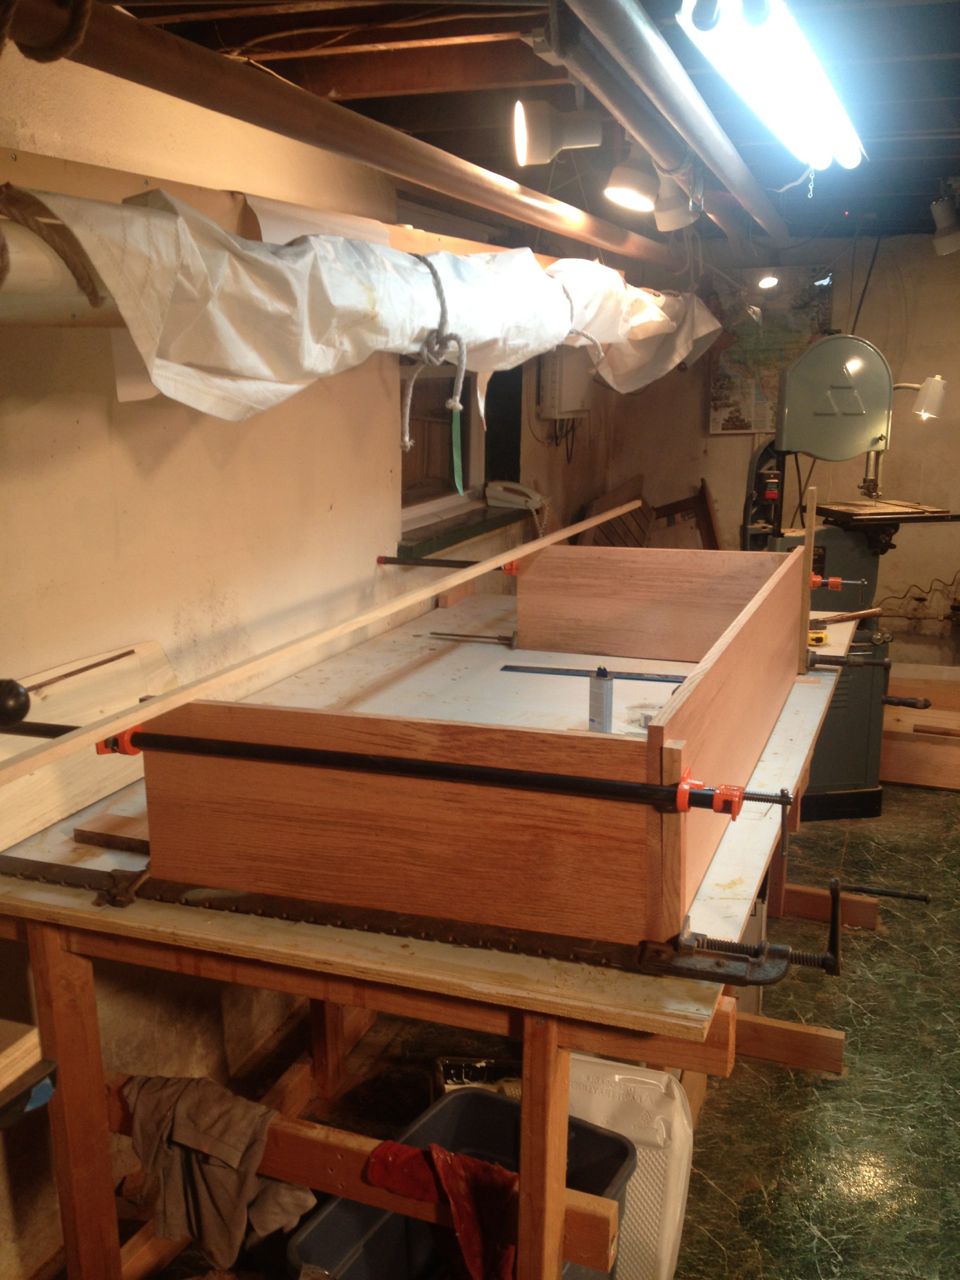 |
| Glueing sides to top |
Anyway, it was good to remind myself that I don't have to solve every problem with a new, expensive tool, and in many cases, it's more practical (and more fun) to take a slow, low tech approach. I did a lot of planing on this project, and I'm happy to say, I can produce a flat, 90 degree edge almost as fast as it would take to set up a big jointer.
If you know the word for taking off too much at the ends while planing, please post it below. It's driving me crazy that I can't think of it!
Next Episode: Flush Cut
I think the word you are looking for is "ah s***!"
ReplyDeleteSnipe will also work. Also put some plastic shipping tape on the pipes to keep the tannin in the oak from reacting with the iron in the pipe and leaving black marks. It also provides release in case glue finds its way there so you will not glue your work piece to the pipe. If that happens the term is ah S***!
ReplyDeleteI believe the term you are searching for is "snipe."
ReplyDeletelol
ReplyDeleteWhat a timely post! I am that guy you speak of, just behind your curve if learning woodworking and have learned much from your blog.
ReplyDeleteFunny I just completed edge joining 3/4 inch oak PLYWOOD wow what a challenge that was. Ultimately I secured the edges facing each other securing them and using my skill saw and a straight edge cut both boards simultaneously so any imperfections would have a mirror image to the other side.
I've heard of that technique, but have never tried it. The edges I was working with were the edges of rough cut lumber, so they were not even close to flat. It would have taken many passes with the saw to flatten them.
DeleteI'm surprised you were able to edge glue plywood, though. I guess the edges absorb the glue? Interesting.
How timely this post is. I am the guy just behind your learning curve and have learned a lot from your posts.
ReplyDeleteI just finished edge joining 3/4" plywood veneer to make a table top. I solved my edge problem by laying the edges facing each other (as if joined) and ram my circular saw down both edges simultaneously. Transferring imperfections or slight curves to a mirror image on the other side. It worked but plywood does not lie flat nor is it planed to a perfect size so I still had issues. In the end I got it all close enough that I am very proud of it.
If you plane two boards together and then join them wouldn’t a dip on one be a dip on the other? It does not seem like it would work.
ReplyDeleteWhat am I missing?
You are correct but eliminating a dip or hump is easy compared to getting both edges at 90 degrees. I think that’s the point of the trick. Although I found it fairly easy to do, in the end.
Delete