I should have known better.
First, I realized I'd have to choose the dishes before building the rack, because the dividers would have to be laid out just so. And as long as I was actually going to buy dishes, they might as well be good ones. Good for sailing, that is. None of those silly plastic ones with signal flags around the rim that they sell down at your local chandlery.
Taking a tip from Ferenc Mate, I started looking for plates that were:
- heavy stoneware, so they'd take some abuse, not slide around too much, and hold some heat,
- with at least a 1/2" lip to help keep food -- even gravy -- in the plate,
- without a wide overhang that makes it easier to tip over the plate
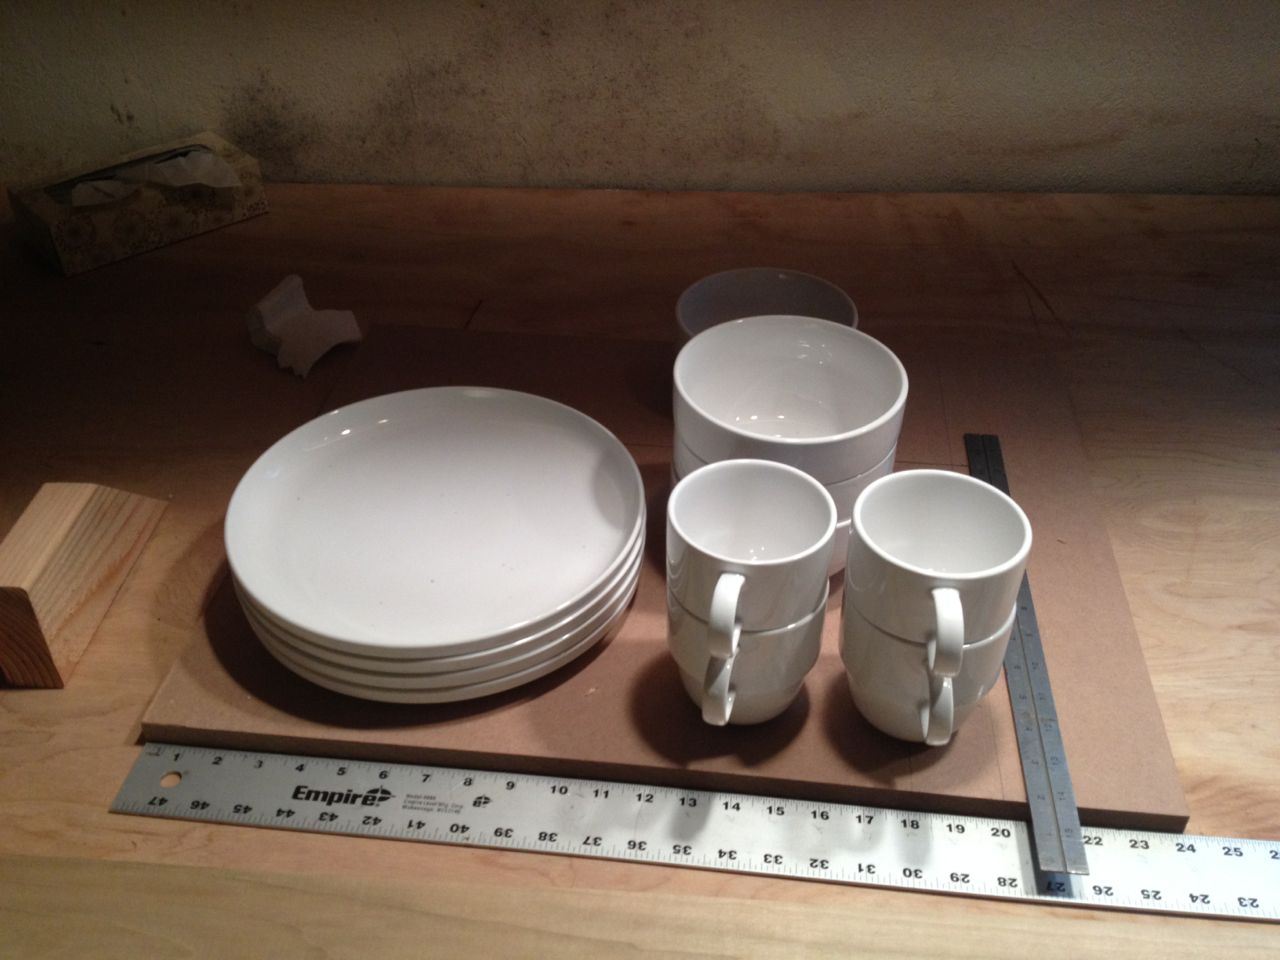
I'd never seen a plate like that (and Mate reports he had to have them custom made) but to my surprise, I actually found one at Target:
 |
| The perfect sailing plate? |
As you can see, it's pretty substantial stoneware, with a 1/2" vertical rim with very little overhang. I'm pushing down on the rim to demonstrate how hard it is to flip the plate up. Try that with a normal plate with 1-2 inch wide rim.
The plate is also relatively modest in size: about 10 3/4 inches across. Big enough for a meal, but not too big to stow.
The next step was to lay out the dividers. I marked off the dimensions of the rack -- roughly 20 1/2 inches wide by 12 inches deep by about 9 inches high -- basically by moving the plates around until they seemed to fit in the space.
 |
| Laying out the rack dividers |
Of course, you need to leave enough space over the rack to pull the cup or bowl out, so I couldn't stack too high. I had to split the 4 mugs into two stacks, and I will probably have to live with keeping just 3 bowls in the rack, since there was no room for that 4th bowl.
I first thought I could stand forks, knives, and spoons up in the small space remaining in the back righthand corner, but then realized I'd need to make a hole in my side deck to accommodate their height -- there wasn't enough space between the rack and the underside of the deck to stand up a knife! That's how constrained the space is.
I was also a little miffed by the wasted space over the dinner plates. The space was certainly big enough to hold a few forks, but I couldn't figure out how to store them over the plates. Eventually, I realized I could move the plates up a few inches, on a shelf, and build a small drawer under the plates for silverware.
Now, I normally launch into projects with a few rough drawings, but this time I realized I would need fairly detailed plans. Getting all the dividers, shelf, and drawers to fit perfectly would not be easy. So I spent a great deal of time with graph paper, pencil, and rulers, laying out the joinery. It actually took 3 drafts to get it right. Here are some of the plans:
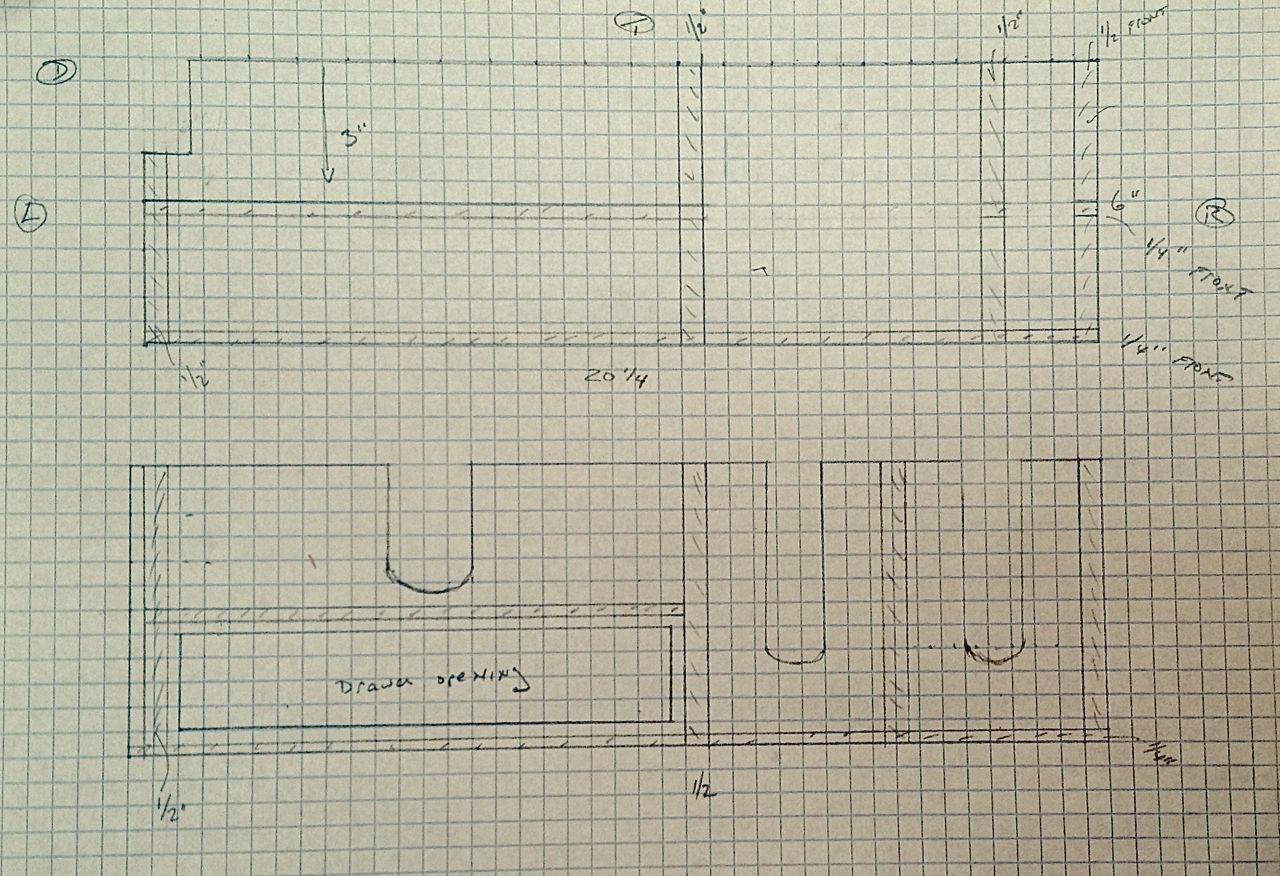 |
| Front and rear panels |
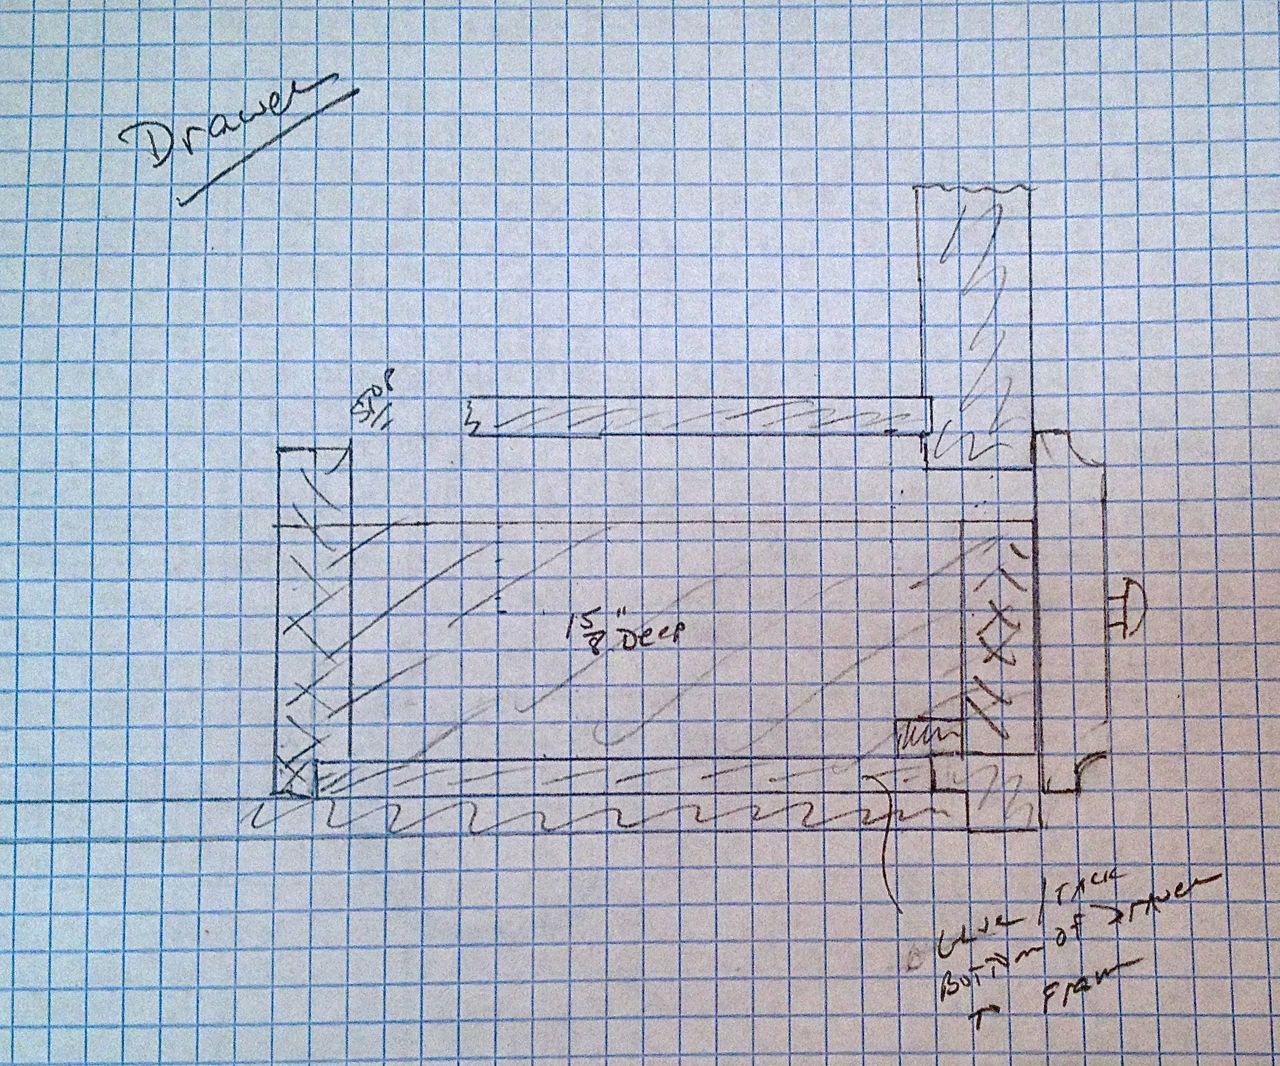 |
| The drawer (will be longer than shown) |
The drawer was the biggest headache, because I had to make it deep enough to actually hold the forks and spoons. A stack of 4 forks is surprisingly high. I had to redraw the plans a final time when I realized the drawer wasn't deep enough.
However, after several evenings work, I was finally satisfied enough with the plans to start cutting wood. I still have a big hunk of teak left over from the galley project, so wanted to use that as the face. After considering other options, I eventually decided on poplar for the sides and dividers, and 1/4" ply for the bottom and shelf.
 |
| The front, back, and sides cut out and stacked together, just for fun. |
I toyed with the idea of using dovetail joints to join the box, but after watching several videos on Youtube and trying to make a few joints with scrap wood, quickly decided that dado and rabbet joints would be just as good.
 |
| Rabbet for bottom |
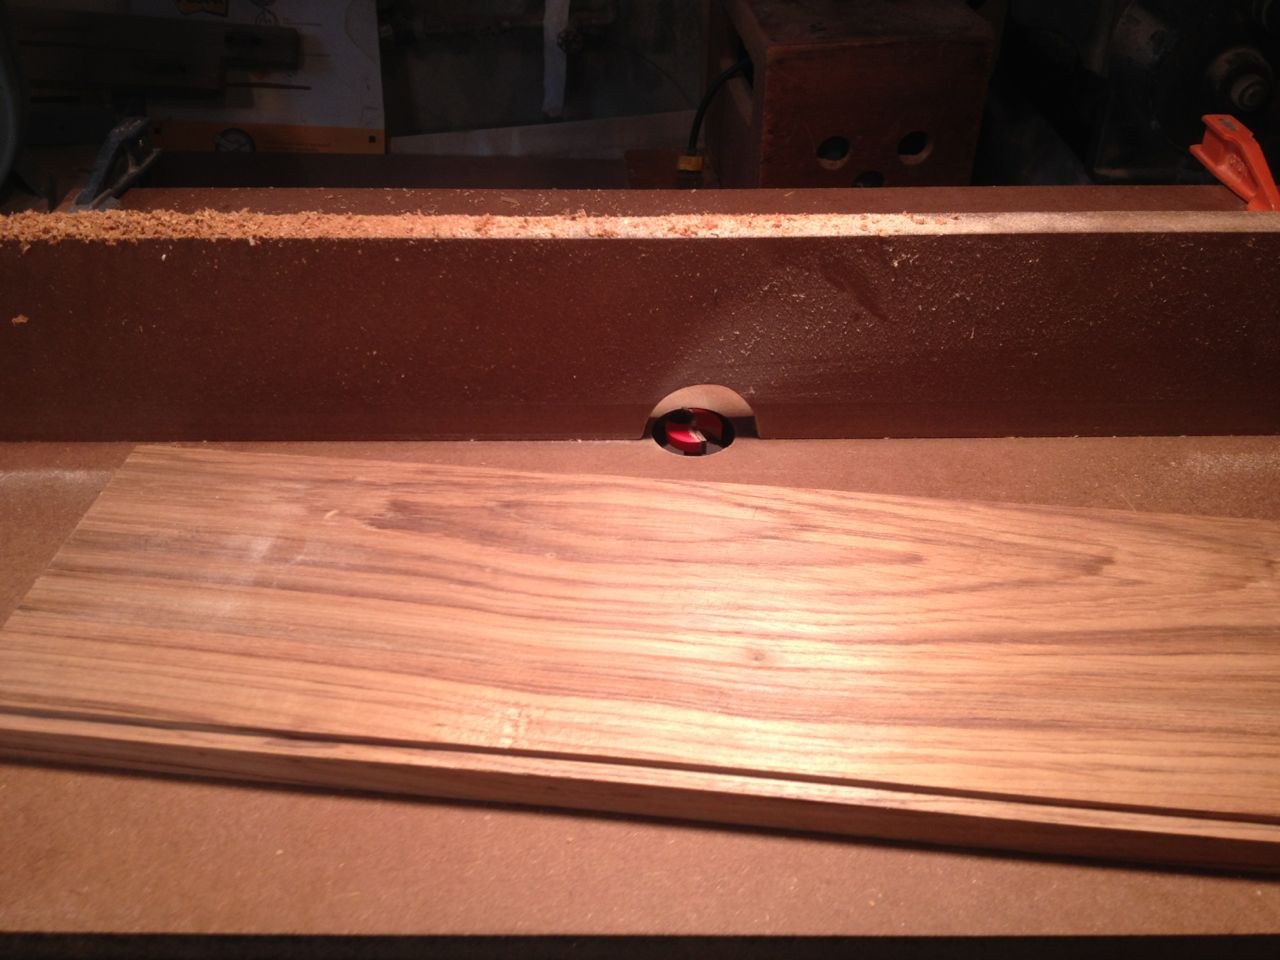
I used my wonderful new router table to make the rabbets for the bottom (1/4" plywood) and for the side joints.
Since my table doesn't have a miter groove yet, I was a little worried about making the dados (grooves) for the dividers, but eventually realized I could make them on the table if I was very (very) careful:
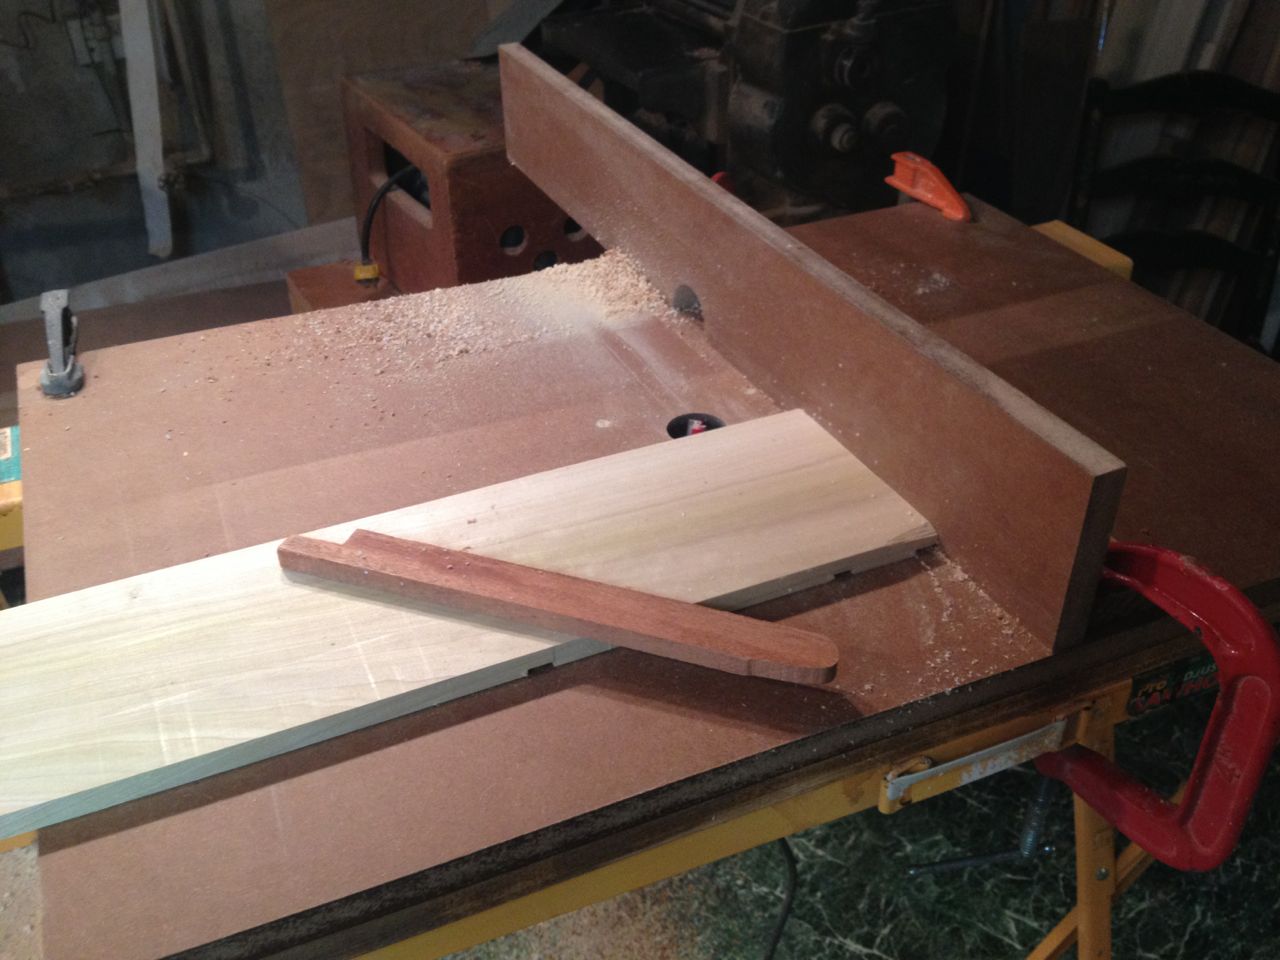 |
| Making dados without a miter channel in the table |
Some readers will no doubt be horrified at the danger posed by the unguarded spinning bit... I must admit I thought long and hard about it myself, but with Helena standing by with 911 pre-dialed on her phone, I dared to use the set up above, using a long push stick. Somehow, I survived.
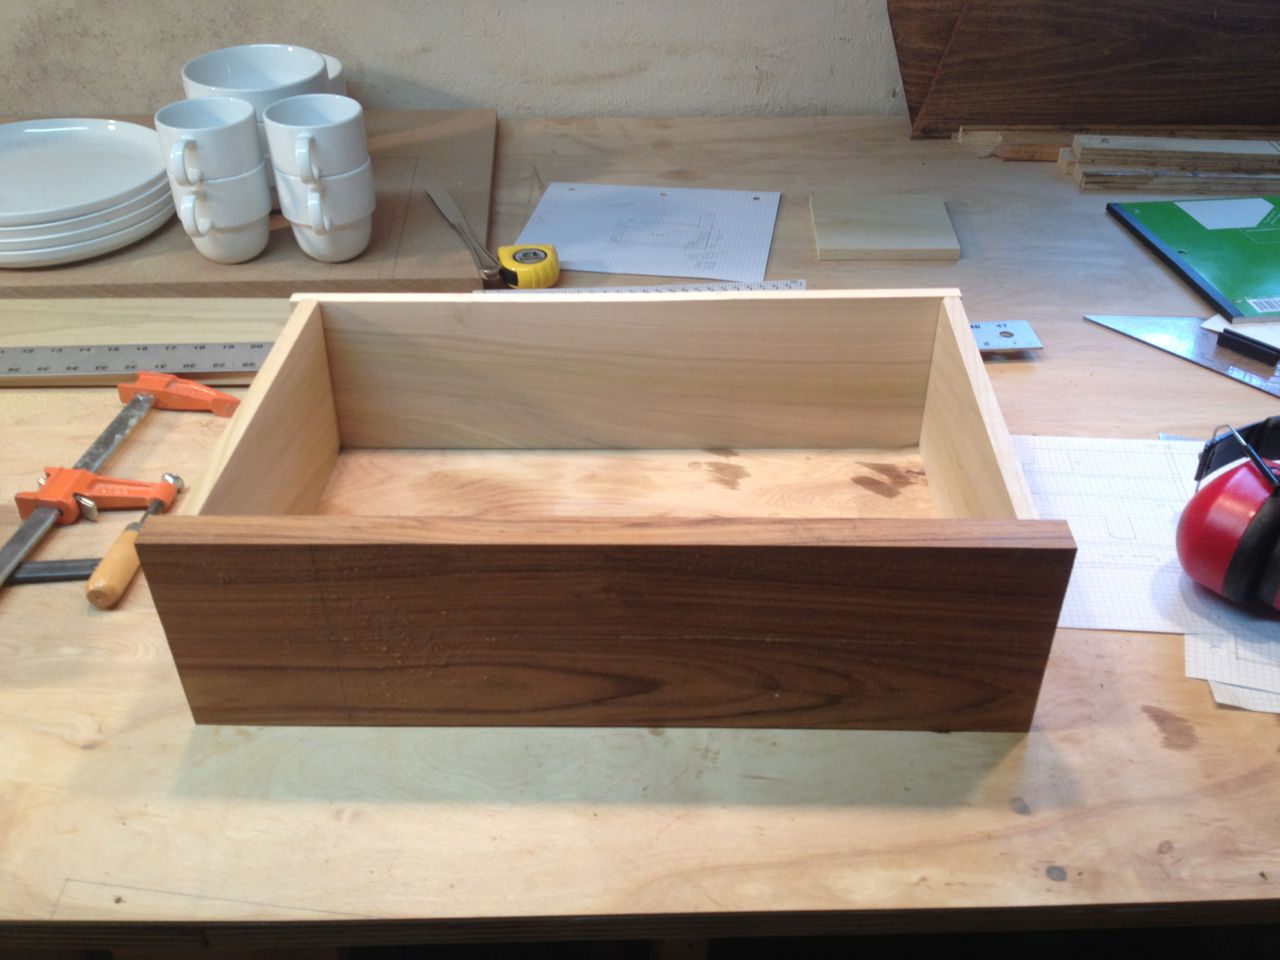
After a whole lot of careful cutting and routing, I tried fitting the pieces together for the first time, with a couple clamps to hold everything together.
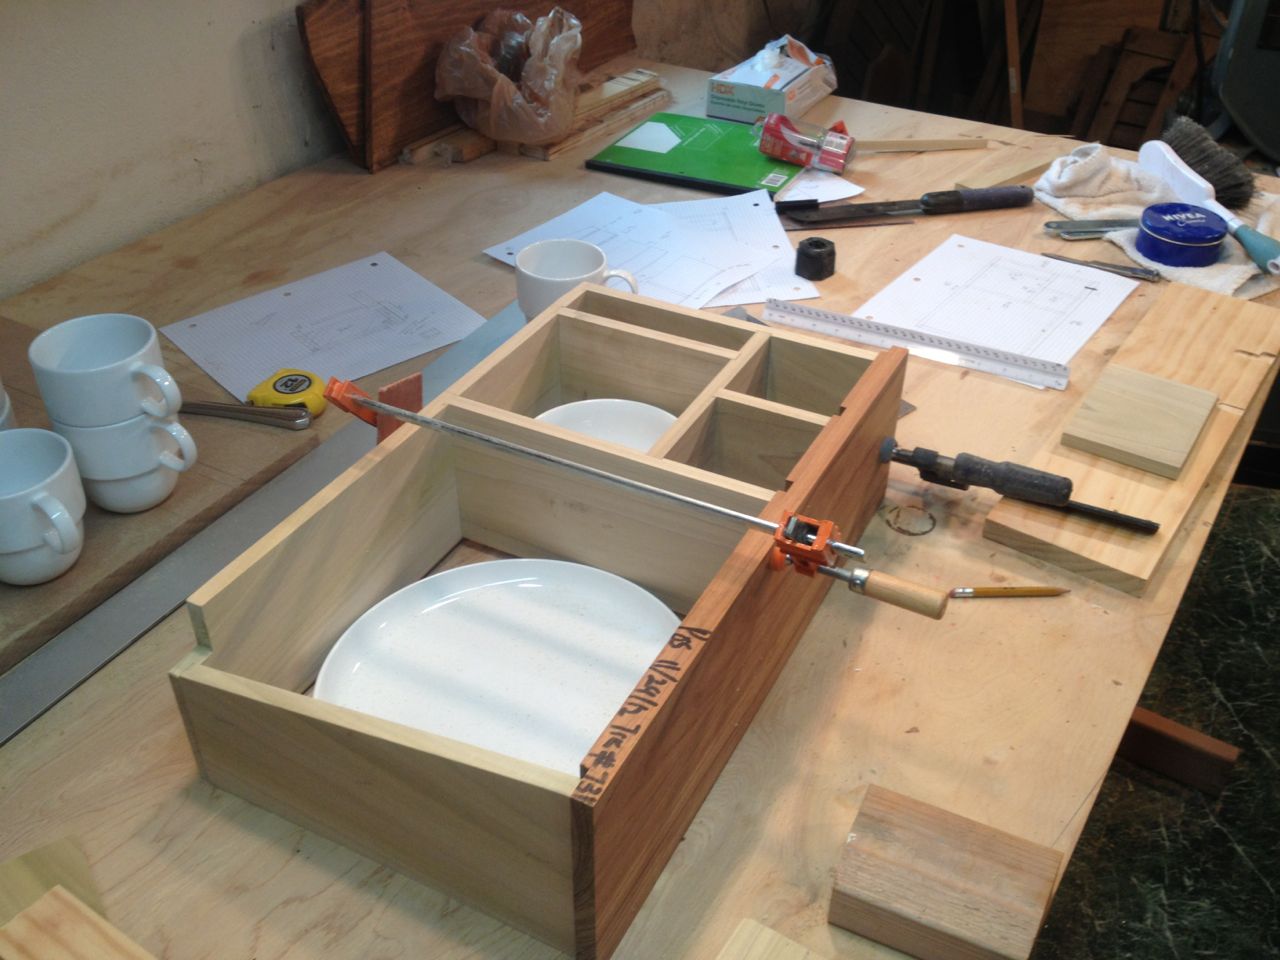 |
| First test-fitting |
Amazingly enough, everything seemed to fit together.
You will notice the odd shape of the left side. It is cut away to fit under a curved deck beam. Just to make it a little trickier.
I then routed the dado for the dinner plate shelf. This will be a 1/4" piece of plywood, which will be glued into all 4 sides.
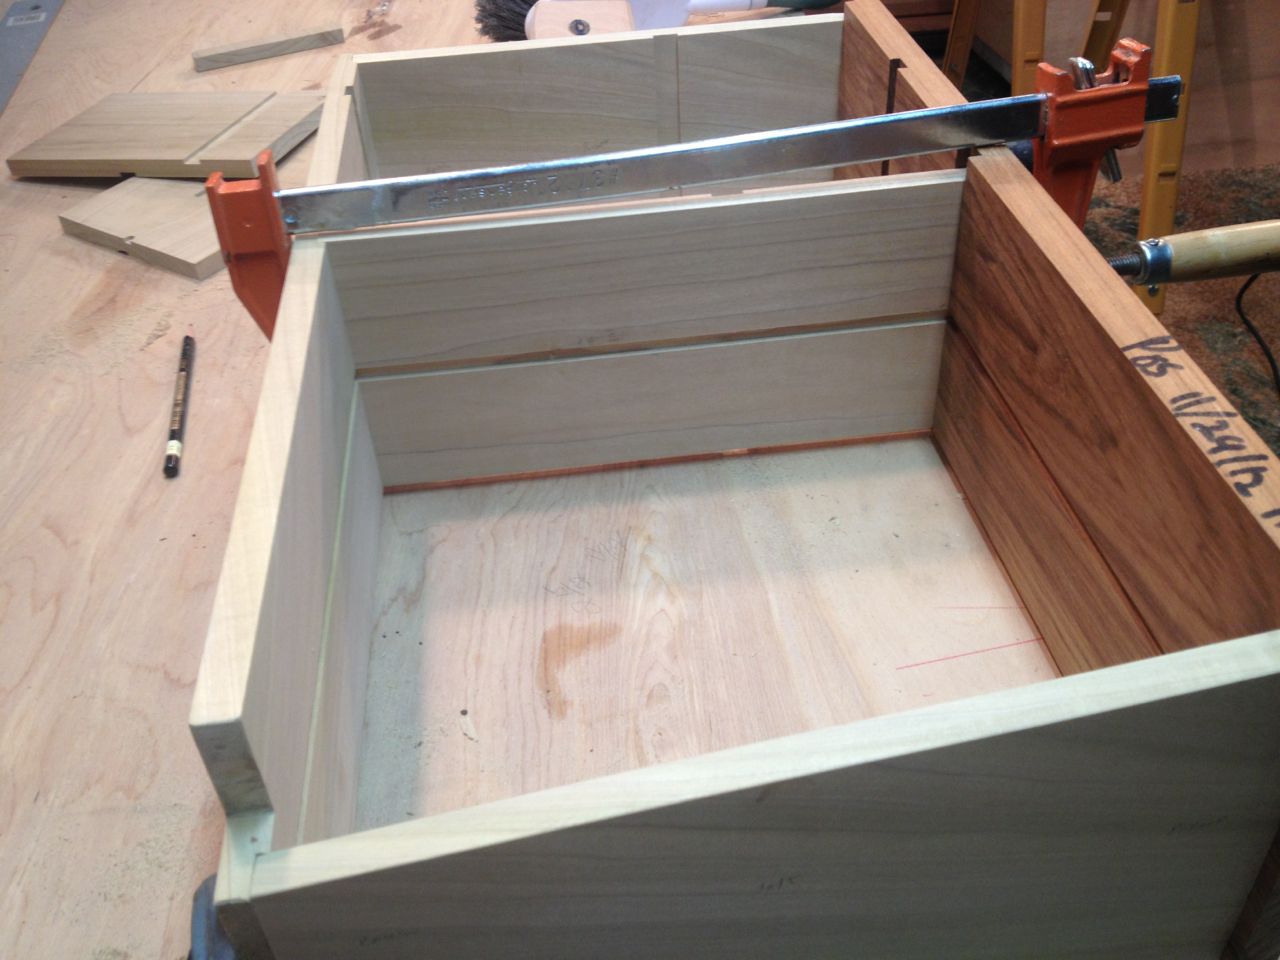 |
| Grooves for shelf |
Anyway, that is as far as I've gotten with this little project so far. Let me know what you think!
Next Episode: Careful Cutting
Hi John, I know you're from RPI (I was ME, '64), you know it's not graph paper, it's quadruled ;-) Remember the "Hubie paper" for lab reports? IIRC, named for a Prof. in the Aero Dept. Been enjoying all your posts. We just bought a 1928 Cape Cod Catboat, in great condition, but I'm into projects already. Limited woodshop eqpt here.
ReplyDeleteAl Parker
New Bern, NC
Oh gosh, you are going way back ;-) All I can say is, buy quality tools, used if you can find them. Junk tools are... well, junk.
DeleteI was apprehensive when I saw the photo of the router table set up. It was ripe for a nasty kick back. Next time I suggest you use a piece of scrap plywood with one square corner as an improvised miter fence to steady the work against the router table fence, pushing them both through the cut. The scrap will also serve to prevent splintering.
ReplyDeleteI think I got away with it because the grooves were so shallow. I will remember your tip for the next time. I do need to cut a miter groove.
DeleteI forced myself this last week to learn Sketch Up. for tricky builds like this it is so amazing. I highly suggest it.
ReplyDeleteH'mm. I never heard of Sketch Up, but it looks pretty amazing. I actually mess around with wooden boats to get away from computers, but for tricky projects like this one, it might be worth bending my rules a bit! Thanks for the tip.
DeleteI love your cool design! Did you know that Eileen Grey studied a lot of boat interior design before create her pieces?
ReplyDeleteI never heard of Eileen Grey before googling her a few minutes ago. But I'm not surprised. I think many of the designs we think of as yacht were created in the 20s and 30s -- the peak of yacht design, some would argue.
Delete