As I wrote the same phrase at the end of the last episode, I thought, "This is becoming a cliche. A posture. No one is going to believe me!"
However, this is the real purpose of the legendary 'moaning chair', or as I prefer, the 'thinking chair'.
There is a difference between my moaning and thinking chairs. The moaning chair is what I use when I dive into something without knowing how to do it or thinking it through. I invariably make a fatal mistake (fatal for a piece of wood, that is), and end up moaning about it.
That's why I prefer the thinking chair. Before diving in, I like to think things through. I come up with an idea for how to solve a particular problem, then walk my way through the process in my imagination.
Most of the time, I discover some sort of hitch which causes me to can that idea and come up with a new one. I keep trying out ideas in my head until I come up with one that seems like it just might work. Only then do I try it.
Of course, there's always a hitch that I can't anticipate, but that's life. As the Lord Chancellor said:
I'll take heart
And make a start
Though I fear the prospect's shady
Much I'd spend
To gain my end
"Faint heart never won fair lady!"
My latest project is a good case in point. When I removed the glued up wood from the forms, the bottom of the laminated beam had -- as expected -- big globs of epoxy squeeze out. Hard as rocks, of course.
The problem was, how to remove this epoxy without turning my shop into a toxic Superfund site? I turned to the Wooden Boat forum for help and got a bunch of ideas, including:
- Taking the big bits off with a scraper, then finishing with a belt sander
- Going straight to the belt sander
- Hitting it first with a belt sander, then finishing up on a jointer and table saw
- Using a scraper and then a plane
- Knocking the big bits off with a rasp, then switching to a scraper
- Busting the big bits off with a chisel, then using a belt sander
- Remove it all with a heat gun and scraper
- Band sawing off the glued edges
- Running both sides through a planer
- Using an angle grinder
As I ran through the various scenarios in my head, I eliminated any that started off by creating a toxic cloud of epoxy dust, with a belt sander, electric plane, jointer, or whatever. If I'd had a big jointer with professional dust collector, like my friend Roger, I might have tried that, but I didn't, and didn't want to ask Roger to contaminate his shop, so ruled that out.
I liked the idea of using a heat gun to soften the epoxy, and then scrape it off. However, my last adventure with a borrowed heat gun (to remove paint) had been less than successful because I'd run into a layer of epoxy-based paint. That stuff refused to come off, no matter how much heat I applied. All I'd ended up doing is burning the wood underneath. Literally burnt it black. So, as I turned it over in my mind, all I could imagine was a charred failure.
I also didn't want to run out and buy an expensive tool, unless I would need it for another job, fairly quickly. One tool I've needed for several projects this year was a belt sander. And Helena has a few jobs lined up where it would come in handy again, so I didn't object too strongly to buying a belt sander, if necessary.
Just cutting off the epoxied surfaces with some sort of saw sounded neat and clean, but I couldn't imagine doing it with any tool I had. In particular, I didn't think my 3-wheel bandsaw was up to the job of cutting through 2.5" of hickory and epoxy -- even if I could think of a way of feeding the heavy, long, curving piece of lumber through the machine, which I couldn't.
A table saw or circular saw was also out of the question because of the tight bend. I could probably do it with my Japanese pull saw, but after doing a test cut, I realized it would take 4 hours per side. Far too long.
After several days in my thinking chair, I decided the cleanest, fastest approach would be to cut the big globs off with a sharp edged tool, and finishing it off with a belt sander. So, taking advantage of a beautiful, warm February day, I moved my operation outside, to make sure my shop didn't end up contaminated.
I attacked the globs with various edge tools: rasp, hand plane, chisel, etc., but the tool that worked best was my very sharp draw knife. I tackled it in two stages: first cutting off the big blobs, then going over it more carefully to scrape off most of the surface glue.
I thought I might even be able to 'plane' the surface clean with the drawknife, if I was careful enough, but then I discovered a big mistake.
To eliminate weak spots in the boomkin, I'd alternated the directions of the layers in the lamination. This prevented two adjacent layers from having the same knot in the same place, but it also meant that the grain was running in alternating directions.
This meant that, no matter how careful I was, I'd always be using the drawknife against the grain on half the edges. If you've ever tried to use a drawknife against the grain, you know what I mean. The blade wants to dive into the wood under the grain, and you end up busting out a big hunk. This was made worse by the fact that the edges of the laminate weren't lined up exactly, so some edges were higher than others.
Talk about unanticipated hitches!
So, after busting out a couple pieces, I gave up on the idea of planing the edge, and just scraped it as clean as possible.
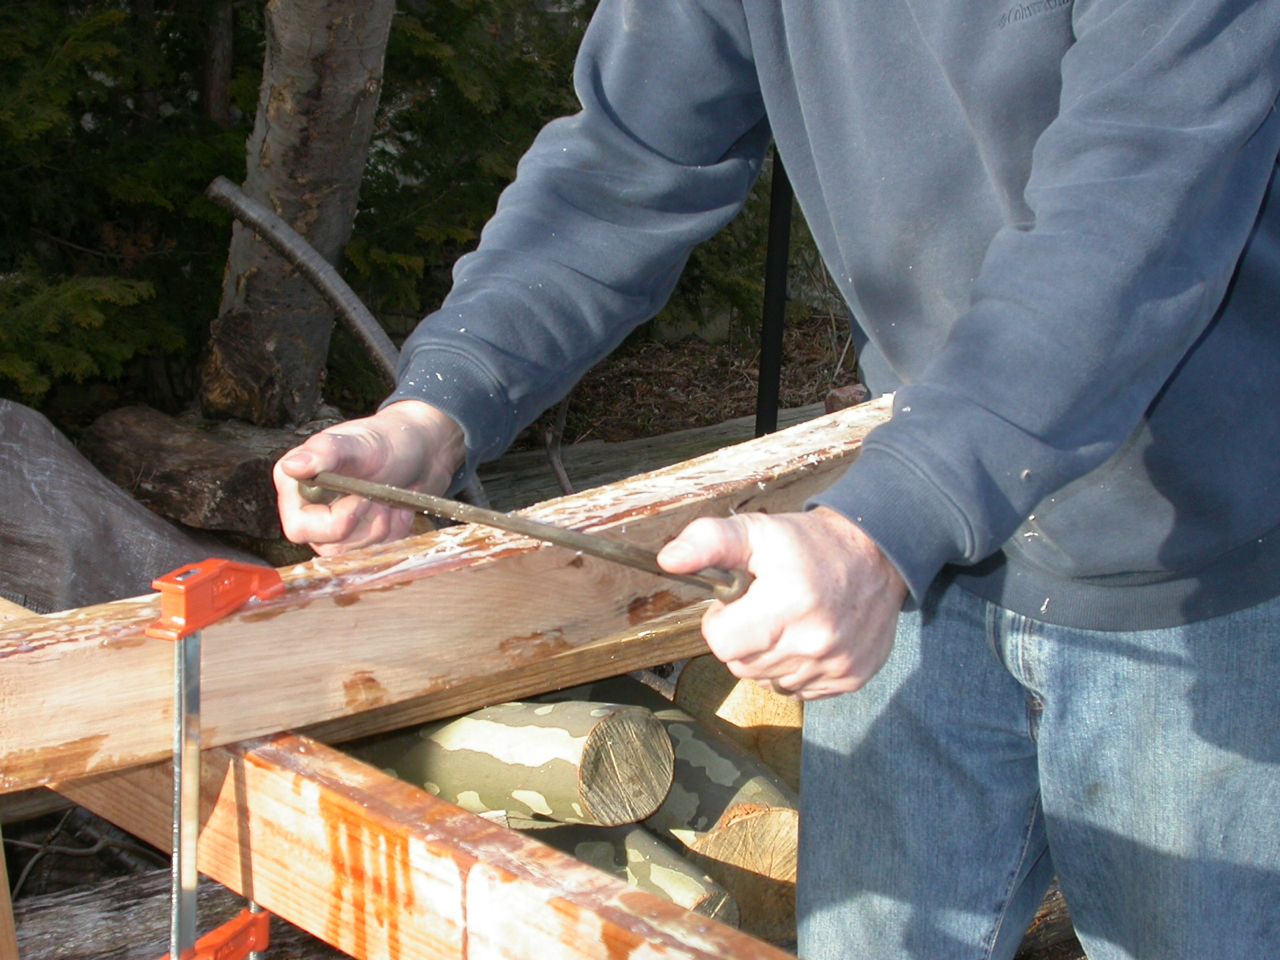 |
| Scraping off most of squeeze-out with draw knife |
By cleaning out the dust bag frequently, the amount of dust was minimal -- less than I'd expected -- but I was glad I was outside. The photos also don't show the drop cloth I used under the saw horses, which made cleaning up the dust that did fall easier.
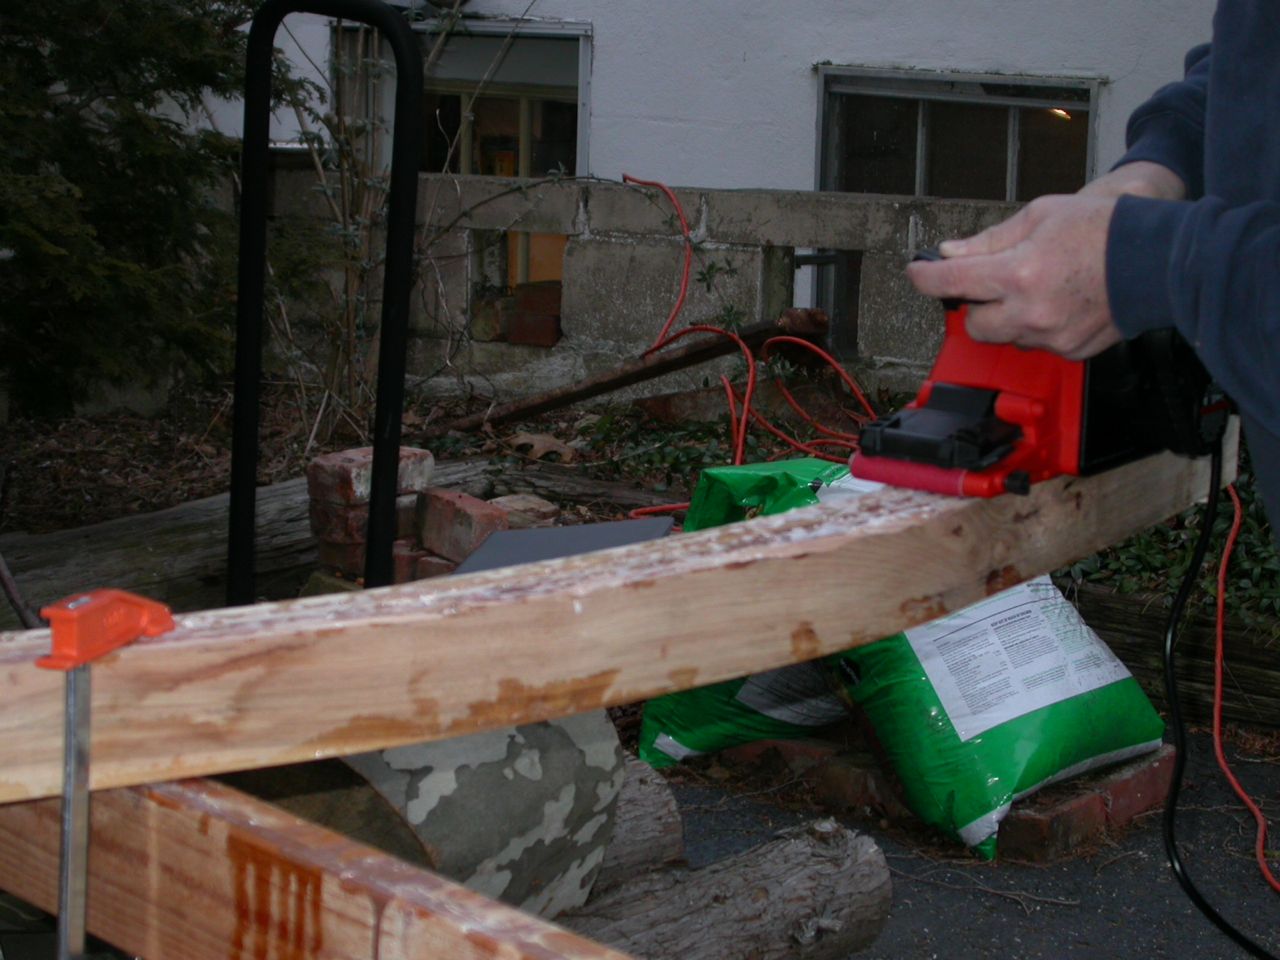 |
| Sanding remainder off with belt sander |
The next step was to 8-side the beam. For that, I had to make a special tool: a spar-maker's gauge. This was pretty cool, so I recorded the details in the video below:
Making & using a spar maker's guage
That was fun, but how could I remove the 4 corners from this curved beam? More time in the thinking chair, followed up by several experiments.
A hand plane worked well, if slowly, on the straight parts, but of course, didn't work at all on the curves. The draw knife took off material quickly, and worked in the curves, but the wavy grain and knots in my low quality hickory made it very difficult to do neatly. The problems with the wood were compounded by the alternating grain direction, already described. After several tries, I laid my draw knife aside, because I was afraid I'd really do some damage that would ruin the piece.
Eventually, I turned to my worm-drive circular saw. I'd never cut a curve with it, but several people had told me it was possible. I could also set the base to 45 degrees, which would make it easy to cut the corners off. If only it would go around the sharp bend...
Well, never faint heart won fair curve, so there was nothing for it but to take heart and make a start.
Again, I donned protective gear, adding those squishy ear plugs, because that powerful saw on hickory makes a deafening racket. No joke.
Much to my surprise, the circular saw was the perfect tool for this job. Because of the configuration of the Skilsaw, which places the blade on the left side, rather than the more normal right side, it was easy to follow my lines and cut fairly close to them. Greg Rossel recommends this saw, and every time I use it, I'm glad I spent the extra bucks for it. Great tool.
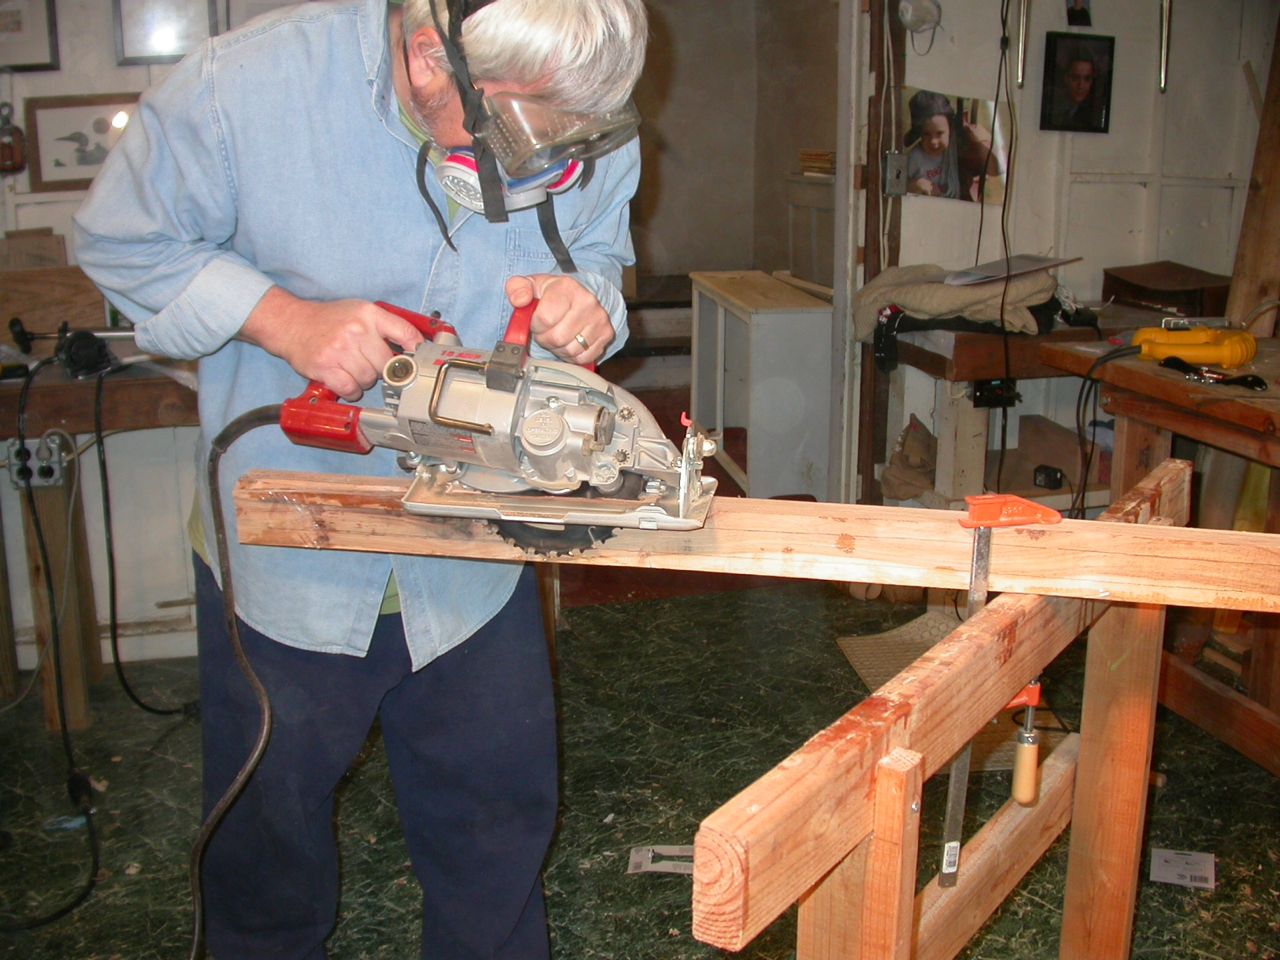 |
| 8-siding the laminated beam with a circular saw. |
So, here is the 8 sided result: my roughed out boomkin, looking pretty neat and clean, and ready for the next step.
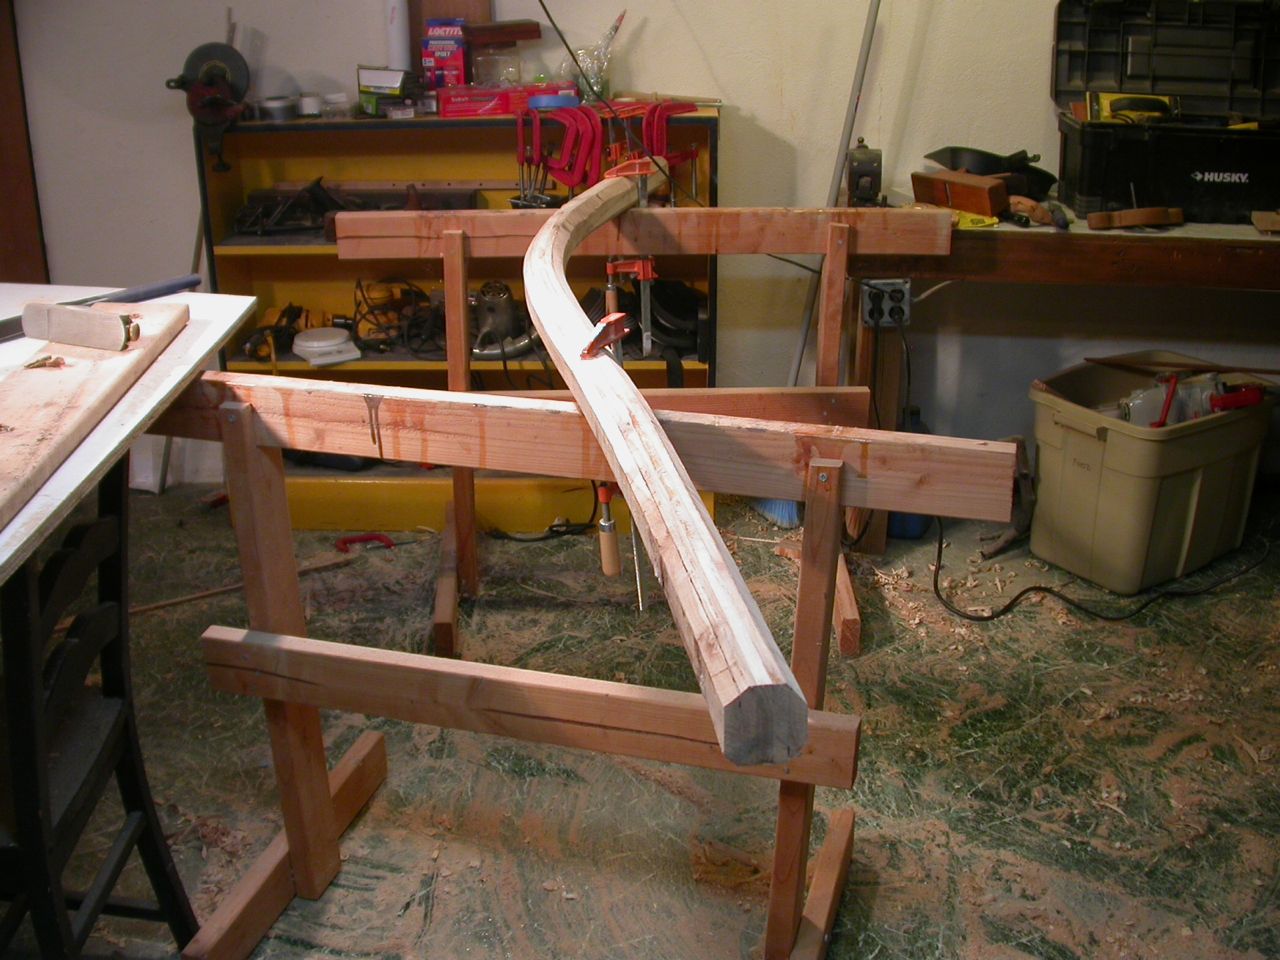 |
| 8-sided boomkin |
The next step, of course, it to 16-side it, and then smooth it into a round spar. I'd been planning all along to use my draw knife for this step, but that's out. No way am I going to risk busting out a big hunk of wood out of this baby. I've got way too much time invested in it at this point.
Back to my thinking chair!
>>> Next Episode: Whole Lot of Round
get a good LOW ANGLE block plane (Stanley makes/made them, others do too) and get it good and sharp. The plane body fits in the palm of your hand, and is short enough to fit some of your inside curves.
ReplyDeleteSharpen the iron to As-Sharp-as-YOU-can-get-it, and go at it. The low angle is far more forgiving to odd grain. You can set it for tissue thin shavings; it will take time but will work. The bits you can't get with the plane will take sandpaper or a rasp worked on a skew angle.
Charlie
Nice story, John. Instead of using the circular saw, I use for spar- and oarmaking a "spoke-shave". It is a simple instrument and costs a little. It works like your drawknife and you can pull it with two hands.
ReplyDeleteSpokeshave!
ReplyDeleteJust bought a spokeshave, and am tuning it up this afternoon. Hope it does the trick.
ReplyDeleteYou could have run the boomkin through a table saw, if it isn't too heavy, by holding it up and against the fence, lowering it as you follow the curve. The other alternative is to remove the piece from the clamps before the glue is fully cured and after it is set up enough to stay together. The other factor, actually the most important, is that epoxy is just inert plastic after the solvents evaporate. The dust is relatively harmless.
ReplyDeleteNice post. I've also been wrestling with epoxy squeeze-out on a strip planked paddleboard I'm working on. I tried a few things to tame it, including planing it off by hand, but the thing that seemed to be the easiest hand tool option was a Stanley 80 cabinet scraper. Basically a spokeshave with a scraper in it. It doesn't seem like it's working at first, as it knocks down the high spots, but once that is done is takes off epoxy like butter. And with just little epoxy shavings, not dust.
ReplyDeleteReally like the gauge, I made a similar gauge to find the centers of the rail on the paddleboard; very handy.
I agree that the spokeshave is probably the way to go to round the boomkin, they can quickly round just about anything with a really good feel. But you may need both a flat (for the straight and outside curved sections) and round spokeshave (for the inside curve).
John,
ReplyDeleteTry hooking your shop-vac up to your belt sander and you'll have even less dust. I take the collection bag off and hook the vacume up where the bag goes with enough duct tape to seal seal the connection, works like a charm for me. I have made attatchments to hook my shop-vac up to all my wood chip and dust spewing power tools. You don't get all the dust but on some tools you may get 90%, less on others, but still better than no vac. Give it a try. You'll be pleasantly surprised.
Ken
John,
ReplyDeleteAnother great post! I learn something new in every one. I will soon be gluing up a couple of small masts and booms. Your posts are my tutorial.
BYW, in my opinion, there is no harmless dust. I wear a respirator when creating any dust that is more than just plain wood dust. And I always wear a dust mask when sawing or sanding wood. Probably too anal about it ( I even use ear plugs when driving nails ) but, vision, hearing and lungs need protection.
Sounds an awful lot like the "Thotful Spot" (http://canoez.blogspot.com/2009/05/tech-tip-tuesday_12.html) Am enjoying your blog!
ReplyDeleteAgreed - this is what spokeshaves are for. Great for spars, oars, etc.
ReplyDelete