I rarely get to test this corollary, since it seems like every boatbuilding problem is unique, but building a second, identical boomkin spar was the perfect opportunity to see if I'd learned anything.
Because there were so many lessons to be learned in the boomkin exercise, I've decided to break them up in to sections, just too keep myself organized.
Lamination
There were two parts of the lamination process I wanted to improve:- Minimize the squeeze-out left to dry on the piece
- Line up the pieces better
The first goal is obvious... the more squeeze-out you can get rid of before it dries, the better. As it turned out, an additional improvement (see below) made this effort moot, but it's still worth noting.
My approach to this problem was simple: clamp the pieces to the form, as usual, then remove the clamps that attach the piece to the forms. There is at least one clamp between every form, so the piece is still held in the right position.
This lets you flip the assembled pieces over so you can scrape/wipe the glue away. You do get some additional squeeze-out after final clamping, but 80% of the problem is eliminated, anyway.
While I was clamping the pieces to the form, I tried very, very hard to keep the edges lined up. In my haste during the first glue up, I hadn't been careful enough with this, and the edges didn't line up very well at all. It's hard to get them to line up perfectly, but it's important to get them to line up as well as possible. Next time, I'll be even more careful about lining them up during the steaming process.
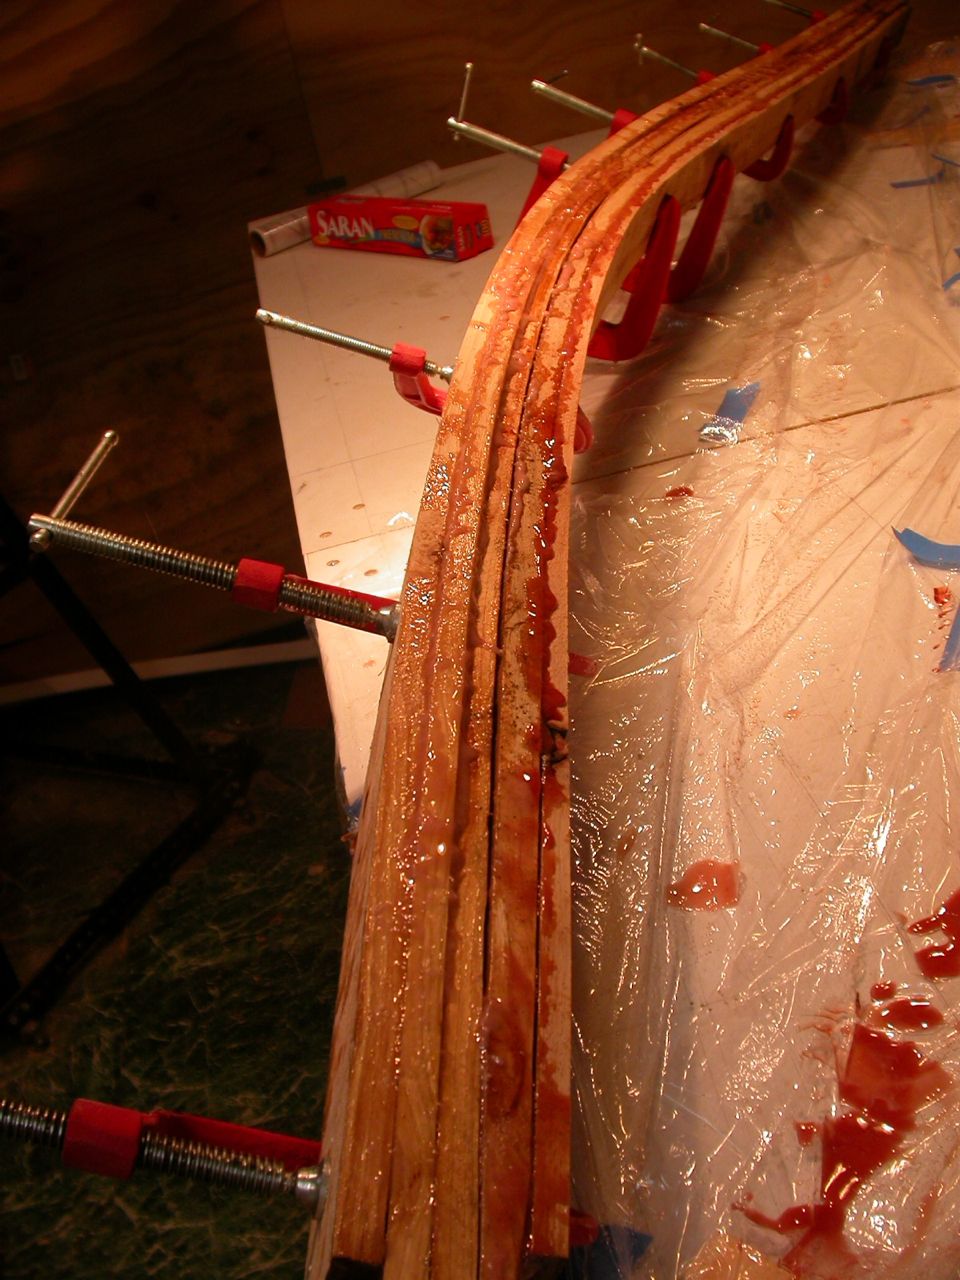 |
| Squeeze-out on bottom of piece |
The pic above shows the large amount of squeeze-out on the bottom of the piece.
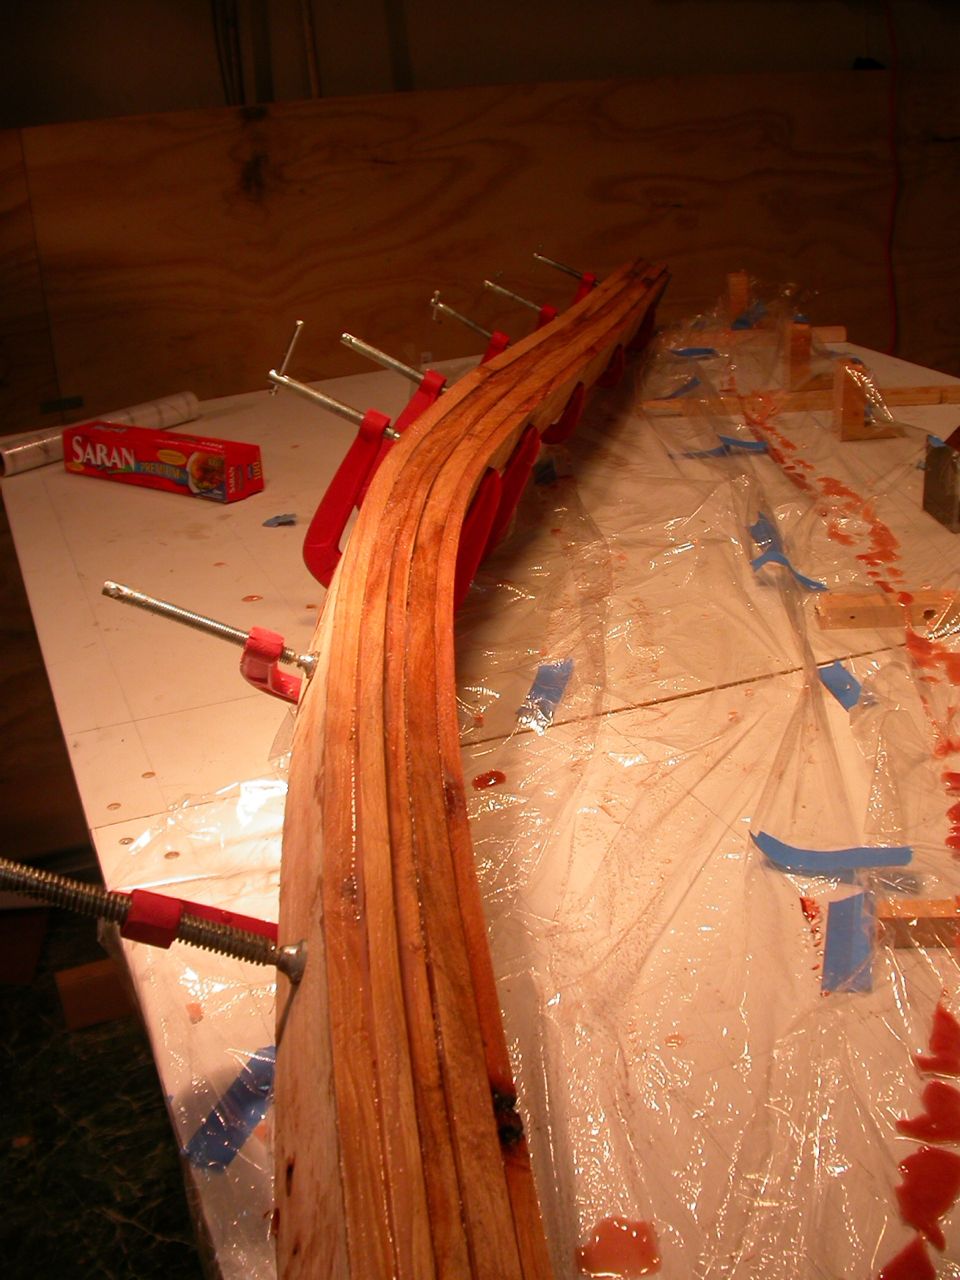 |
| With squeeze-out cleaned up |
The scraping process also gives you the opportunity to fill any visible gaps in the laminations with glue. An added bonus!
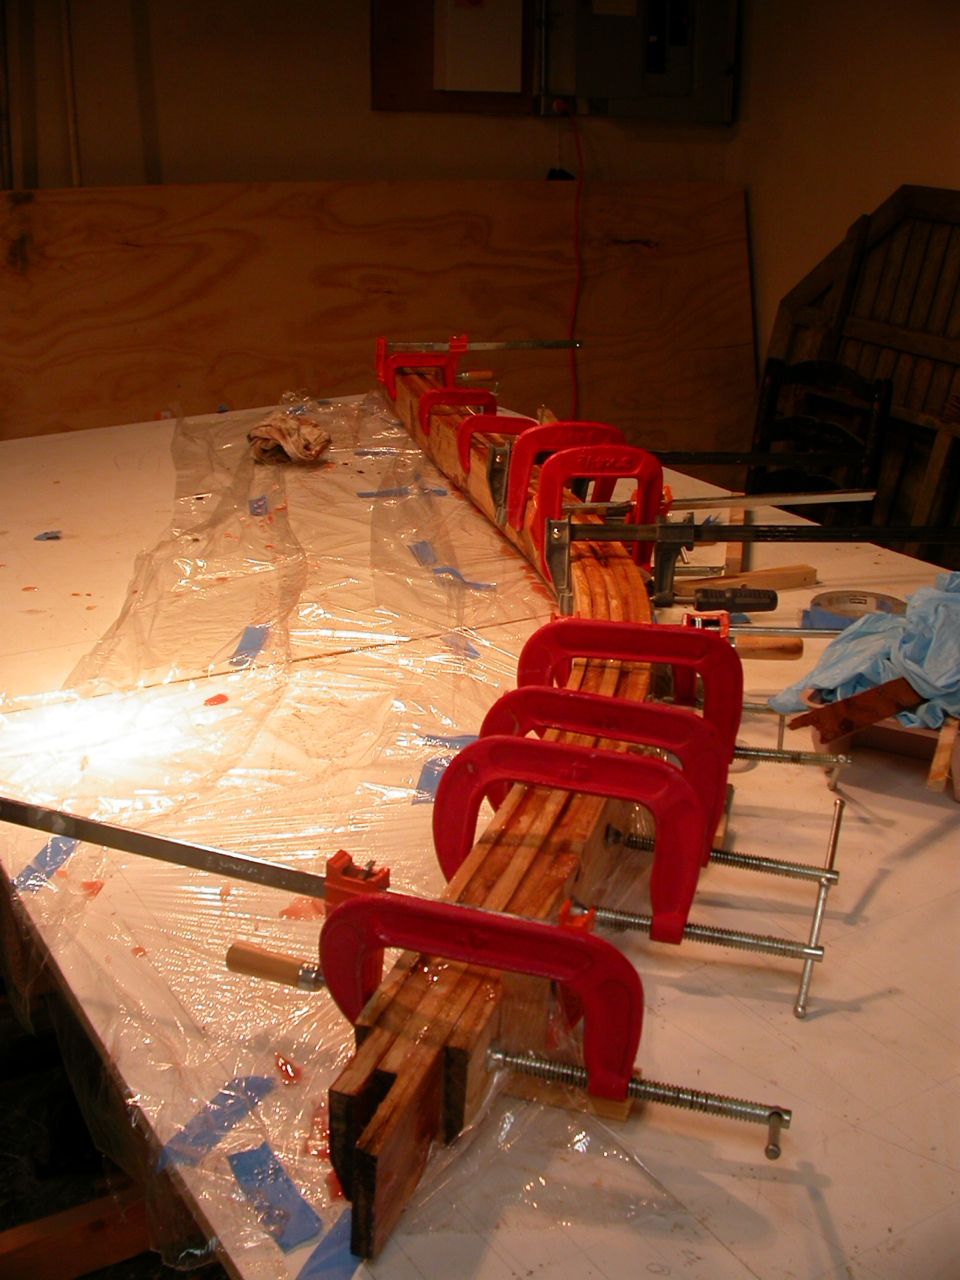 |
| Clamped back onto to forms |
Shaping
Once the second lamination was dry, I was anxious to see how well it lined up with the first. This was the first time I'd ever laminated anything, remember, so I was still doubtful about the process.
So it was with some trepidation that I compared the two pieces. I shouldn't have worried: their curves matched up nicely. Big relief!
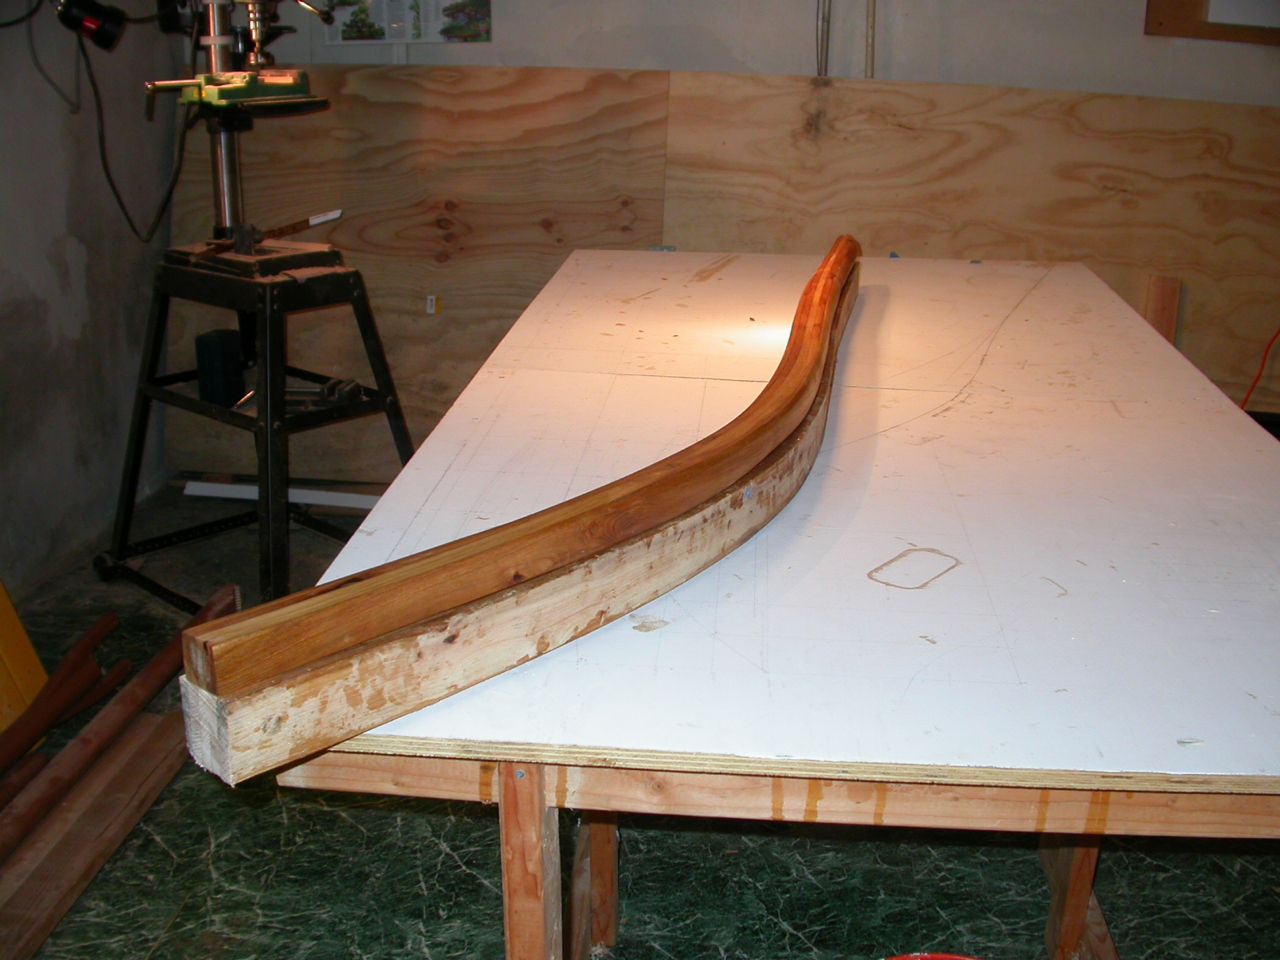 |
| A perfect duplicate |
Now it was time to shape the second spar so it would be a perfect duplicate of the first, with a minimum of effort.
I started by drawing a centerline down the middle of the spar. I just used a ruler to find the middle of the spar, every foot or so, and then connected the dots with a surprisingly flexible steel ruler. It bent around those curves without deforming and made drawing the centerline pretty easy.
 |
| Drawing center line |
Then I used a pair of cheap calipers to take off the width of the first spar and transferred them to the second, using the centerline. For example, if the measurement was 2 1/8", I marked 1 1/16" on either side of the centerline on the second spar.
I marked the widths every foot, and then again connected the dots with my steel ruler.
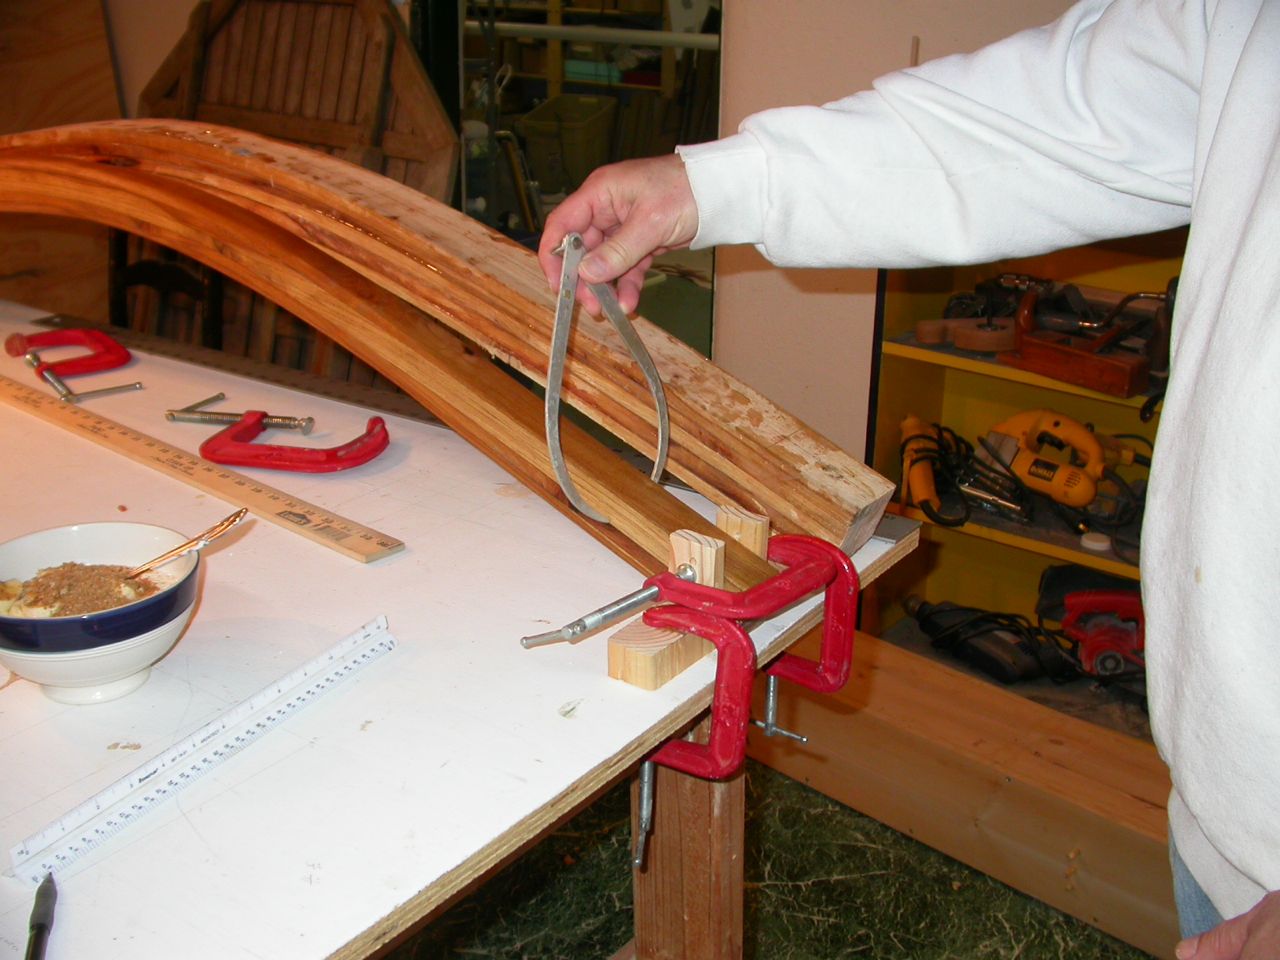 |
| Taking widths with calipers |
As you can see in the picture below, the result is the first spar spiled or scribed (not sure which word is correct) onto the second.
Note that the surface I'm drawing on is the flat side of a single board. The glued edges are to right and left.
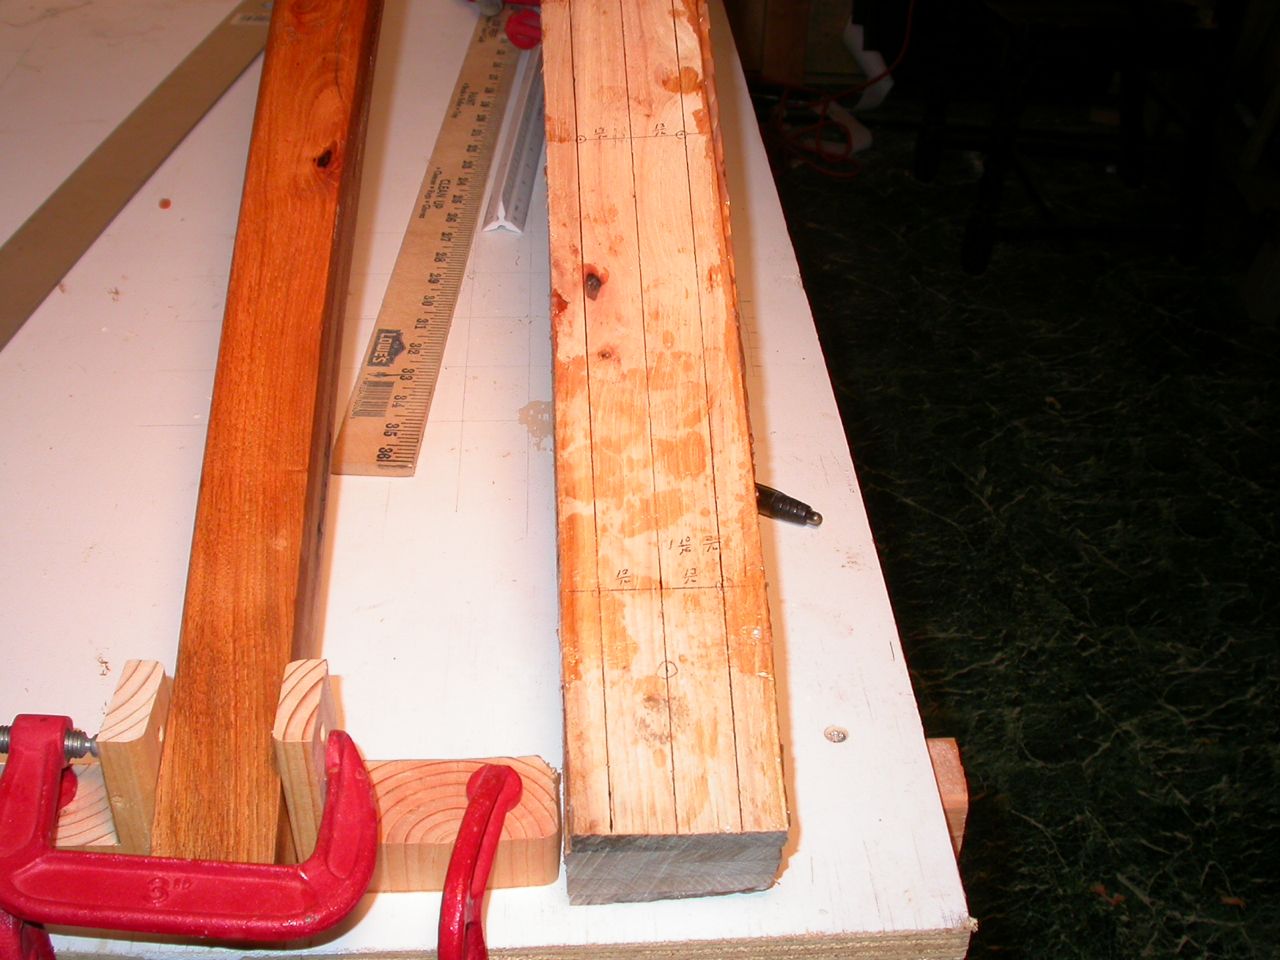 |
| The finished lines |
Then it was time to remove the excess. Now, the last time, I spent an absurd amount of time doing this with a belt sander and plane. We are talking days here.
This time, I planned to expedite the process with my amazingly handy circular saw.
I thought of this option the last time, but frankly, I didn't have the nerve to try it. I thought for sure I'd wreck it. But after trying the alternative, the danger of making a fatal error didn't seem as bad as spending days making sawdust and shavings!
It was a bit tricky cutting around the curve, but a little clamping ingenuity solved the problems. Unfortunately, cutting the curve was one of those all-absorbing tasks that makes me forget to take pictures!
 |
| Shaping with circular saw |
Unfortunately, the piece was too thick to cut completely through with the circular saw, but it was easy to finish the cut with a handsaw.
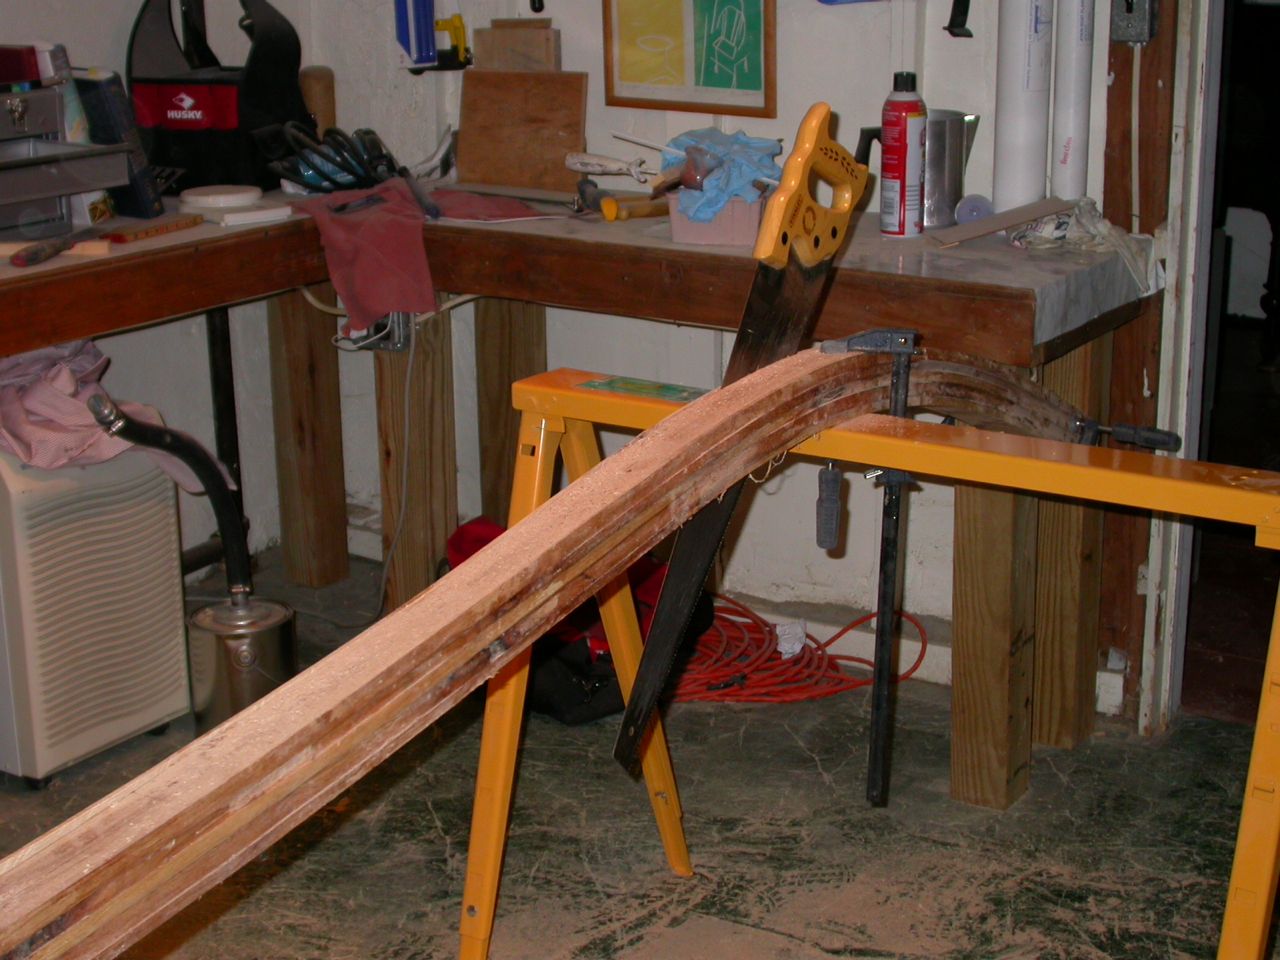 |
| Finishing cut with handsaw |
Here are the two off-cuts, which show why removing the squeeze-out turned out to be not so important. It all got cut off, anyway!
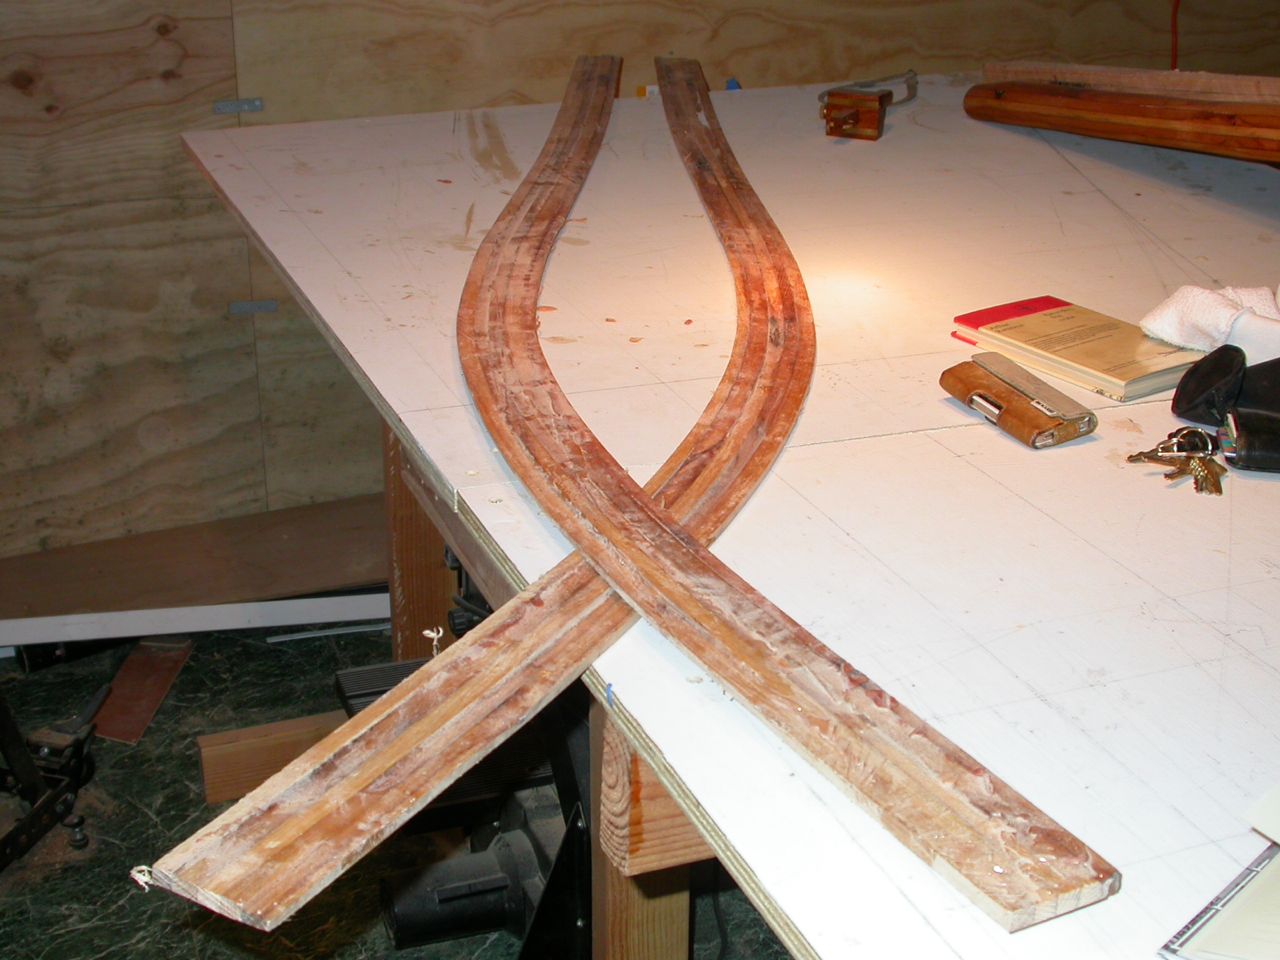 |
| Off-cuts with squeeze out still attached. |
Of course, I didn't cut right to the line, so a bit of planing was needed to make it perfect. But as Larry pointed out last time, its a heck of a lot easier to plane a flat surface than around one, and there was much (much!) less to plane, so the job was done quickly and easily.
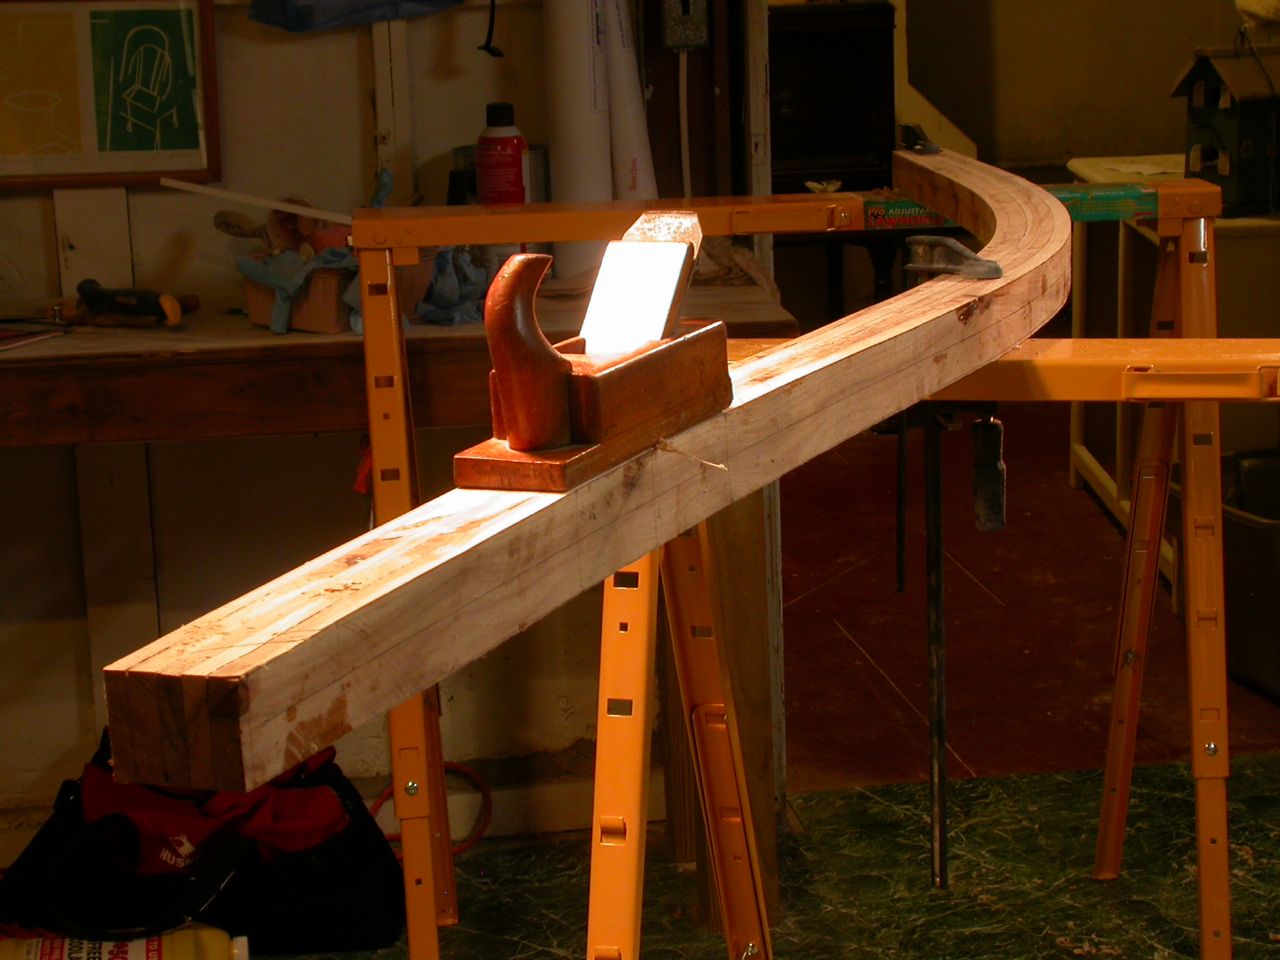 |
| Planing down to the line. |
Then it was time to shape the other side, which was a little trickier, because the lines were curves, rather than straight lines.
The process is was the same: I first marked a centerline, and then transferred the widths from the first spar around the centerline on the second.
The difference was, I couldn't connect the dots with a steel ruler this time. I had to use a flexible wooden batten. I did this the same way you would use a batten in lofting: I tapped thin nails into my marks, and then bent a batten around them. Slightly more time consuming than drawing straight lines, but more fun!
 |
| Using batten to draw curves |
Believe it or not, I cut those curves using my circular saw. Unfortunately, it was again one of those all-absorbing tasks, and I failed to take pictures, even of the finished cut, but suffice to say that if you take it slowly and carefully enough, a circular saw can cut around that relatively gentle curve.
Rounding
I say 'rounding', but actually the spar goes from round, where it goes through the transom, to octagonal, for most of it's length, to square, at the ends.
Since most of the surface, even the octagonal section, was flat, I was able to use a normal plane for most of the 'rounding'. A plane is much faster, cleaner, and easier than a spokeshave, so I minimized the amount of spokeshaving I needed to do.
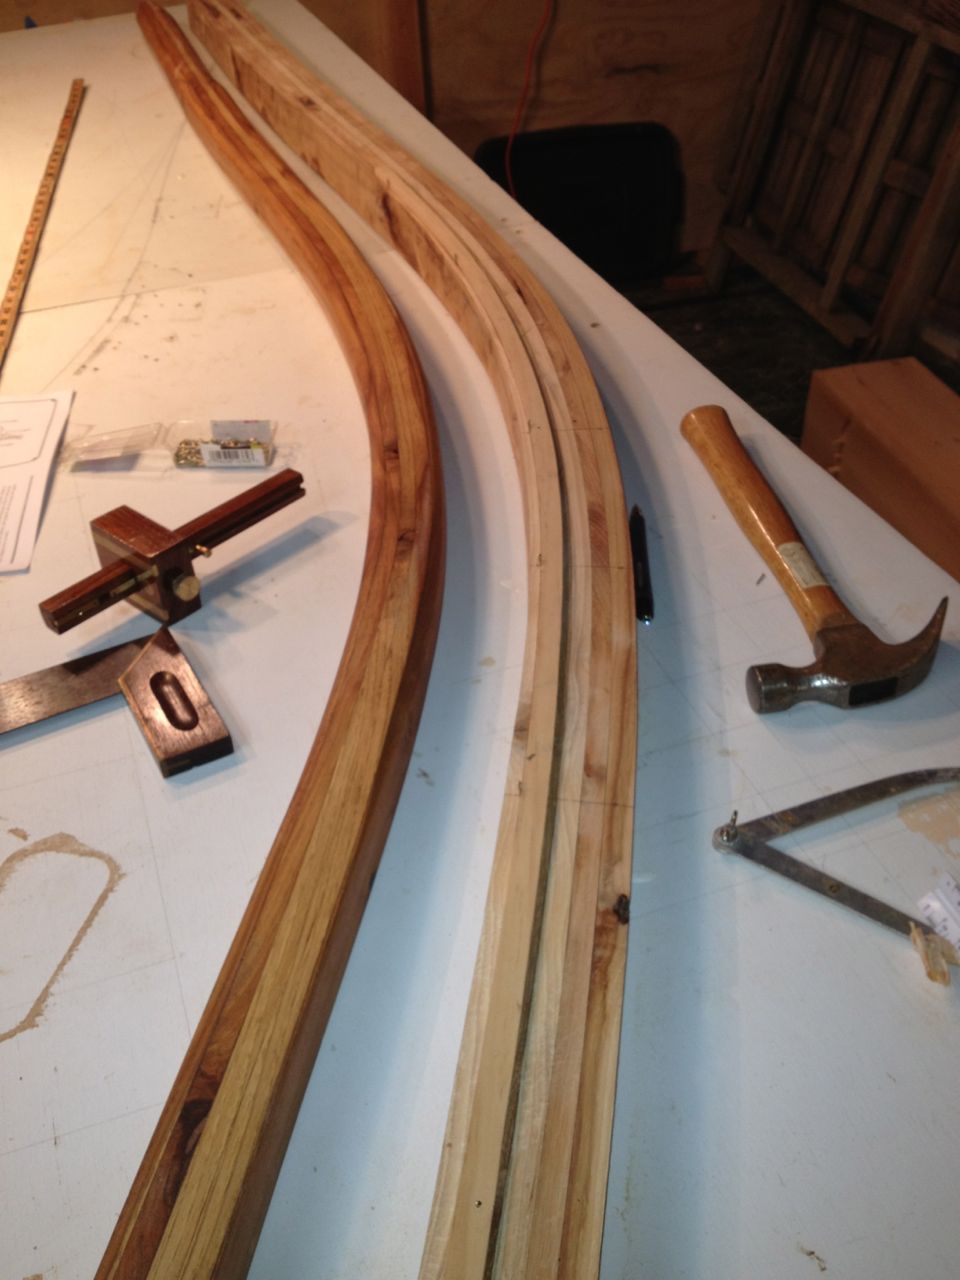
Again, this must have been very fussy work, because I didn't take any pictures, but when the second spar was roughly shaped (i.e., before sanding), I tested it's fit on the Blue Moon.
In the photo below, the first boomkin is closest, the second is on the far side. They are identical, so are interchangeable.
 |
| Test fit... success! |
Note that it is spring, and I've got my engine back on. Yay! The boomkins curve right around the engine, making it easy to raise or lower the engine, or change the oil. This is the whole point of all this work. So its great to have the engine there to test with.
Smoothing
Along the way, I had discovered several gaps in the glue lines that I wanted to fill before sanding the second spar.
I'd been smart enough to gather up some of the sawdust from the first spar, and I thought it would be fun to use this as thickener in the epoxy, rather than the usual West System filler, which is a bit coarse.
 |
| Hickory sawdust, from sanding |
I'm not sure this was a great idea, but only time will tell. The gaps were small and shallow, so the filler is just cosmetic.
A close inspection found some gaps even on the first spar, so I filled them at the same time.
 |
| Patching glue gaps |
Then it was time to sand. Last time, I did this with a non-electric hand sander. I'm not sure why, but I had the idea it would come out better if I did. But by this time, the fun had gone out of hand sanding, and I used Helena's Dewalt orbital sander with a dust bag. Much faster, much cleaner, and a much smoother surface.
Hand sanding is good for the arm muscles, but... what was I thinking?!?!
Sanding is too boring for pics, but here is the result: two beautifully smooth and identical spars, all ready for varnishing.
 |
| Two spars ready for varnishing |
A close up of the laminations.
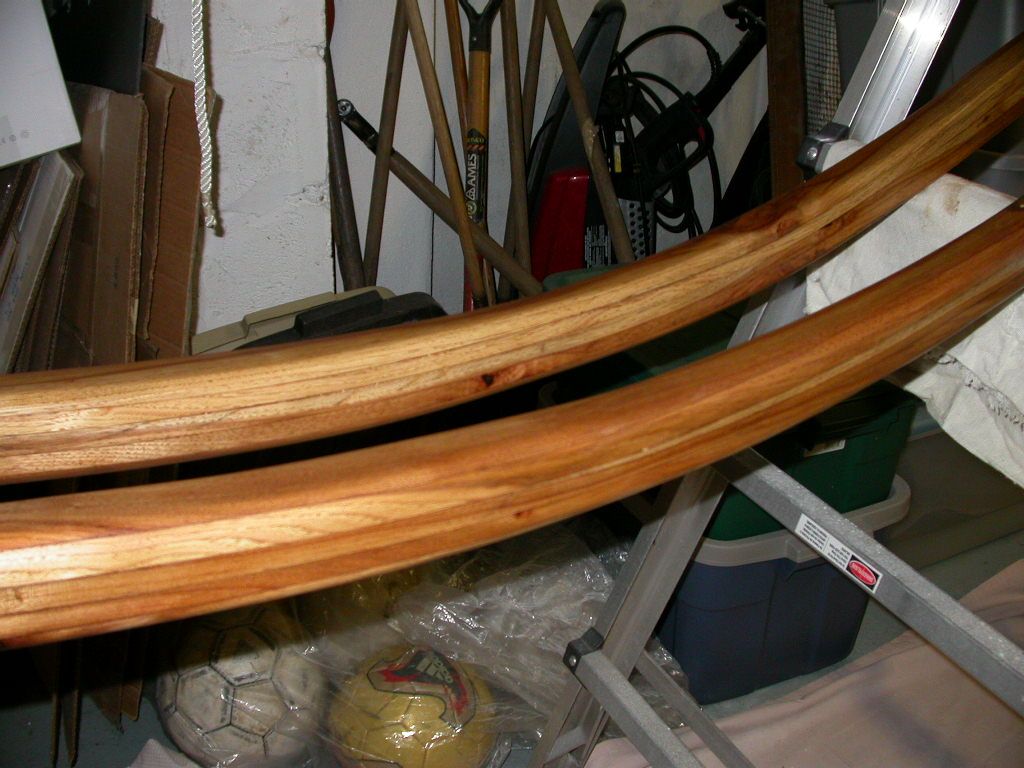 |
| Laminations |
Hard to believe that rather poor quality, rough-cut hickory has turned out this nice, but that's what an excessive amount of work can do for you.
It's going to need a good, protective layer of varnish to protect them through the summer, so that's my next step.
Meanwhile, the Blue Moon is headed out to the mooring this weekend, and I've been doing all sorts of other jobs, including painting her topsail yard:
 |
| Topsail yard with 2 coats of Kirby white. |
Spring is here!
>>> Next Episode: Hardened Hole
"Helena's Dewalt orbital sander" ???
ReplyDeleteThere are 2 rules about sanding.
#1. Don't (if at all avoidable)
#2. The person who owns the most effective tool gets to use it. :)
Very nice results, showing that even we computer nerds can learn.
I know you are supposed to minimize sanding, and I did pretty well with the second one because I was able to plane it smooth enough to start with 120 grit and go up to 220 for varnishing.
ReplyDeleteIf only computer nerds could figure out how to make money woodworking! Actually, I can't figure out how anyone can make money woodworking... If I charged my normal rates for this boomkin, they would be worth about $4,000.
For that matter, how does anyone every build a big boat? The amount of time needed would be ENORMOUS, unless you really, really knew what you were doing and could speed up the process, I guess.
I don't think I'll ever get that good.
Hi John
ReplyDeleteThis might be a stupid question, but if the two spars are identical is it feasible to make one (twice as wide) and then slice down the middle prior to finishing as individual spars?
Love the blog
Kon
Another great post!
ReplyDeleteThanks John
I don't see why not, of you had wide enough boards. Mine were just wide enough for one spar.
ReplyDeleteVery informative and great details!! Wonderful blog,Great article and blog. Thanks for sharing your design talents with the rest of us.
ReplyDeleteThanks for sharing your experiences. I'm doing some research on woodworking. I want to improve my woodworking skill to do some interesting things like you. So your post is quite helpful.
ReplyDeleteCreative! It's amazing! I want to upgrade my woodworking. Thank your post so much! It is really useful for me.
ReplyDeleteThank you so much for your excellent blogs. It's maybe helpful and educating for woodworkers. Thanks again.
ReplyDelete