Whew. Just another day in the life of our intrepid adventurers. After patching the hole in Swallow's planking, and sailing her to the boatbuilders to be repaired (imagine a small, lakeside town in rural England with several boatbuilders to choose from!), Captains Flint and John commence building a new mast for Swallow.
.png) |
| Captain Flint (in his dreams!) roughing out Swallow's mast. |
Using the broken mast as a guide, they take measurements with the calipers, and then use the shaping plane to replicate the tapered shape of the old mast.
What didn't strike me until this week was how long this shaping took. John & Captain Flint worked all day (meaning sun up to sundown, which is a long time in an English summer) for several days at this work. And that was before they used up a whole roll of sand paper getting the mast as smooth as the original.
Unfortunately, 'shaping plane' was a generic term used to describe many different types of planes, so it's difficult to say what sort of plane they used, but I suspect it had a hollow sole, and a concave blade, so it could take off a wider shave on a round surface than a straight blade can.
I didn't have such a plane, alas, so had to do a very similar job with my spokeshave. A job, as I should have guessed from reading Swallowdale, that took a very long time!
The first job was to 16 side my 8-sided spar. Here's a video with the general approach.
After the spar was 16-sided, it was a simple job to make it round, with a few more (hundred) strokes from the spokeshave. By this time, I was an expert at sharpening this tool!
I then had a round spar that was about 1/4" too thick. I'd purposefully left it oversized so that I would be able to trim it down to the right size. As Captain Flint told John: "Remember one thing. Never take off too much. If you take off too little, you can always take off a bit more, but if you take off too much you can never put it back."
What he didn't say was how long it took to take off "a bit more". A quarter inch doesn't sound like much, but believe me, it is, when you can only remove a thin shaving that is only 1/8" wide.
My first priority was to shape the in-board end of the spar to the right diameter, so it could fit through the hole in the Blue Moon's transom. Before I spent days shaving the rest of the spar, I wanted to do a test fitting, to make sure the boomkin would actually curve around the outboard engine, the way I expected it to. If it didn't, then the whole project was a waste of time.
The hole in the transom was 2 1/4" wide, so I made a template from a piece of plywood, by drilling a 2 1/4" hole in it. Inch by inch, I shaped the end of the spar so it would fit the template.
I coated the inside of the template hole with graphite to make it easier to see the high spots on the spar.
To do this, I just ran a pencil around the inside of the template, then pushed the template onto the spar.
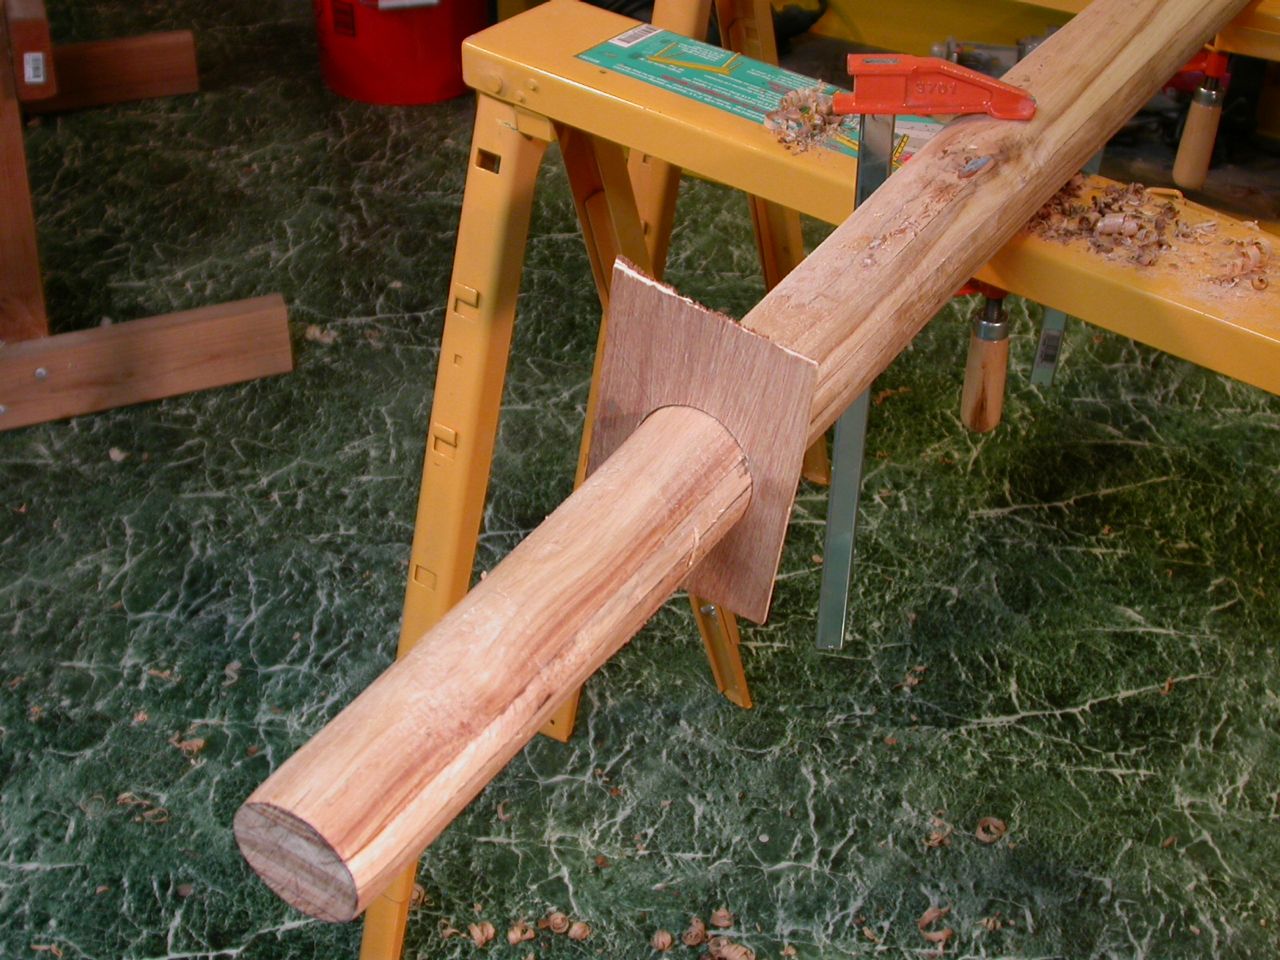 |
| Rounding spar to correct size with a template, coated with graphite from a pencil |
The result? A round spar of the correct diameter.
It's a slow, but sure process.
 |
| Graphite marks show the high spots that need to be removed. |
The photo below shows how the new spar now curves around the space needed by the outboard. Exactly as I'd hoped for.
Actually, the angle of the photo doesn't show how much extra space there is, very well, but trust me, it's a lot. I should have brought the old boomkin down and taken a contrasting photo, but I didn't think of this. I'll try to take a couple more photos of the old and new curves, the next time I go down to the dock for a fitting. But the old boomkin curved right over the top of the outboard.
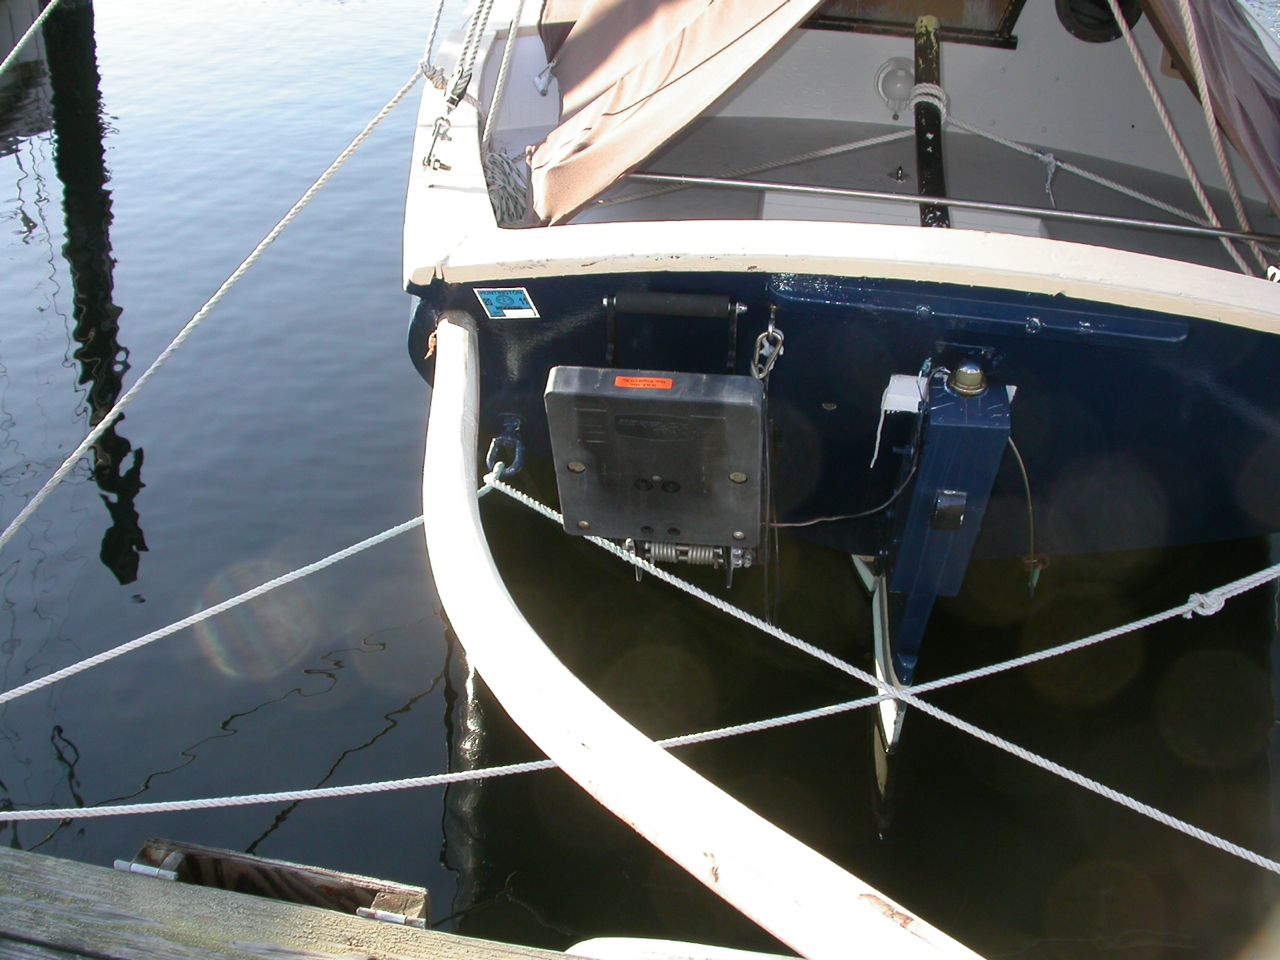 |
| Test fitting of new spar |
>>> Next Episode: Back to Square
No comments:
Post a Comment
I'd love to hear from you. Please comment!