The first reason is cost: if I just needed one plane, I'd probably just buy a $300 plane from one of the better tool manufacturers and be done with it. But I need several planes, and a few -- such as a concave spar plane -- that are simply not available from even the bigger tool makers. For the price of one plane, I can make a half-dozen of (hopefully) equal performance, if not convenience.
The second reason is something I read in the bible of boatbuilding, Howard Chapelle's Boatbuilding:
"Planes used by ship carpenters and boatbuilders are commonly those used by house carpenters and hobbyists. However, the older shipwrights trained to fine work will only use planes having a wooden sole, or planes whose whole body is wood. There is a good reason why the wooden plane, or wooden sole plane is preferred; these will cut smoothly in all wood, either seasoned or dry, whereas an iron sole will cause a plane to stick, or 'chatter' in green or wet hardwood. Iron plane soles will also mark work more readily than wooden-soled planes. Most of the wooden-bodied planes are made by the user, of beech, lignum vitae, live oak, or tropical hardwoods. The boat and ship carpenters seem to prefer narrow planes rather than wide ones. The planes commonly used are as follows: smoothing planes with bodies 8.5 to 10 inches long, bits (blades) 1.5 to 1.75 inches wide; jack planes 15-18 inches long, bits 1.75 inches wide; jointers 22 to 26 inches long, bits 1.75 to 2 inches wide. Spar planes are usually made with a hollow bit and sole, on various radii; they are usually about 10 inches long." (Page 592)A set of planes such as Chapelle describes would easily set you back a couple thousand dollars, if you could find them. I'm hoping to make the set for approximately $300, plus some scrap wood, plus some time.
Okay, a lot of time, but that's quibbling.
The third reason should be obvious to anyone who reads this blog: it sounds like a fun project!
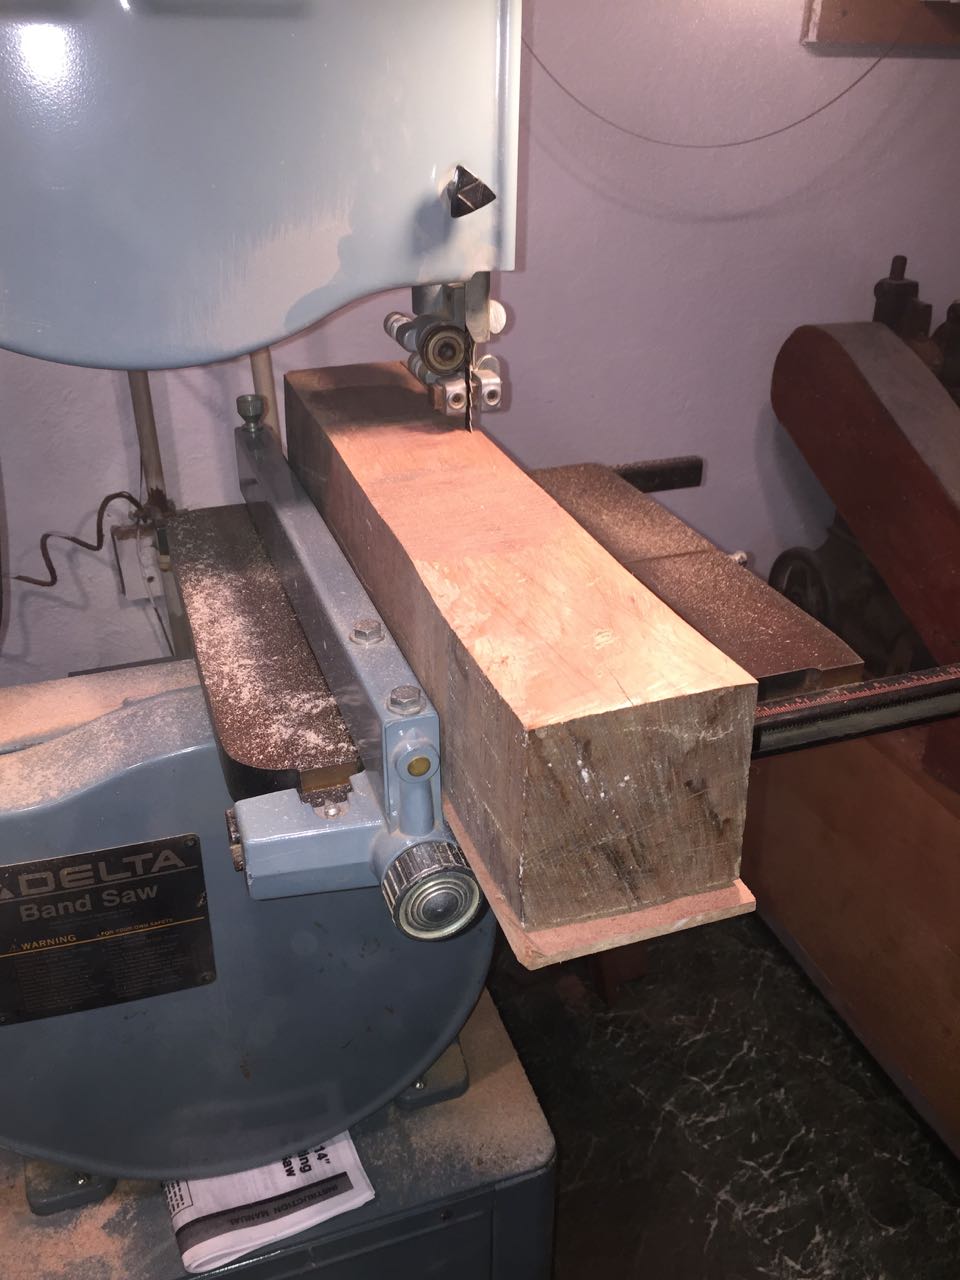
I decided to start with a jack plane, because it's a good all-purpose plane that will be useful for building my new bowsprit. I had a suitable hunk of live oak that I picked up at the Mystic wooden boat show a couple years back. It is an off-cut from some part of the Charles W. Morgan, which was rebuilt over many years at the museum:
 |
| The rest of my plane is on this ship! Somewhere! |
The piece was roughly squared, but only roughly. So the first thing to do was to square it up. My first idea was to plane it square with my old jointer plane, but the wood was so hard, and my old plane so crappy, that I quickly gave up that idea and turned to a method of jointing on a bandsaw that I'd recently read about.
The basic idea is to get a piece of scrap plywood that is bigger than the piece you are trying to square up. The plywood must have one straight edge. You then tack the plywood to one side of the piece, with the straight edge sticking out a bit so it can register against the bandsaw fence, without the piece touching the fence.
In the photo below, you can see the first cut I made on the piece. The plywood is tacked to the piece, and the plywood's straight edge is registering on the fence. Then it's just a matter of adjusting the fence for width, and making the cut. Assuming your bandsaw is set up properly, the cut face will be straight and flat.
Now, many people will say that fences don't work with bandsaws because bandsaw blades famously 'drift' when they cut. I have two answers to this objection: 1) if your bandsaw is adjusted properly, the drift will be tiny and 2) if not tiny, it is possible to adjust the angle of the fence to the drift angle, thus compensating for the drift. My 14" Delta (Queen of the Shop), has a measured drift angle of under 1 degree. For such a short cut, I just ignore the drift angle.
 |
| Live oak blank lightly nailed to a sled |
From there, dimensioning the rest of the blank is simple.
 |
| With two sides squared to each other |
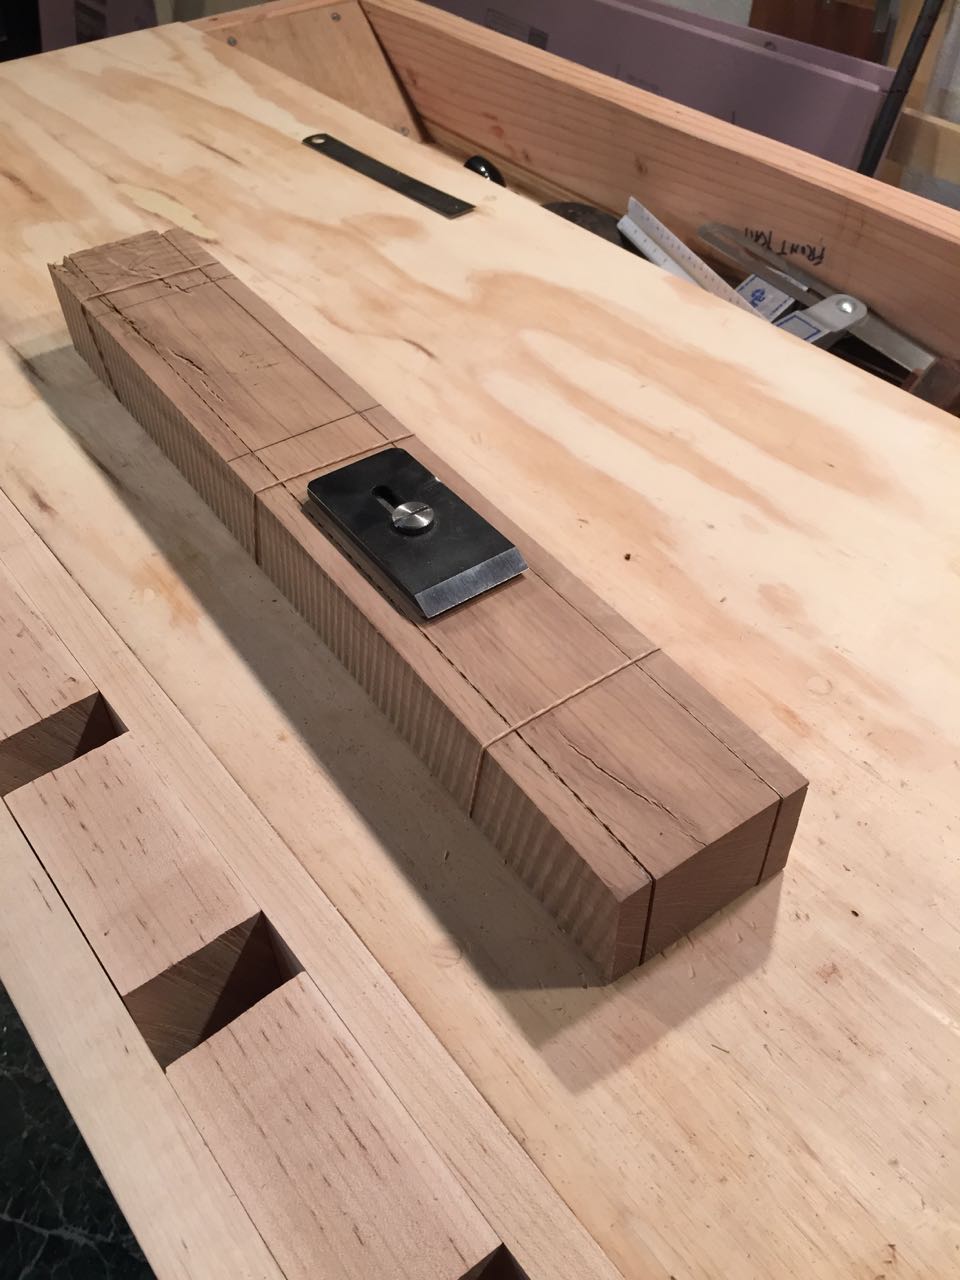
Here is the plane body roughly dimensioned, with the two 'cheek' pieces also cut on the bandsaw. Note that the main body of the plane is slightly larger than the 1 3/4 inch plane blade. After cutting the cheeks, I rubber-banded the pieces together overnight to allow the wood to adjust, hopefully without checking too badly.
I don't know if this works, but I read it somewhere, and it seems logical... more or less!
 |
| With cheeks sawn |
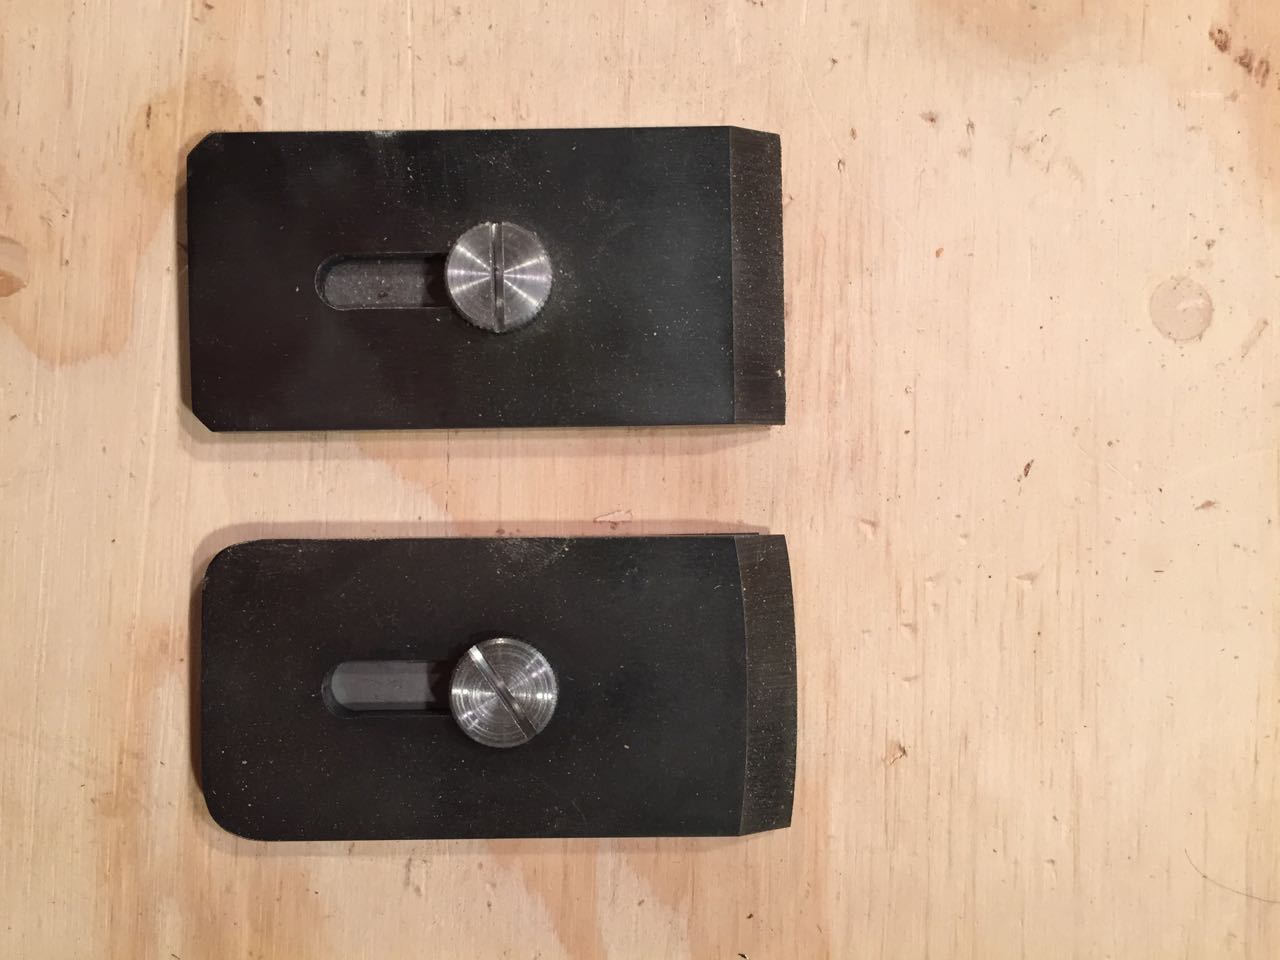 |
| Straight and curved blades |
I just wish I had a better miter saw, but I'll get there eventually!
Another tip: note how I used wedges to hold the piece in the box. No more gripping the piece with tired fingers.
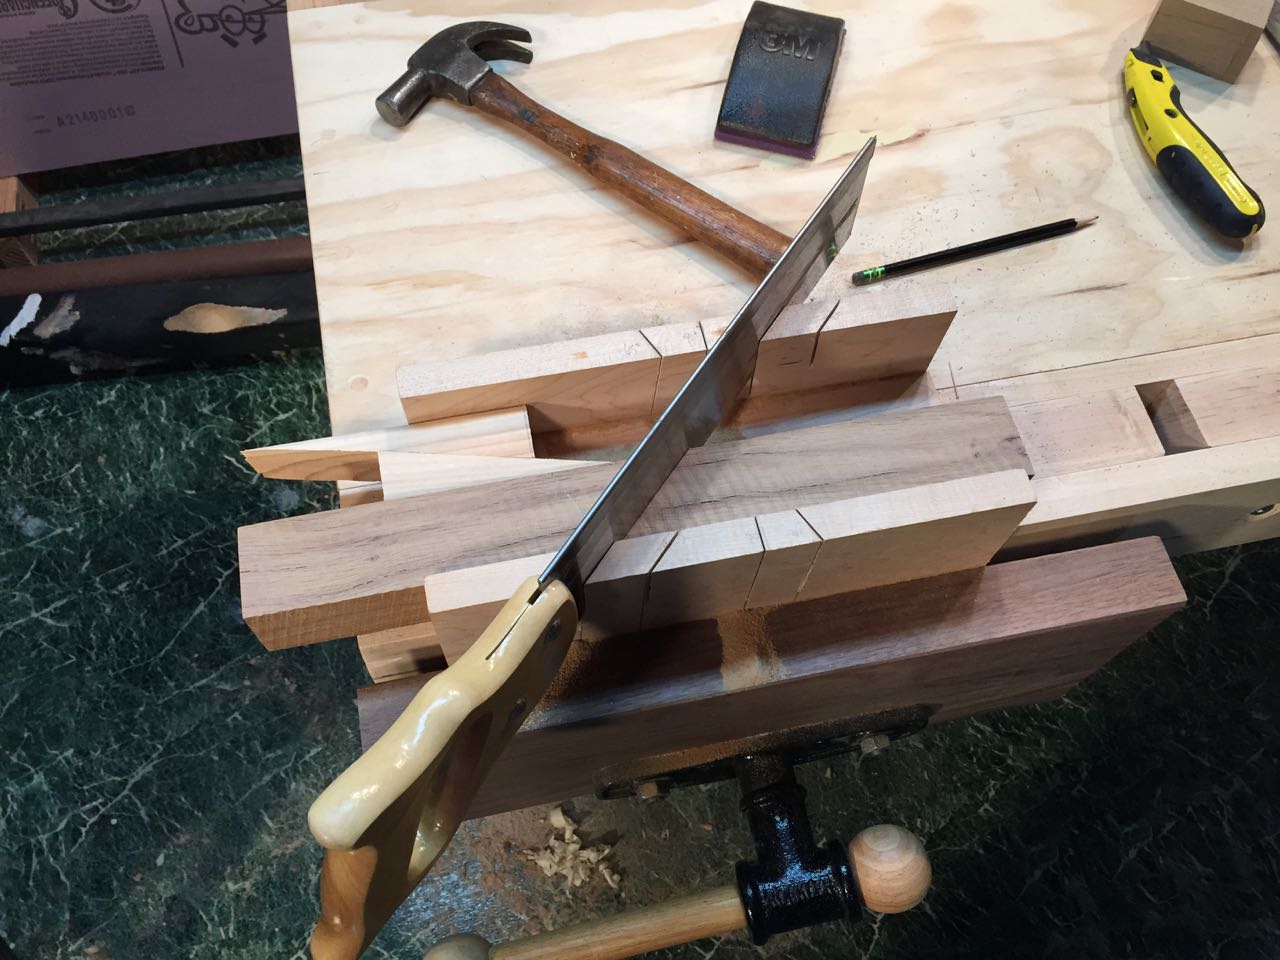 |
| Custom made miter box. |
 |
| The main pieces placed together for show |
Indeed it was. Dead flat, in fact, and very smooth. I lightly stuck some sandpaper on the stone, using a spray adhesive, and proceeded to sand the ramp flat, using several grades of sand paper. Worked a treat.
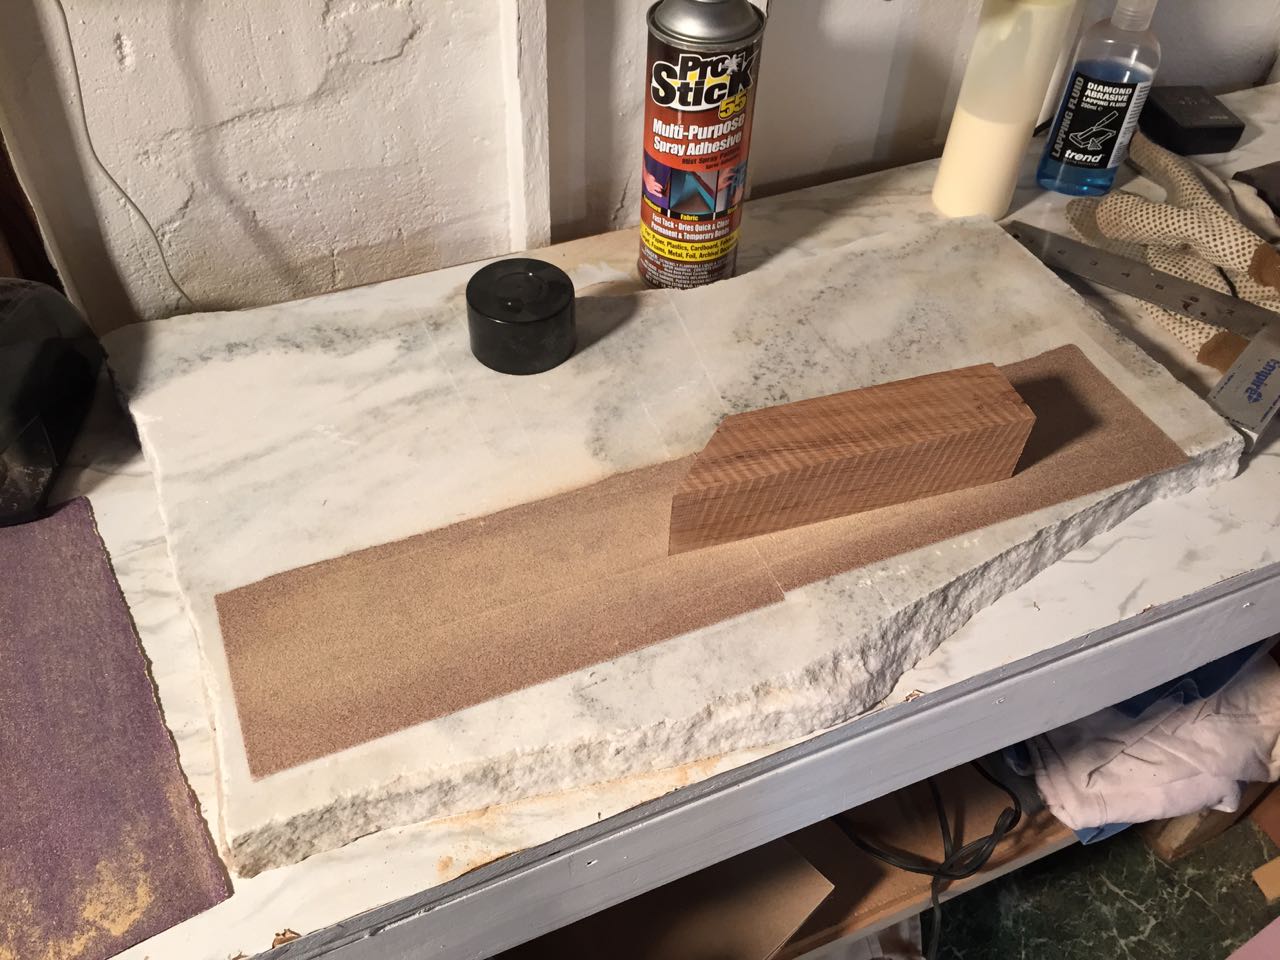 |
| Sanding the blade ramp smooth and flat. |
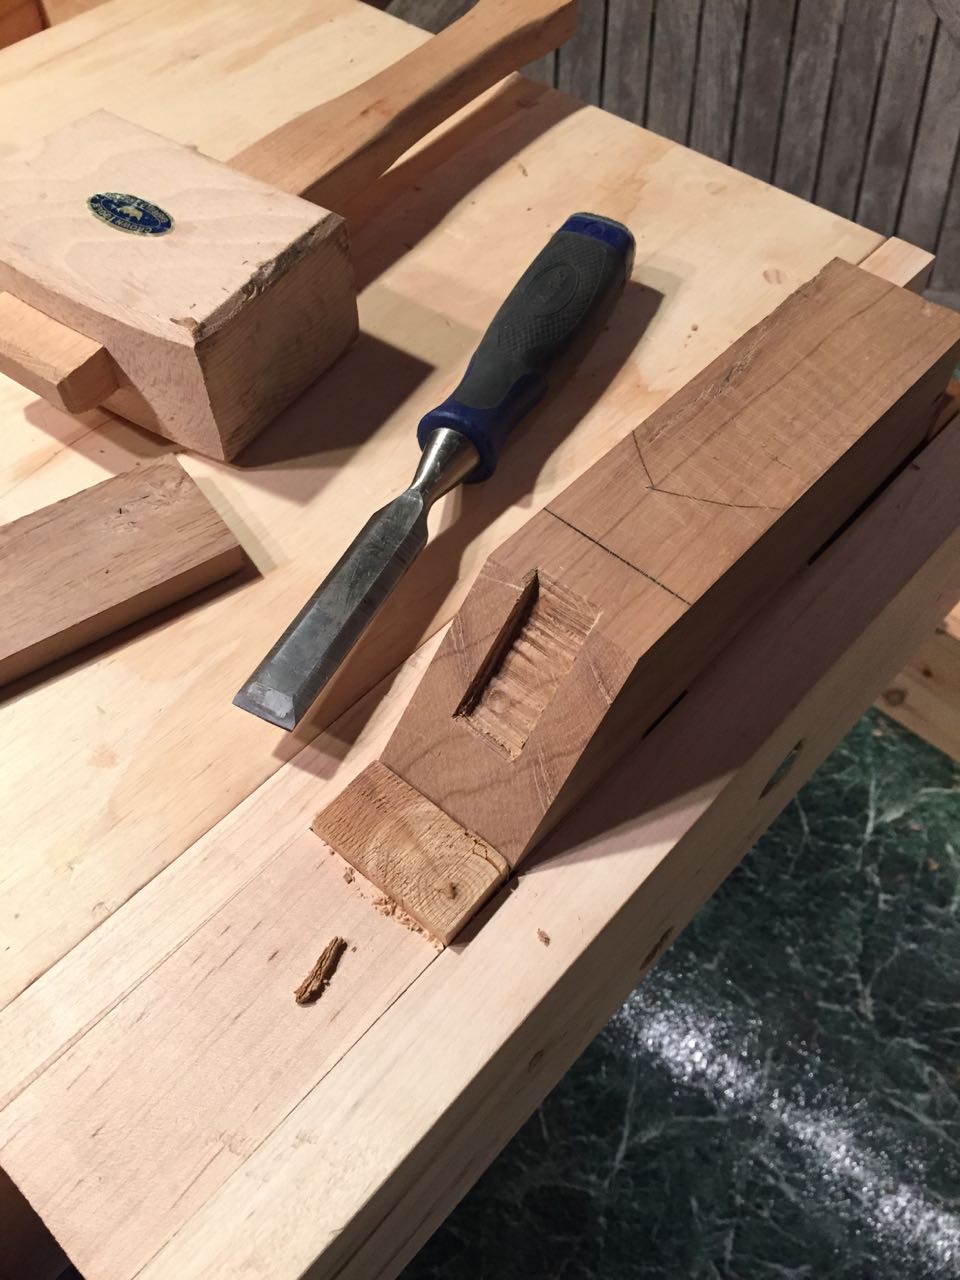 |
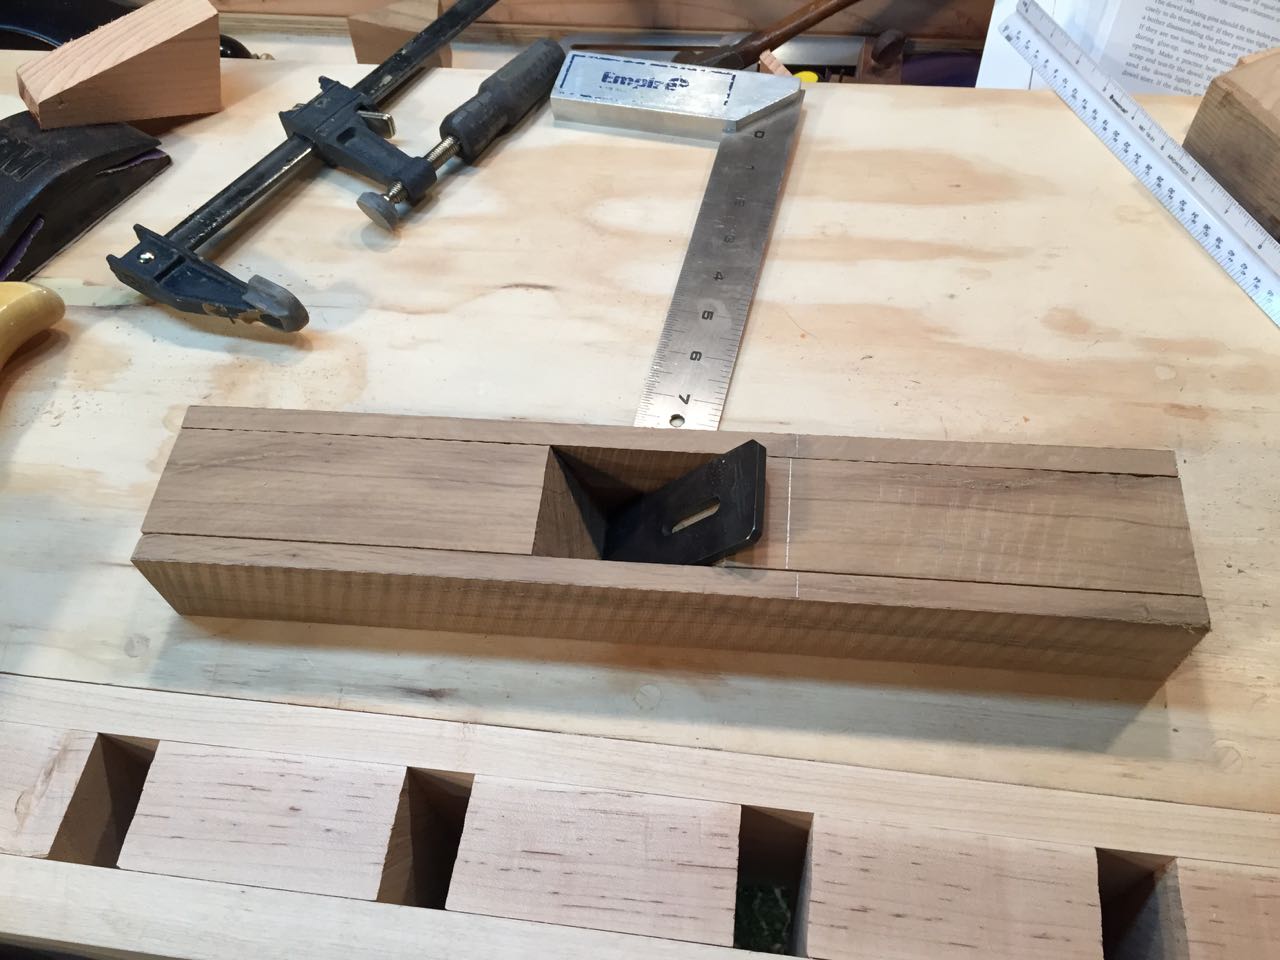
| Cutting a slot for the cap iron bolt head |
After that, it was time to glue the pieces together. This was so scary and brain-bandwidth consuming that I again forgot to take pictures. Besides, my hands were covered with Tite-bond III glue. What a mess! But not as bad as epoxy.
Anyway, once the pieces were glued together, I again did some sanding on the marble to remove all traces of glue.
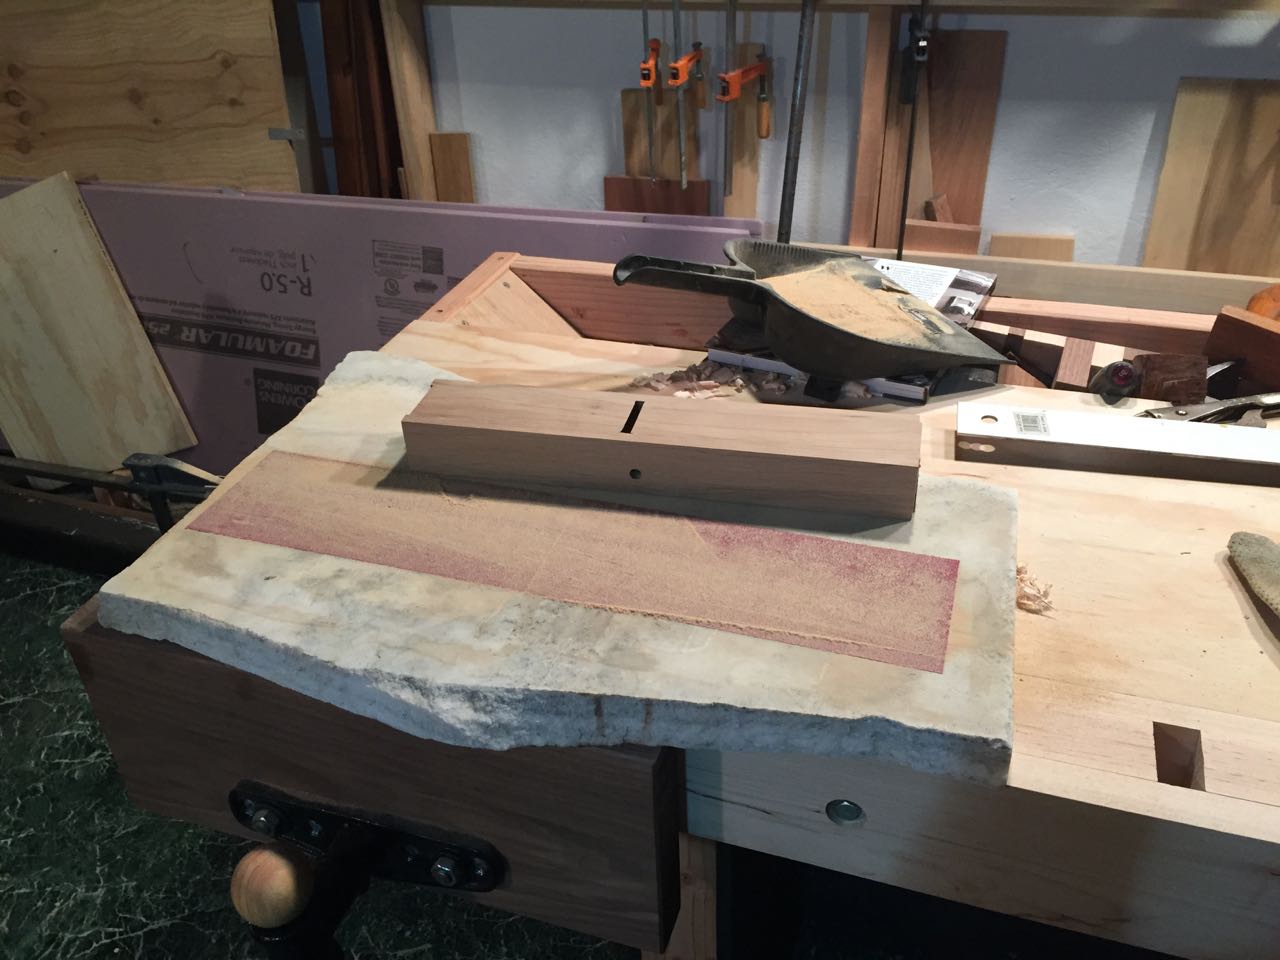 |
| After glue-up, sanding to remove traces of smeared dried glue. |
Here is a peak inside the plane. You can see the throat is quite narrow. Much narrower than the throats of my old, poorly performing wooden planes. The small throat should vastly improve the performance of this plane.
You can see that I also drilled a hole for a bronze dowel that will be used with a wedge to hold the blade in place. I bought 3 feet of this bronze rod awhile back for some project which I've forgotten. Very handy stuff to have around.
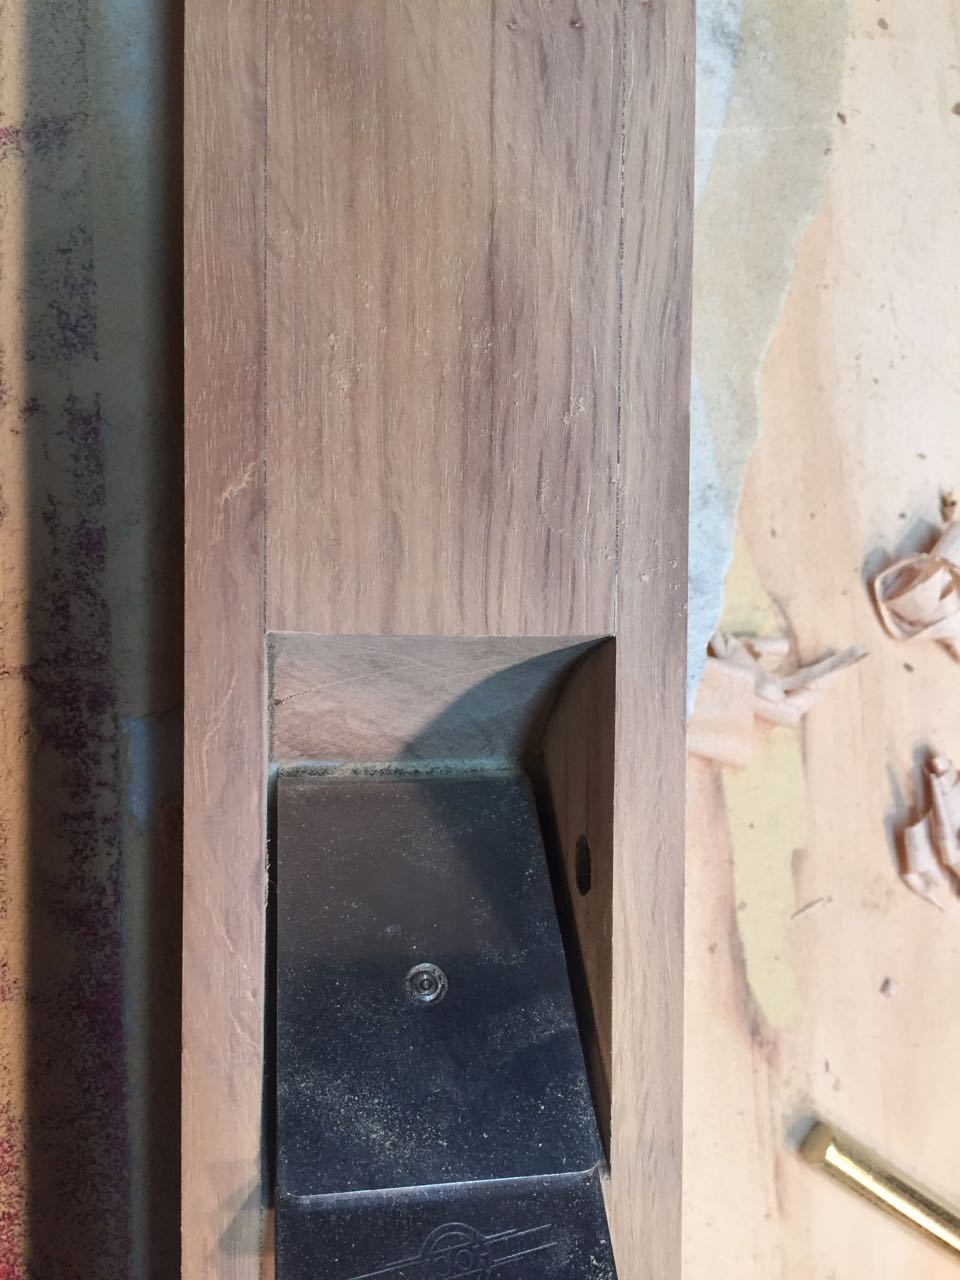
And here is the plane with the bronze rod and a temporary wedge installed to hold the blade in place. I wanted to give the plane a test-drive before putting too much more work into it. Would it work? Was it worth putting a few more hours into it?
After adjusting the blade for a nice thin shaving, using the usual methods of adjusting wooden planes, I was very (very!) happy to hear the smooth, smooth sound of a fine plane making a lovely shaving.
It was a sound I'd only heard on Roy Underhill and Rob Cosman videos -- never before in my own shop, so it was almost a shock to hear it coming from the half-finished, very simple plane in my own two hands. Here are the first couple shavings to emerge from the plane, even before I made the final adjustments.
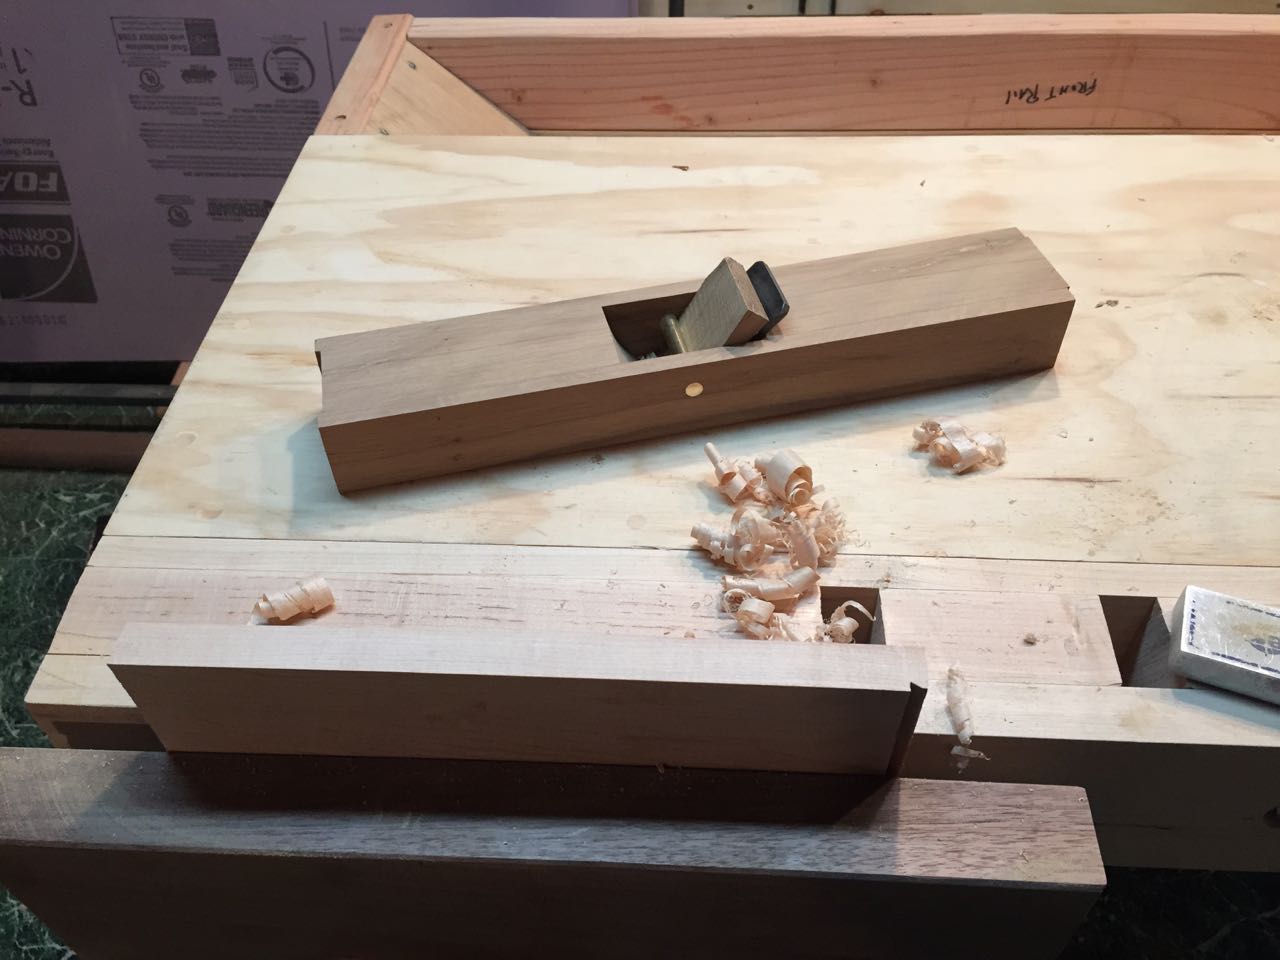
Oh, and I hadn't even sharpened the blade! I used it right out of the box, with just the factory-ground bevel. Even with an unsharpened blade and no handle, the plane worked better than any plane I'd ever used.
I was on the right track.
Next time, the more difficult job of making a really good handle for the plane.
Very Cool!
ReplyDeleteWell done , will be a fine tool when finished .
ReplyDeleteNot to spoil all your fun, but you can find very nice wooden concave (spar) planes as well as flat planes on Ebay for less than $50, often much less. They take a little tuning up, but once done you have a high quality plane made by the old master craftsmen.
ReplyDeleteI believe you, but that path has not worked for me. I have two old high quality German woodies, equipped with the original German blades, but I've never been able to get the blades sharp enough. I'm sure the problem is with me, but there it is. Also, the traditional style wedges continually jam on me. Very frustrating. I tried sharpening the new blades last night and within minutes had them sharper than I'd ever been able to get the old blades. Also, the simpler wedge never jammed while I planed a piece of mahogany for the handle. Bottom line: I am sold on these Krenov-style blades and wedges.
DeleteFantastic! Making planes is definitely on my bucket list, after finishing all the other projects that are lingering in the garage. Until then, I'll just live vicariously through you, John. Well done.
ReplyDelete