On the one hand, I love the results. For example, the laminated boomkin I am about to create. On the other hand, I'm acutely aware of the toxic nature of epoxy, and the very real threat of an allergic reaction. I had an allergic reaction to penicillin once, and don't care to repeat the experience.
So I'm very careful to wear long pants and long sleeve shirt, with gloves (I like the more expensive nitrile gloves), and mask; and to work in a well ventilated area. And I urge my readers to do the same, if they decide to try this at home.
With that sense of caution, I strapped on my chemical warfare armor, and got to work on the next stage of my boomkin build.
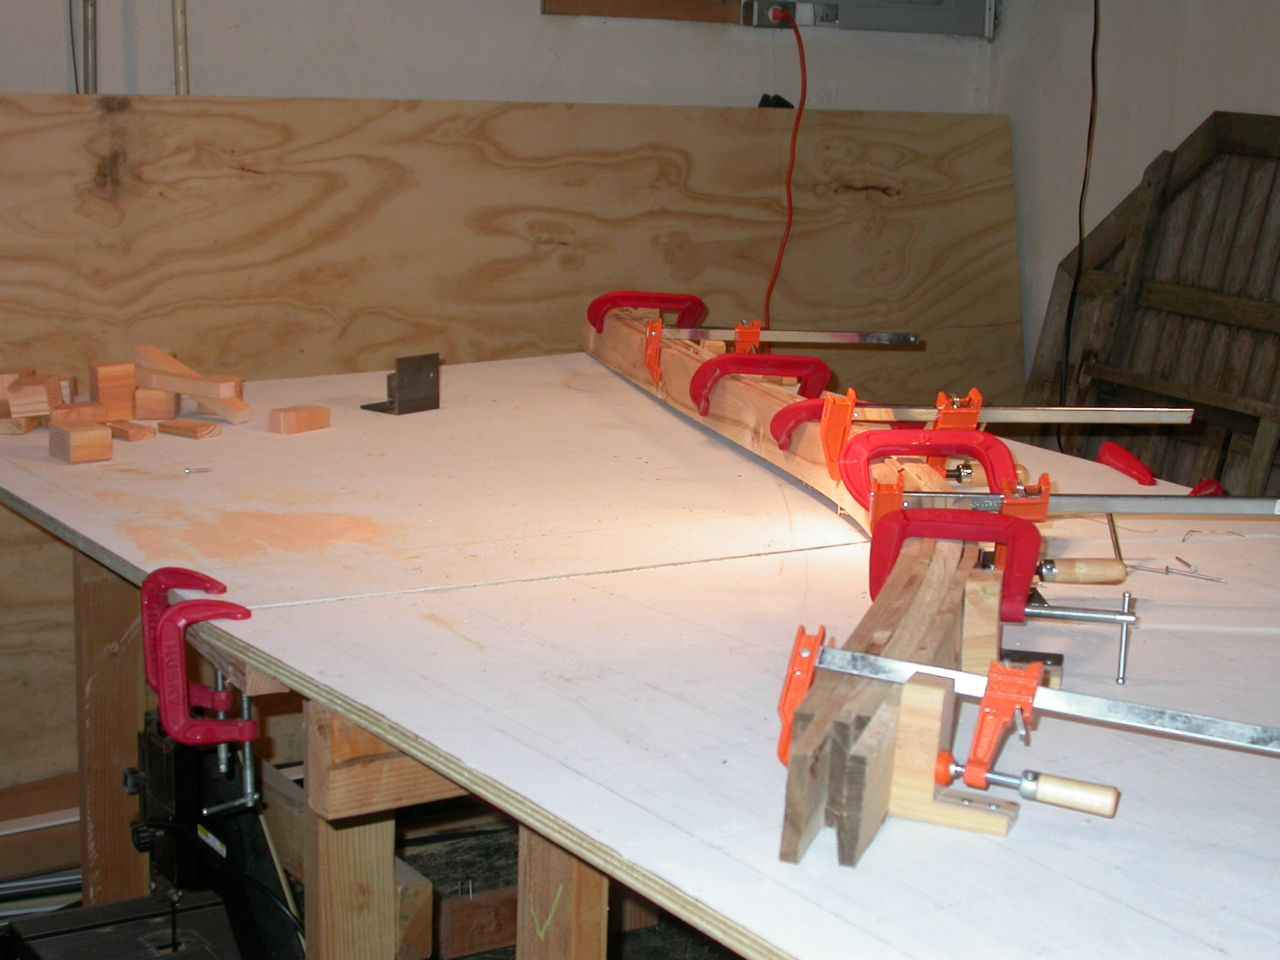
I'd given my steam bent hickory 2 days to cool and dry. The Wood Handbook says drying is an important part of the wood retaining its new shape, so I didn't rush it. The photo below shows the wood still clamped to the the form.
BEFORE unclamping the wood, I drew some 'index lines'. These were pencil lines that I hoped would help me reassemble the pieces correctly.
First, I drew a pencil line, straight across the top of the 5 boards, at the far end. I'd use this line to make sure all 5 boards were lined up properly, in relationship to each other. When the boards were lined up properly, the lines on all 5 boards would also line up.
Second, I drew another pencil line, on the right face of the right most board (in the photo below), right next to the first form. When all 5 boards were glued together, I'd use this line to make sure the whole assembly was lined up correctly on the forms.
This is a very important step, I think, but I hadn't seen it mentioned in any of my boat building books. Luckily, I'd learned a similar lesson the hard way when building the station molds for Cabin Boy. Fool me once!
 |
| Don't forget to draw index lines before removing wood from frame! |
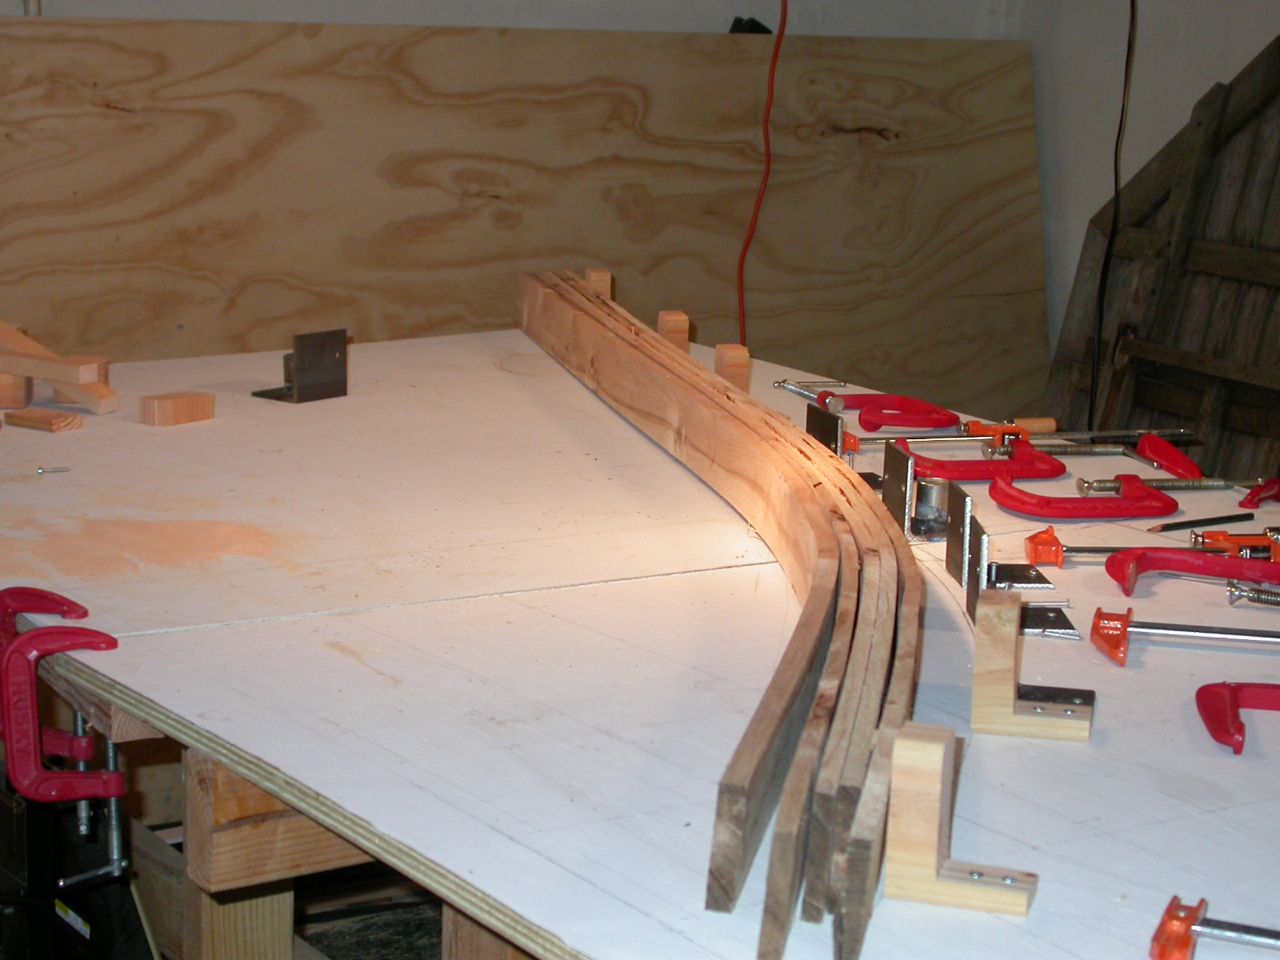 |
| With clamps removed |
- 'wet out' the two sides to be glued with an untracked epoxy/hardener mixture.
- apply a layer of thickened epoxy/hardener mixture
- clamp
I set up an epoxy workstation, as seen in the photo below.
I used two plastic paint roller trays (purchased at HD for half the price at WM). One tray was for the unthickened epoxy, and one for the thickened stuff.
There's no hard and fast rule for adding thickener, but the idea is to end up with something with the consistency of catsup.
I thought I could roll on both, but the thickened epoxy was a bit too thick for a roller. I used an old paint scraper to spread the thickened epoxy as smoothly as I could.
 |
| Epoxy station |
I mixed up the unthickened batch, using a digital scale to get the proportions right. I used 4 oz of epoxy for each batch, with .8 oz of hardener.
Then I rolled it onto both surfaces, to 'wet out' both surfaces.
Then, I added thickener to the remaining epoxy, and spread it onto one of the boards (the right one, in this photo). If I noticed any holes in knots, for example, I was careful to fill them with thickened epoxy. There were just a few small knots that needed this treatment.
Finally, I put the two glued faces together, lined up my index line, pressed the boards together with my hands, and quickly moved on to the next two faces.
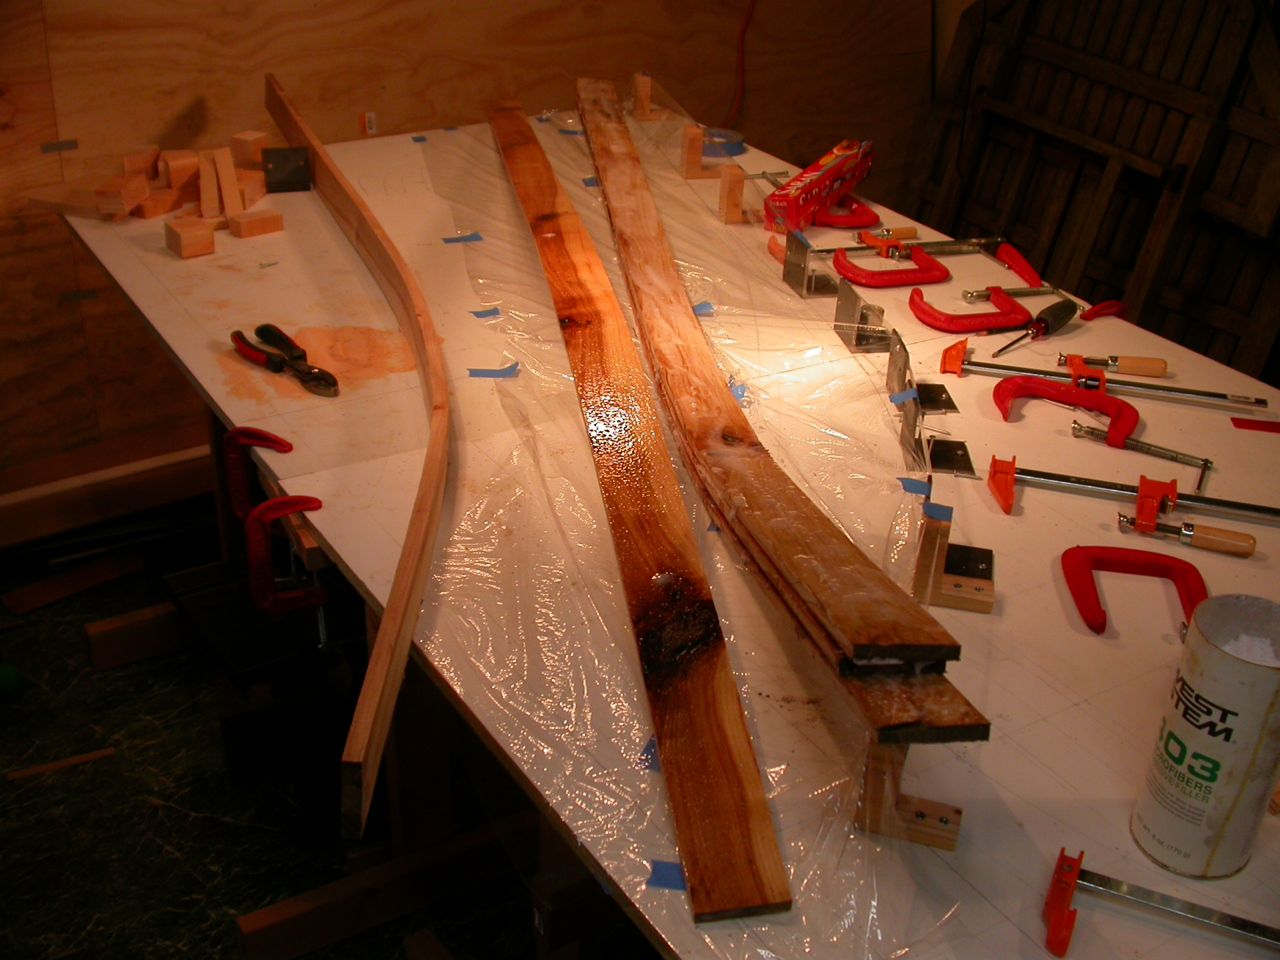 |
| Both boards 'wetted out', and one slathered with thickened epoxy |
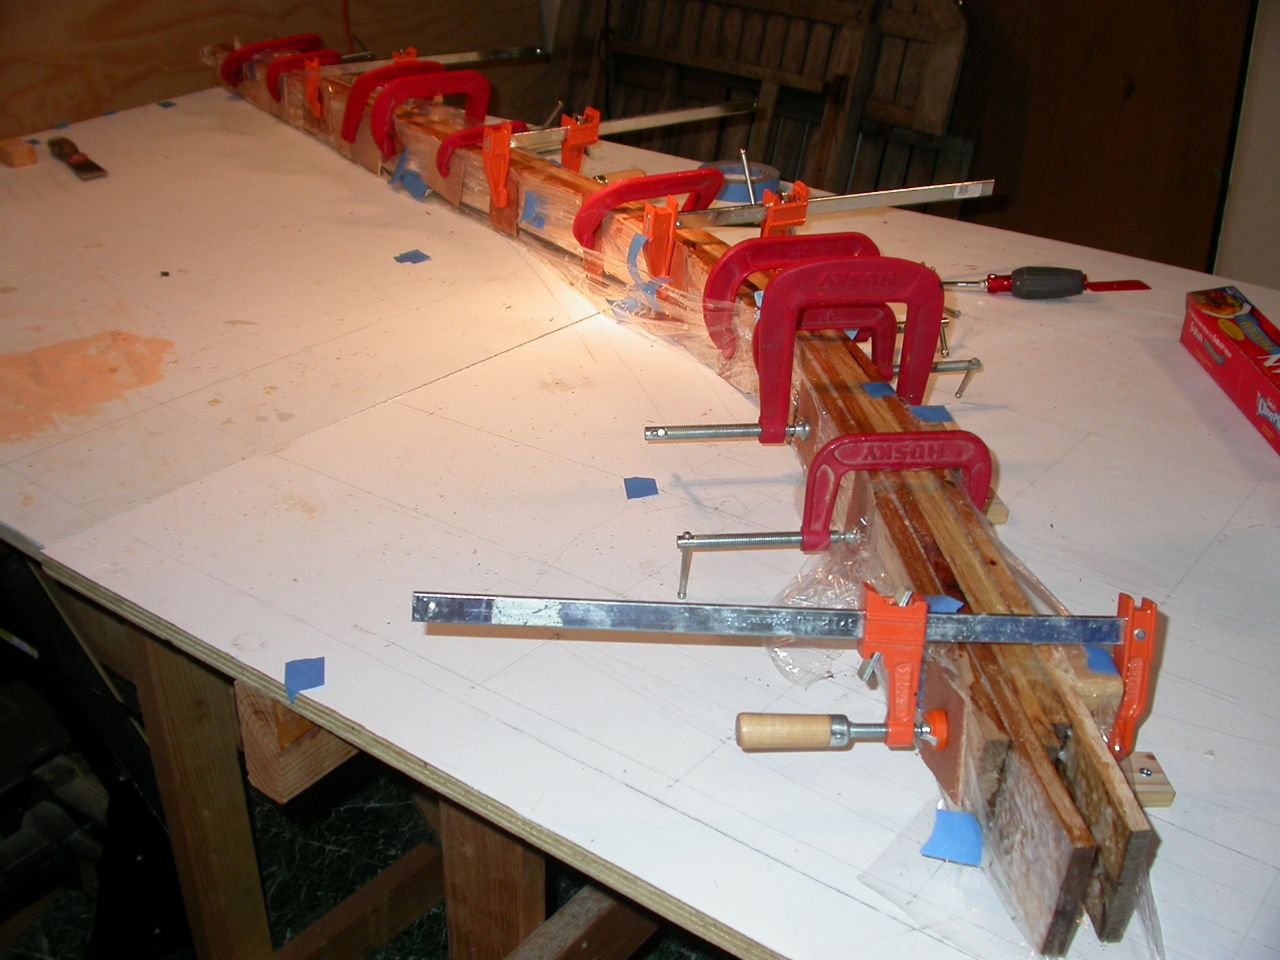
However, it was no big deal. Even though the boards weren't clamped together, it was easy to roll the 5 glued boards together on their sides, and slide them into the curve of the form.
 |
| Initial clamping |
I also added a few additional clamps between the forms, wherever it looked like the joint needed more pressure. Every clamp I own is in action in the photo below. If I'd had more, there would be more in the photo!
 |
| Add caption |
One problem: what to do about the squeeze out on the bottom?
I don't have a solution for that one. I'm sure it will be a big mess that I will complain about, bitterly, in a future blog post, but I don't know what you can do about it. If anyone has a brilliant idea, I'd be glad to hear it!
The whole process took about 1/2 hour, which was well within the bounds of the 206 hardener. I'll give it a good 24 hours to dry, and pick up the story from there. The next step is shaping these glued up boards into something that looks like a spar. I really have no idea how I'm going to do that, but I guess I will think of something...
>>> Next Episode: Meditation on 8
If you are lucky, John, the bottom will be fairly well aligned, and with a good mess of epoxy runout hardened and nice & flat. Well initially I'd say ignore that and figure out what you're going to do on the opposite side for setting the final shape and profile of the "top view". if you've got plenty of width to work with, you can simply saw away the lower epoxy mess as you go to the finished shape.
ReplyDeleteGood Luck, I've enjoyed following your articles all along.
John,
ReplyDeleteA suggestion for the bottom squeeze-out. After about 8 hours, the epoxy will be set enough to hold things in place, but still soft enough to trim with a sharp utility knife or bench chisel. Wait much longer and you'll definitely be making that complaint you forecast.
Release those clamps one at a time, re-clamping right after release from a mold piece. The goal is an assembly that's still clamped, but released from the mold. Flip the whole assembly over and trim. Re-clamp to the mold if you think it's needed.
BTW: I'm breaking my boycott on CAPTCHAs to offer this suggestion. See my blog about same called CAPTCHAs Must Die ... and be aware that Blogger has not started an automatic spam service. So, you should be able to turn off that annoying "Word Verification" feature.
Bob, I like your idea about the bottom squeeze out. I think I'll try it. That's one of the things I really don't like about epoxy, so if it works, I will have less to complain about. Always a good thing.
ReplyDeleteAbout the CAPTCHA thing... I have never seen a captcha box when adding a comment. Not sure what's triggering it for you. I'm going to see if I can duplicate it.
Well, I could not make a CAPTCHA box appear using any of the profiles I have. I guess you are using your Wordpress login?
ReplyDeleteMy Blogger admin screen is the 'new style'... unfortunately, it doesn't have the spam configuration controls you show in your post.
Not sure why they are picking on you, Bob!
John,
ReplyDeleteThe CAPTCHA box won't appear for the blog owner but it wil for everyone else. I followed Bob's link and then checked the dashboard on my blog. There was a SPAM tab that I had never seen before. The message about automatic spam filtering wasn't there but there were three spam comments waiting to be deleted. So, I've turned the CAPTCHA deal off on my blog.
I'm enjoying following your blog.
-Steve
Oh, no CAPTCHA box that time. You must ave figured out how to turn it off.
ReplyDelete-Steve
Yeah, I don't think the 'new' blogger requires captcha anymore.
ReplyDeleteAnother solution for the bottom is a carbide scraper. Works like a charm. But you must hit the epoxy while it is still green or else it's time to get some 60 grit sandpaper and a tyvek suit...
ReplyDeleteAnother option is for the epoxy on the bottom is a carbide scraper. Make sure you hit it while it is green..or you will need 40-60 git sandpaper and a tyvek suit. Epoxy thickenrd with cabosil is SUPER hard.
ReplyDeleteGreat post!
ReplyDeleteExcellent blog - very inspiring and a source of good advice which I need a lot of!
ReplyDeleteDavid Greenwood (Seaward) Simple Sailing Low Cost Cruising blogspot
Nice work. I built a laminated tiller for my Bristol exactly the same way. The only suggestion I'd offer (and you probably know this already) is to generously wipe down any glue edge or side first with acetone before you start gluing.
ReplyDelete