Something happened to me a few weeks ago. After months and years of thinking and plotting and planning and drawing and worrying about how to build a decent galley into the Blue Moon, I suddenly realized I knew how to do it. Not that I knew exactly how to do it, but I had enough confidence to know I could probably figure it out if I dove head first into the process.
This confidence is what I needed to rip out the 'galley' that had served its purpose (however poorly) during my long voyage up the east side of the US. This so-called galley was nothing more than a lightly-built cabinet with three flimsy shelves, with a single-burner gimbaled stove screwed onto the side. I was never happy with it, and while ripping it out, I realized that it probably wasn't built by the original builder of the Blue Moon, who was a very good builder, and quite neat and tidy with epoxy. This tiny cedar cabinet was cemented to the side of the Blue Moon with great sloppy goops of epoxy that I still haven't chiseled off completely. So I must say I took great satisfaction in demolishing the blasted thing, and chucking the pieces into Cabin Boy for disposal.
Then it was time to start building.
The replacement galley will be the same width, but about twice as deep and 10 times more useful, I hope. It will have a large countertop, unbroken by any sinks or stoves. While planning my galley, I read an old book that claimed that a small boat doesn't have room for built-in sinks or stoves, and it was right. When I want to cook, I will put my stove on the counter top. When I want to wash up, I'll stow the stove away, and replace it with a nice plastic dish pan. When I'm not thinking about food, it will be a handy place to examine charts, or assemble small machines, or work on my stamp collection.
I'm still not certain what will go below the top shelf, but there will be some sort of storage. Exactly what, I will decide after the sides and top are in position. No need to rush these decisions...
The sides will be made from 3/4" exterior grade plywood. Actually, MDO, which is exterior ply with two good surfaces. The forward one will support the head of the new bunk I plan to build, but more on that later.
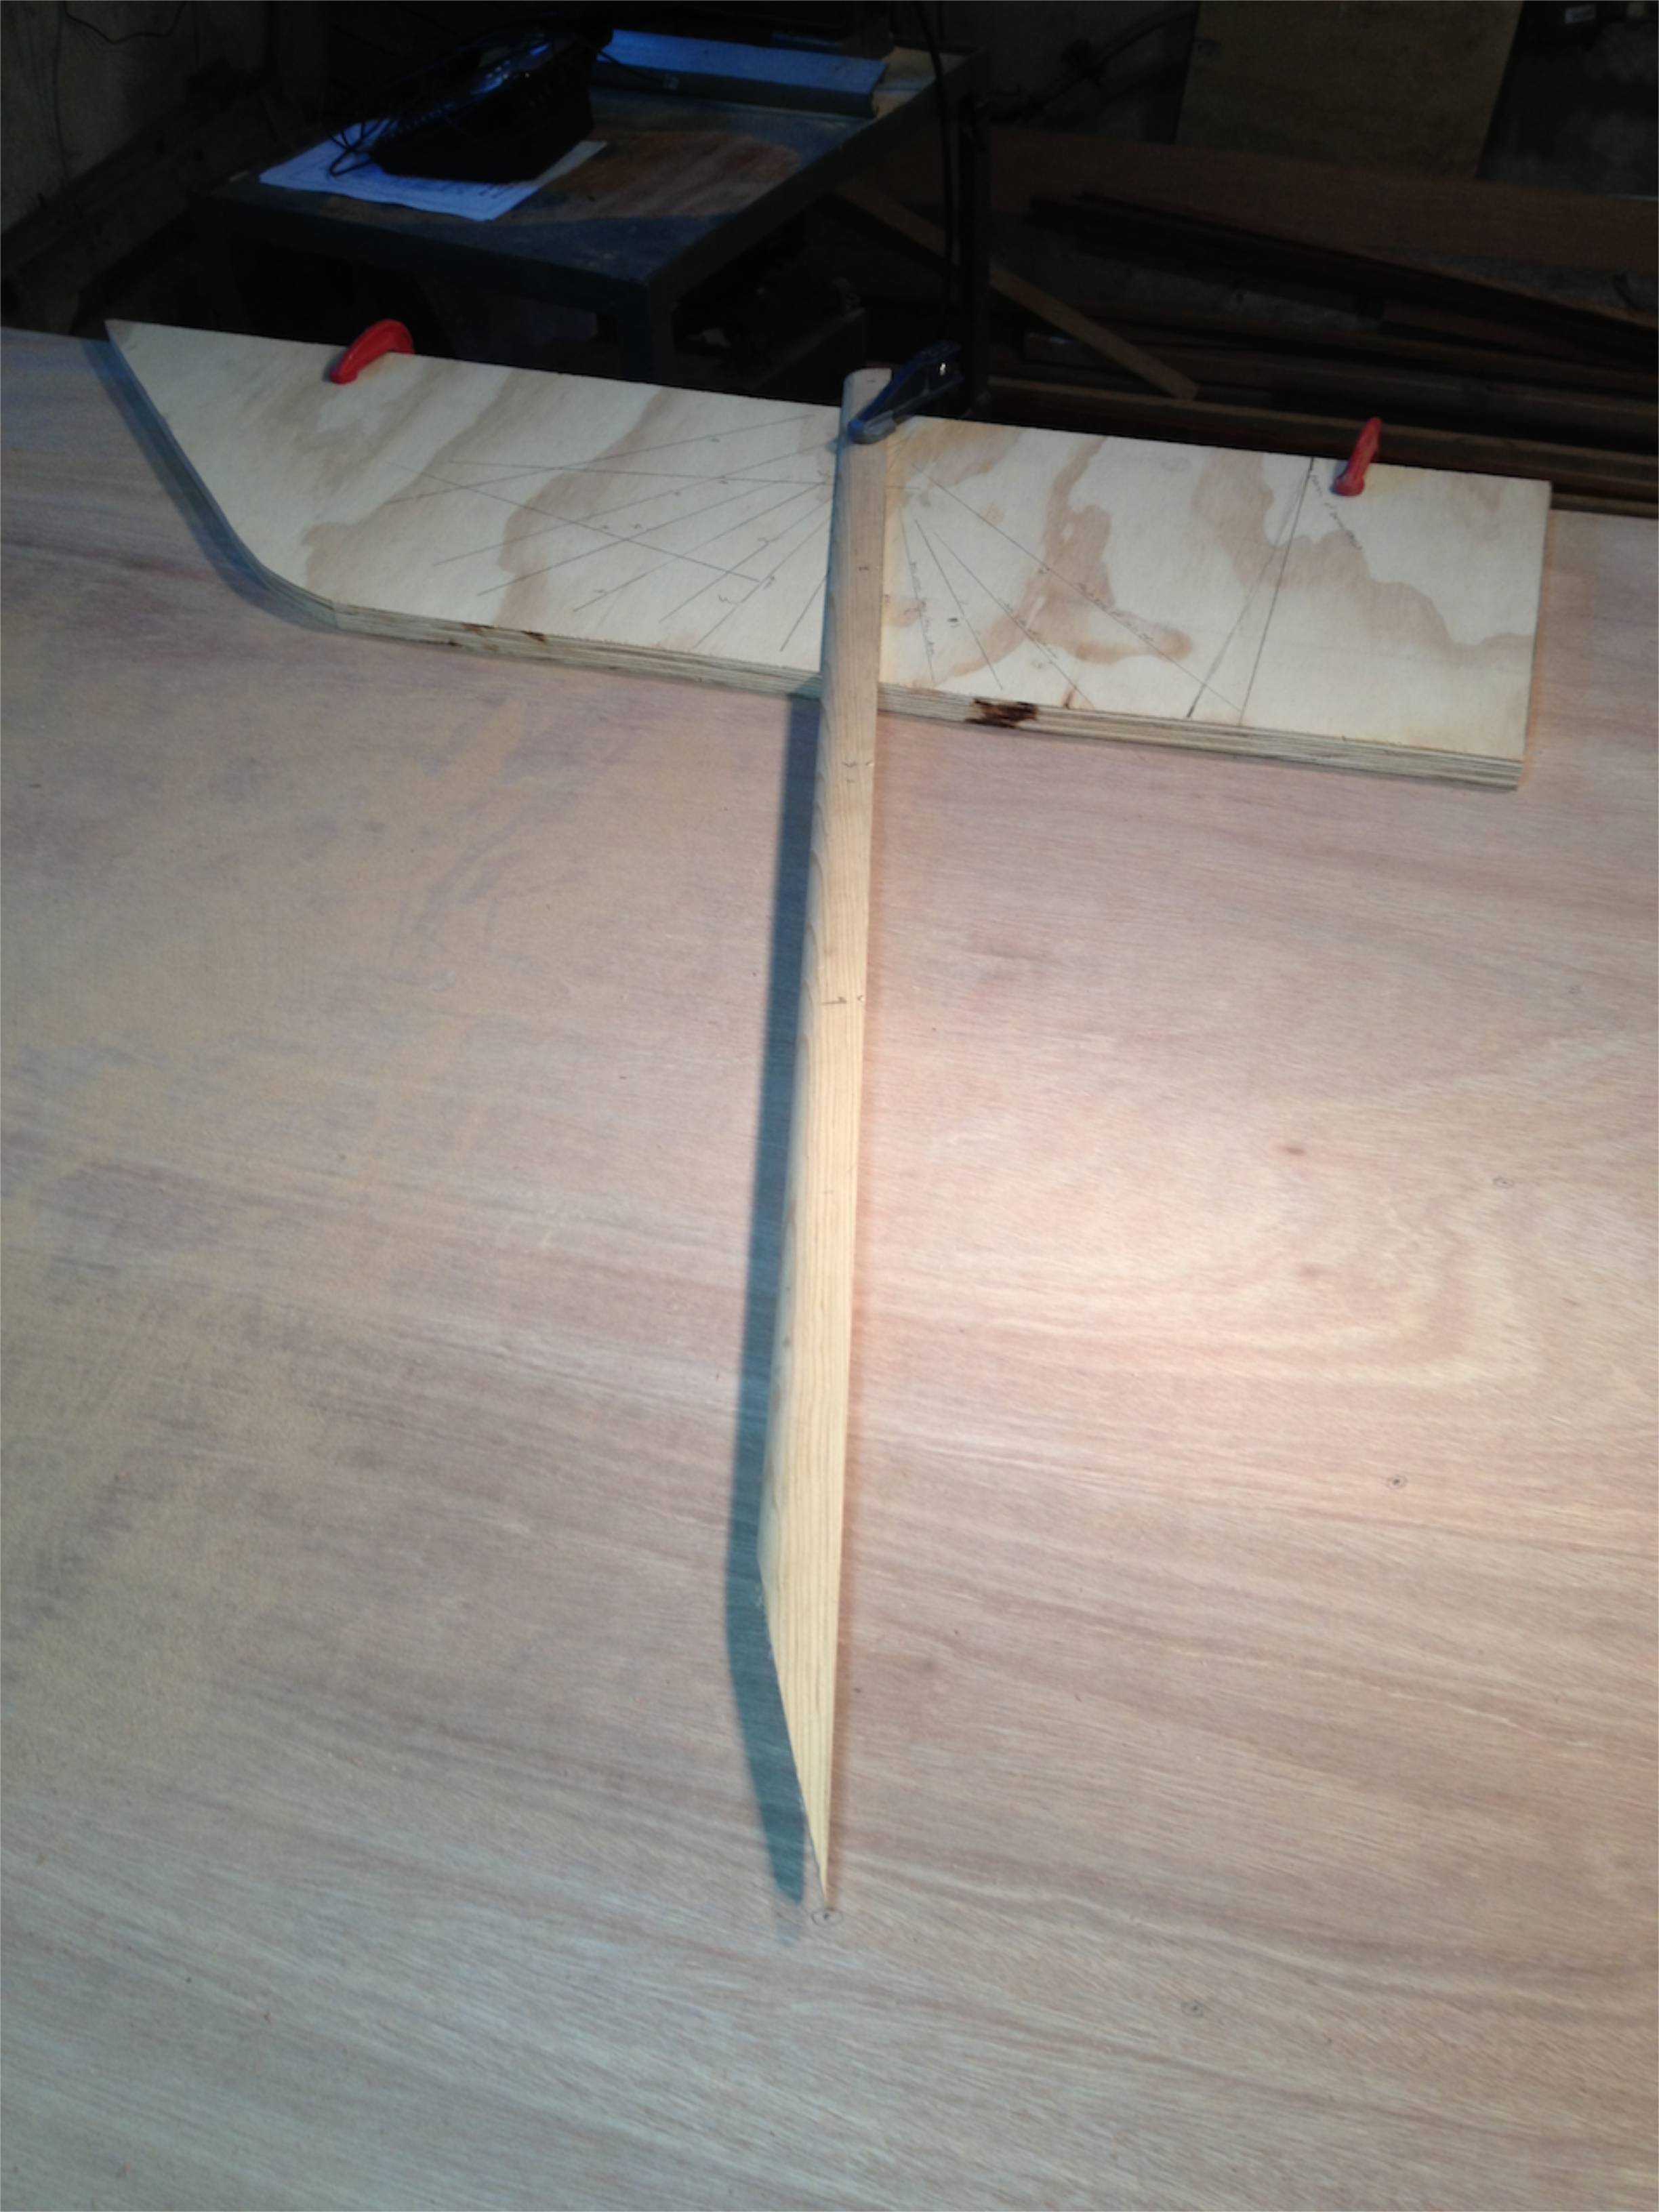
The first step was to make patterns for the two half-bulkheads that will frame the galley. To make these patterns, I used a tick-stick -- one of my favorite boat building tricks.
A tick-stick is a long stick, sharpened at one end, with several notches cut into one side, labeled 1,2,3 or A,B,C, or whatever you fancy. The notches should be close enough together so that whenever you lay the stick alongside the board, one of the notches is on the board.
To use it, you just put the pointy end of the stick somewhere on the hull, or deck, or whereever the bulkhead needs to fit against, hold the stick securely on the board (I only used a clamp so I could take the photo), and draw a line along the stick, being sure to dip your pencil into the notch.
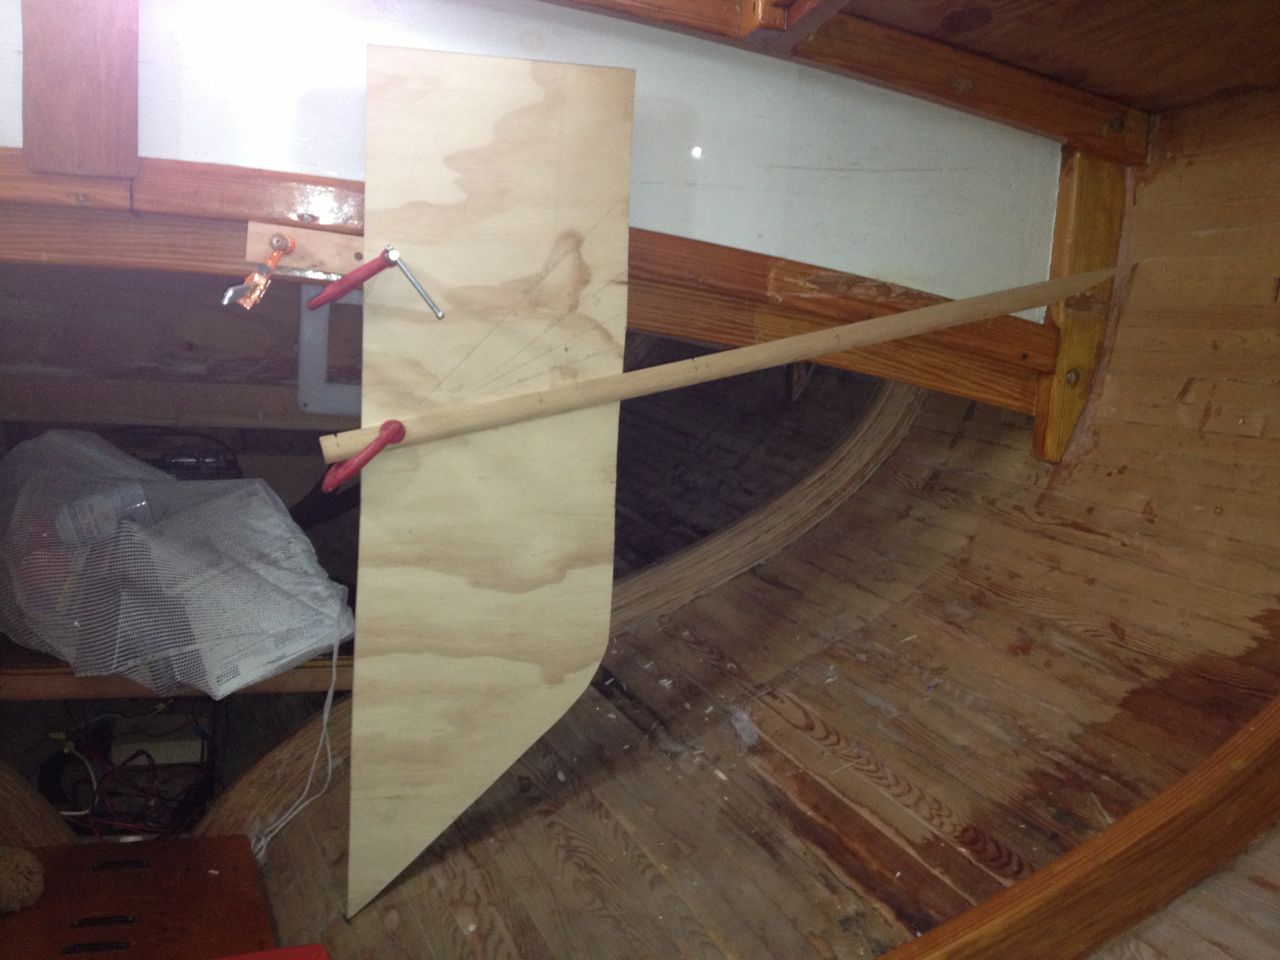 |
| Tick-stick and board in use on the site of the old 'galley'. The wet-looking spot is actually dish detergent that spilled in the cabinet years ago. Why it left such a stain, I do not know... |
The board is equally important. I built mine so the front edge (the one to the left) is straight. It represents the edge of the bulkhead. I positioned the board so this edge was exactly where I wanted the front of the bulkhead to be. I used a quality bubble level (on a calm day!) to make sure the front of the board was exactly vertical.
The pointy end is also important. You want to position the point so it sits exactly on the hull where the corner of the bulkhead will go. The angle just has to be small enough so the point can sit on the hull without the right side of the board interfering with the hull. The board needs to be wide enough to capture the measurements. A foot is wide enough.
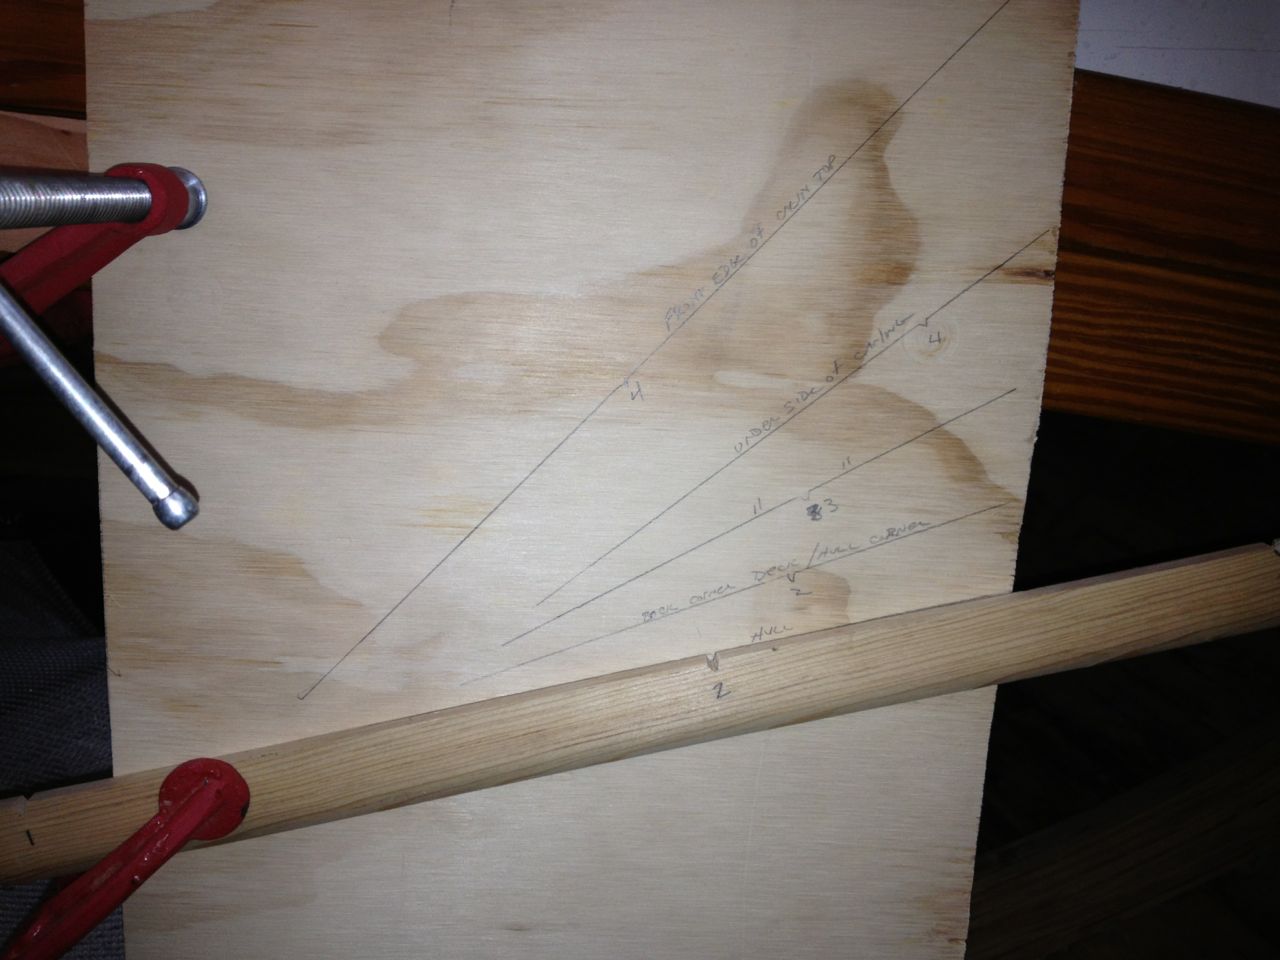
If you click on the photo below, you will see a bigger version of the image. You will see that I have already captured the profile of the underside of the deck, where the deck meets the cabin top, the corner where the deck meets the hull, and several other important structural detail. Note that each line has at least one notch on it, and that the notch is labeled 1, 2, 3, or 4. These correspond to the 4 notches on my stick. You might need fewer or more notches, but 4 worked for me.
Note also that I labeled the various lines to make it a bit easier to reproduce the shape I'd captured later.
 |
| Close up of details |
Here's another shot that clearly shows the 4 notches.
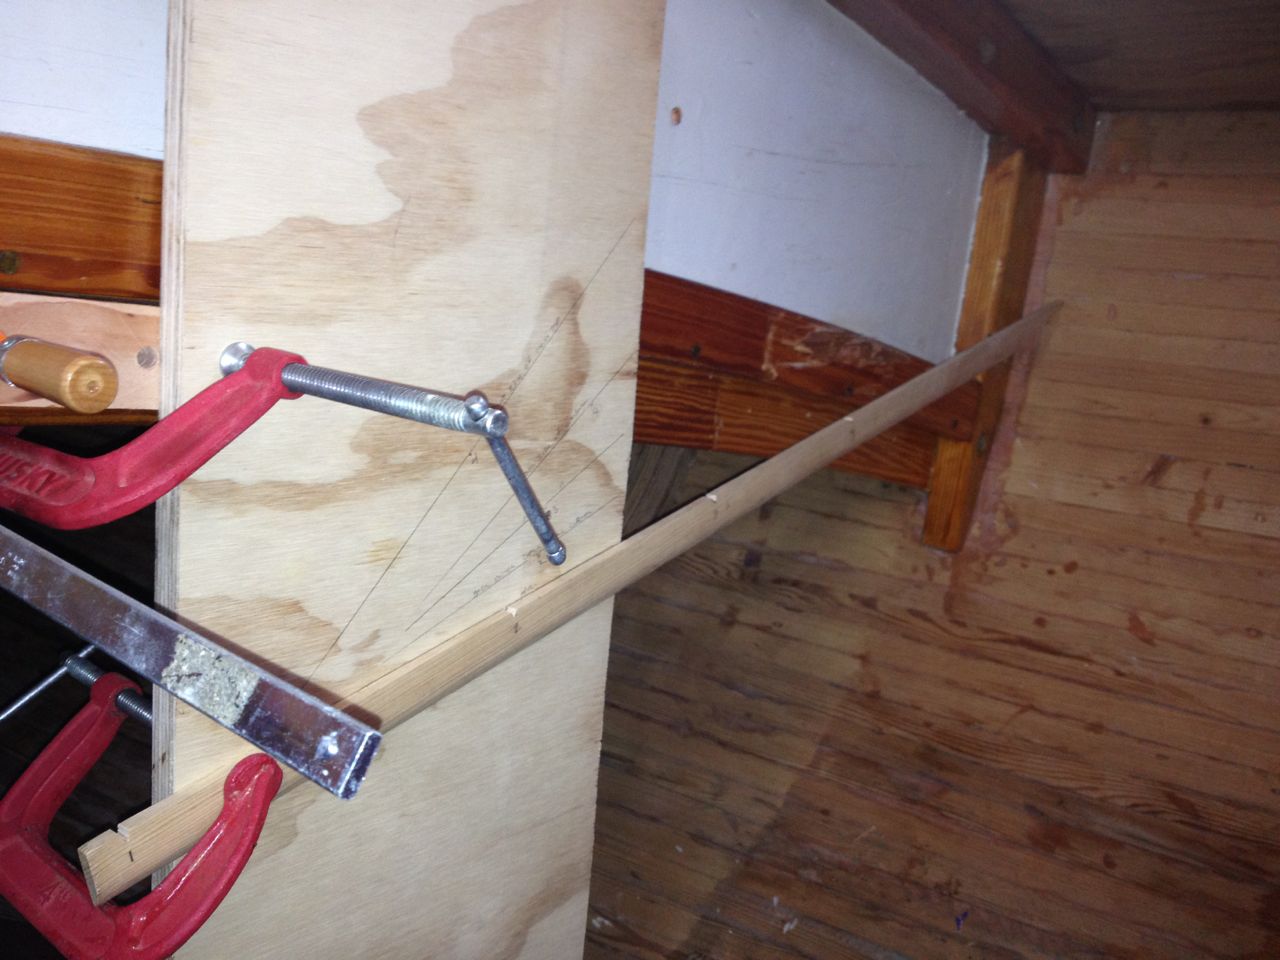 |
| Another angle showing the various ticks |
When you are done, you'll have something like the photo below. The more measurements you take, the better -- up to a point. You don't need a million measurements -- just enough to capture all the important corners and curves.
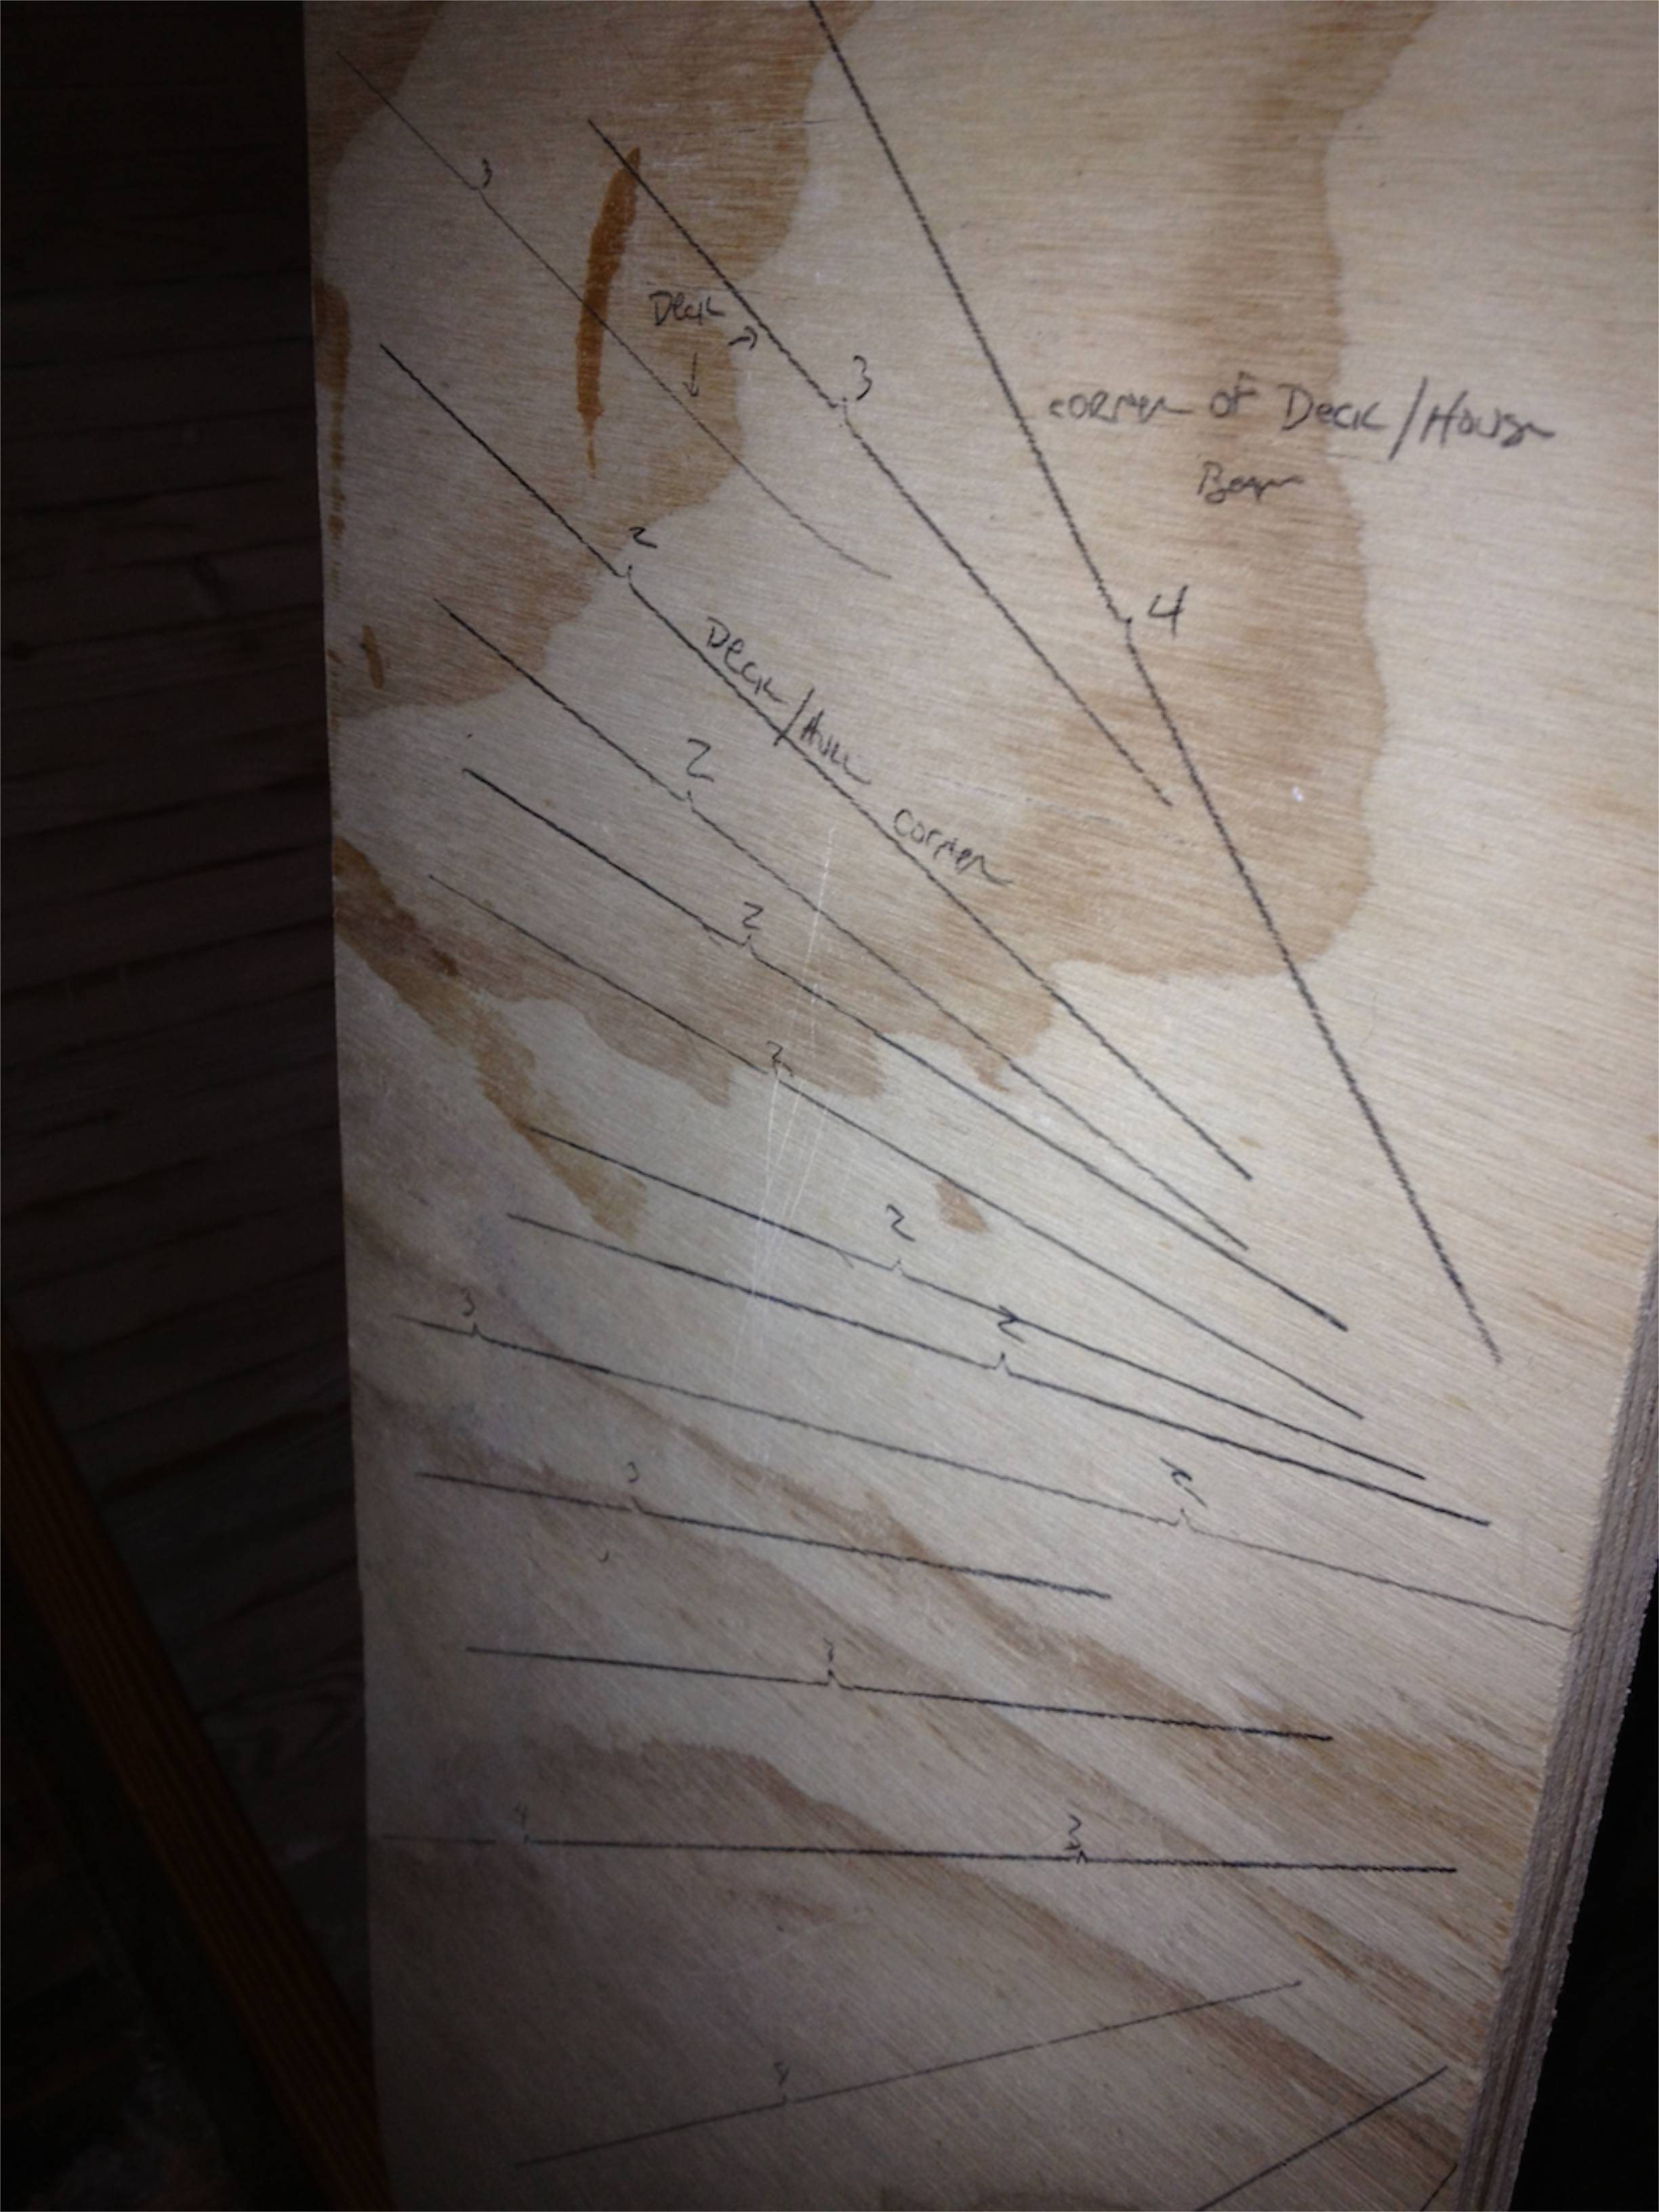 |
| The board when done. Notice labels! Very helpful. |
When I finished with the first half-bulkhead, I did the other. The process was the same, of course.
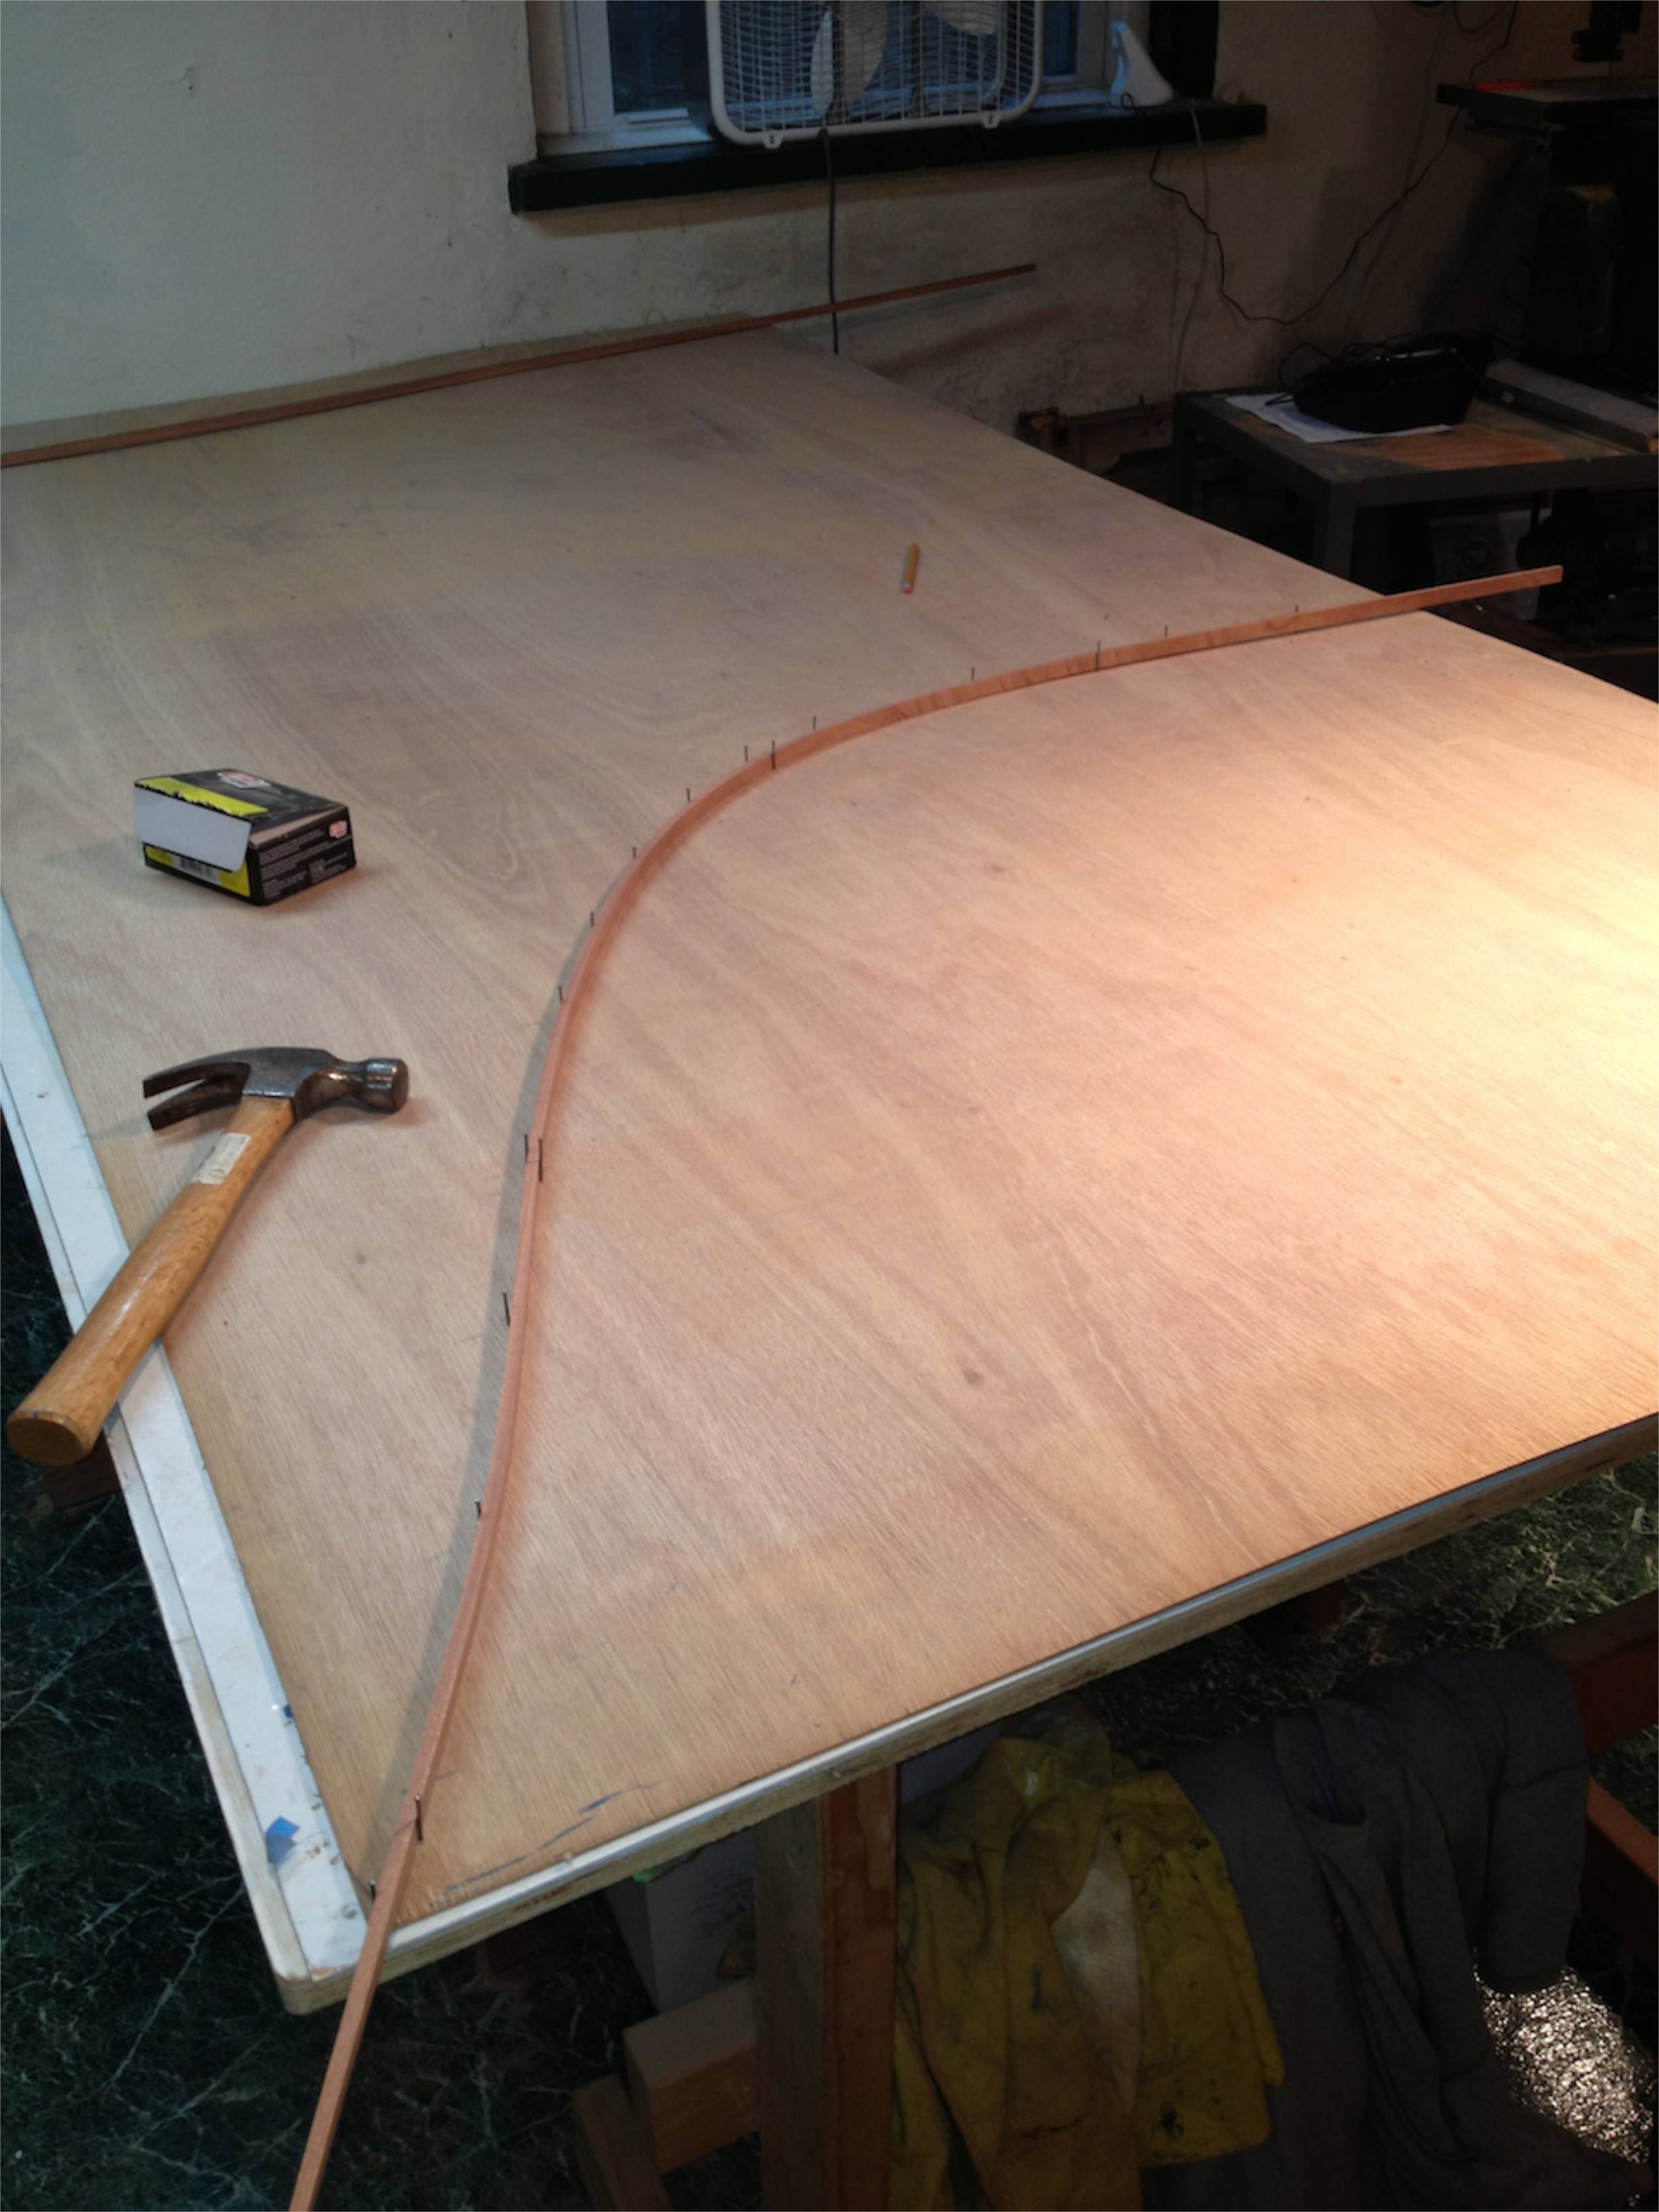
Once I had my two sets of measurements (made on two different boards, but with the same tick-strip), I brought them back to the shop to reverse the process.
The first step is to line up the straight edge of the board with one of the machine-cut edges of the plywood. This straight edge will be the front of the bulkhead.
Then all you do is pick one of the lines you drew on the board and line up the tick strip, being careful to position the correct notch on the stick with the labeled notch on the board. When the stick is carefully lined up, clamp it firmly, then go down to the pointy edge of the stick, and draw a dot right under the point.
Repeat for all the lines on your board.
 |
| Reversing the process onto pattern stock |
When I was done, I had a bunch of dots that represented the shape of the hull, and several more that showed where the flat underside of the deck was, and the two corners where the deck met the hull, and where it met the cabin top.
I used a light mahogany batten to connect the hull dots. This is just like spiling a pattern when building a boat. The dots almost lined up perfectly, but the purpose of a batten is to make the imperfect measurements into a perfect curve. The batten evens out the mistakes. More or less.
 |
| Connect the dots with a batten |
The curve is the hard part. You can use a straight edge to connect the deck-line dots.
I'm always torn about how to cut such a large, curved design from a piece of plywood. I used my go-to tool for this: a jig saw. There might be a better way to do this, but I'll be darned if I know what it is. For now, a jig saw works 'good enough', if you are very careful.
If you do everything right, a beautiful woman will agree to hold your lovely work up to be photographed and generally oooh-ed and ahhh-ed over. The Blue Moon's shapely hull is clearly reflected in the hull line. The straight deck line is between Helena's two hands. The straight forward edge of the bulkhead is to the left.
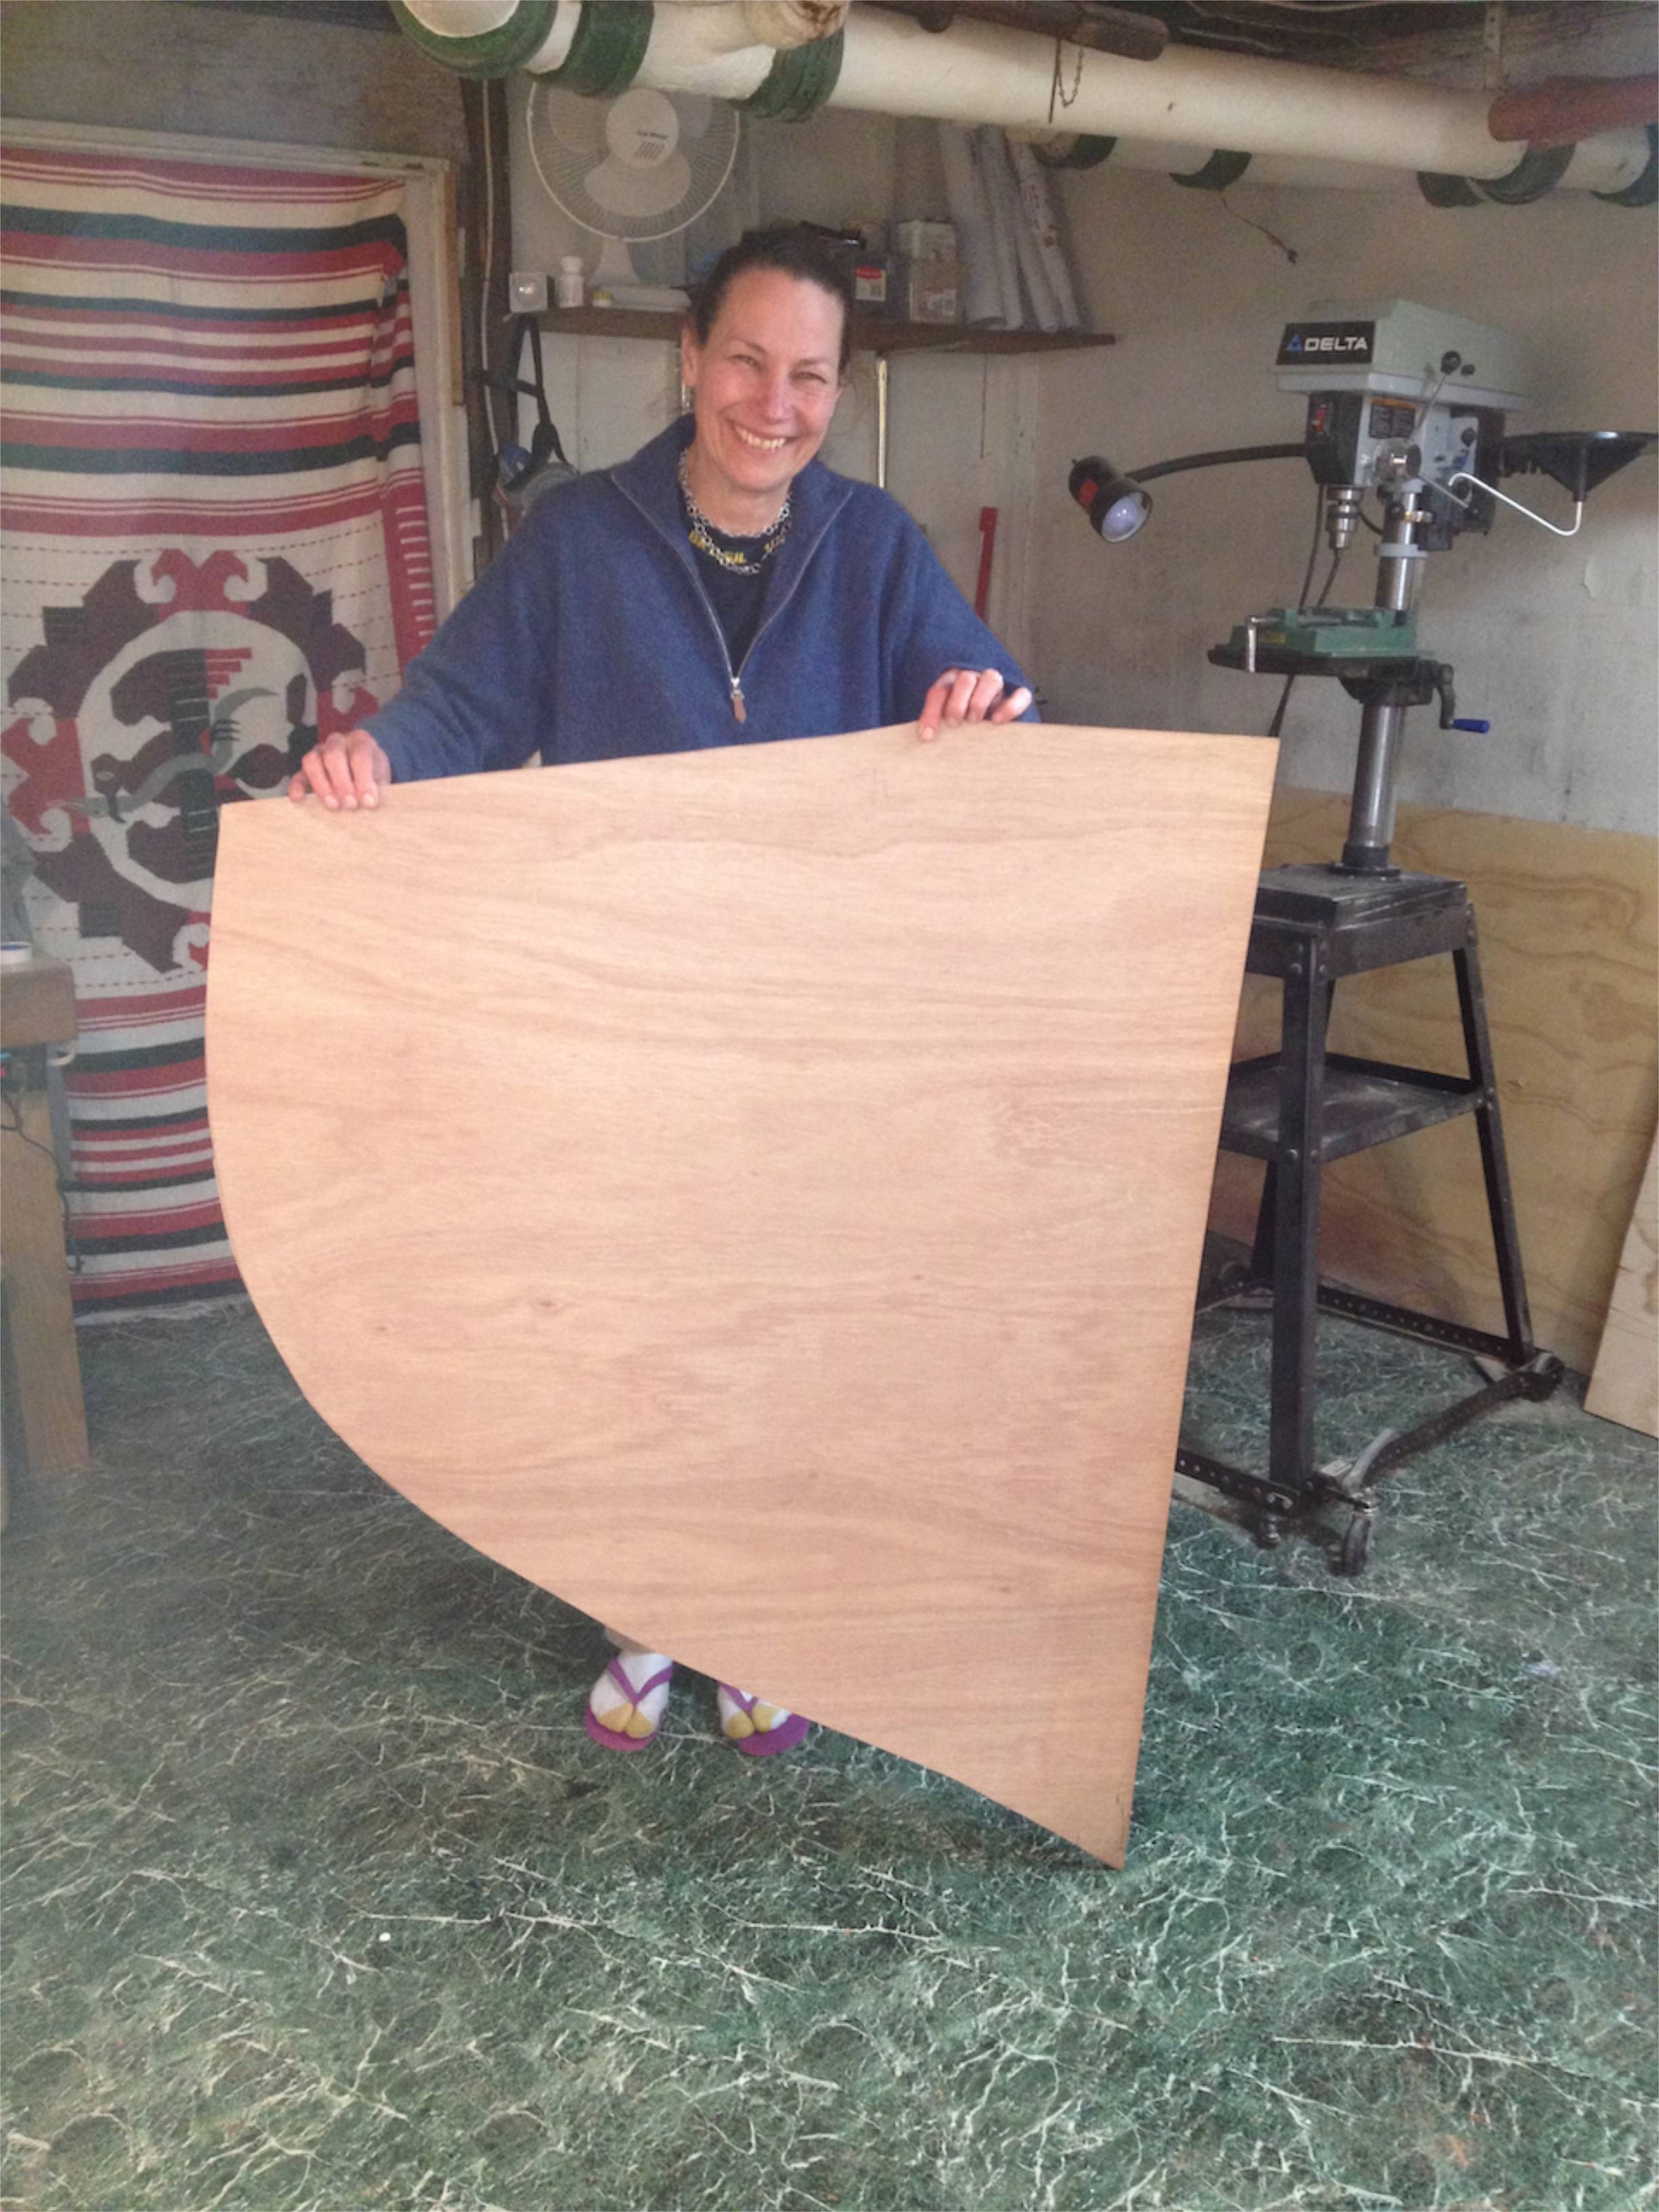 |
| Have beautiful woman hold up your work. |
Here are the two patterns laid on top of each other, with their straight edges lined up. You can see that the Blue Moon changes shape slightly even in the 2 feet that separates these two bulkheads.
 |
| Do it again for the other side of the galley... Notice they are not QUITE the same... |
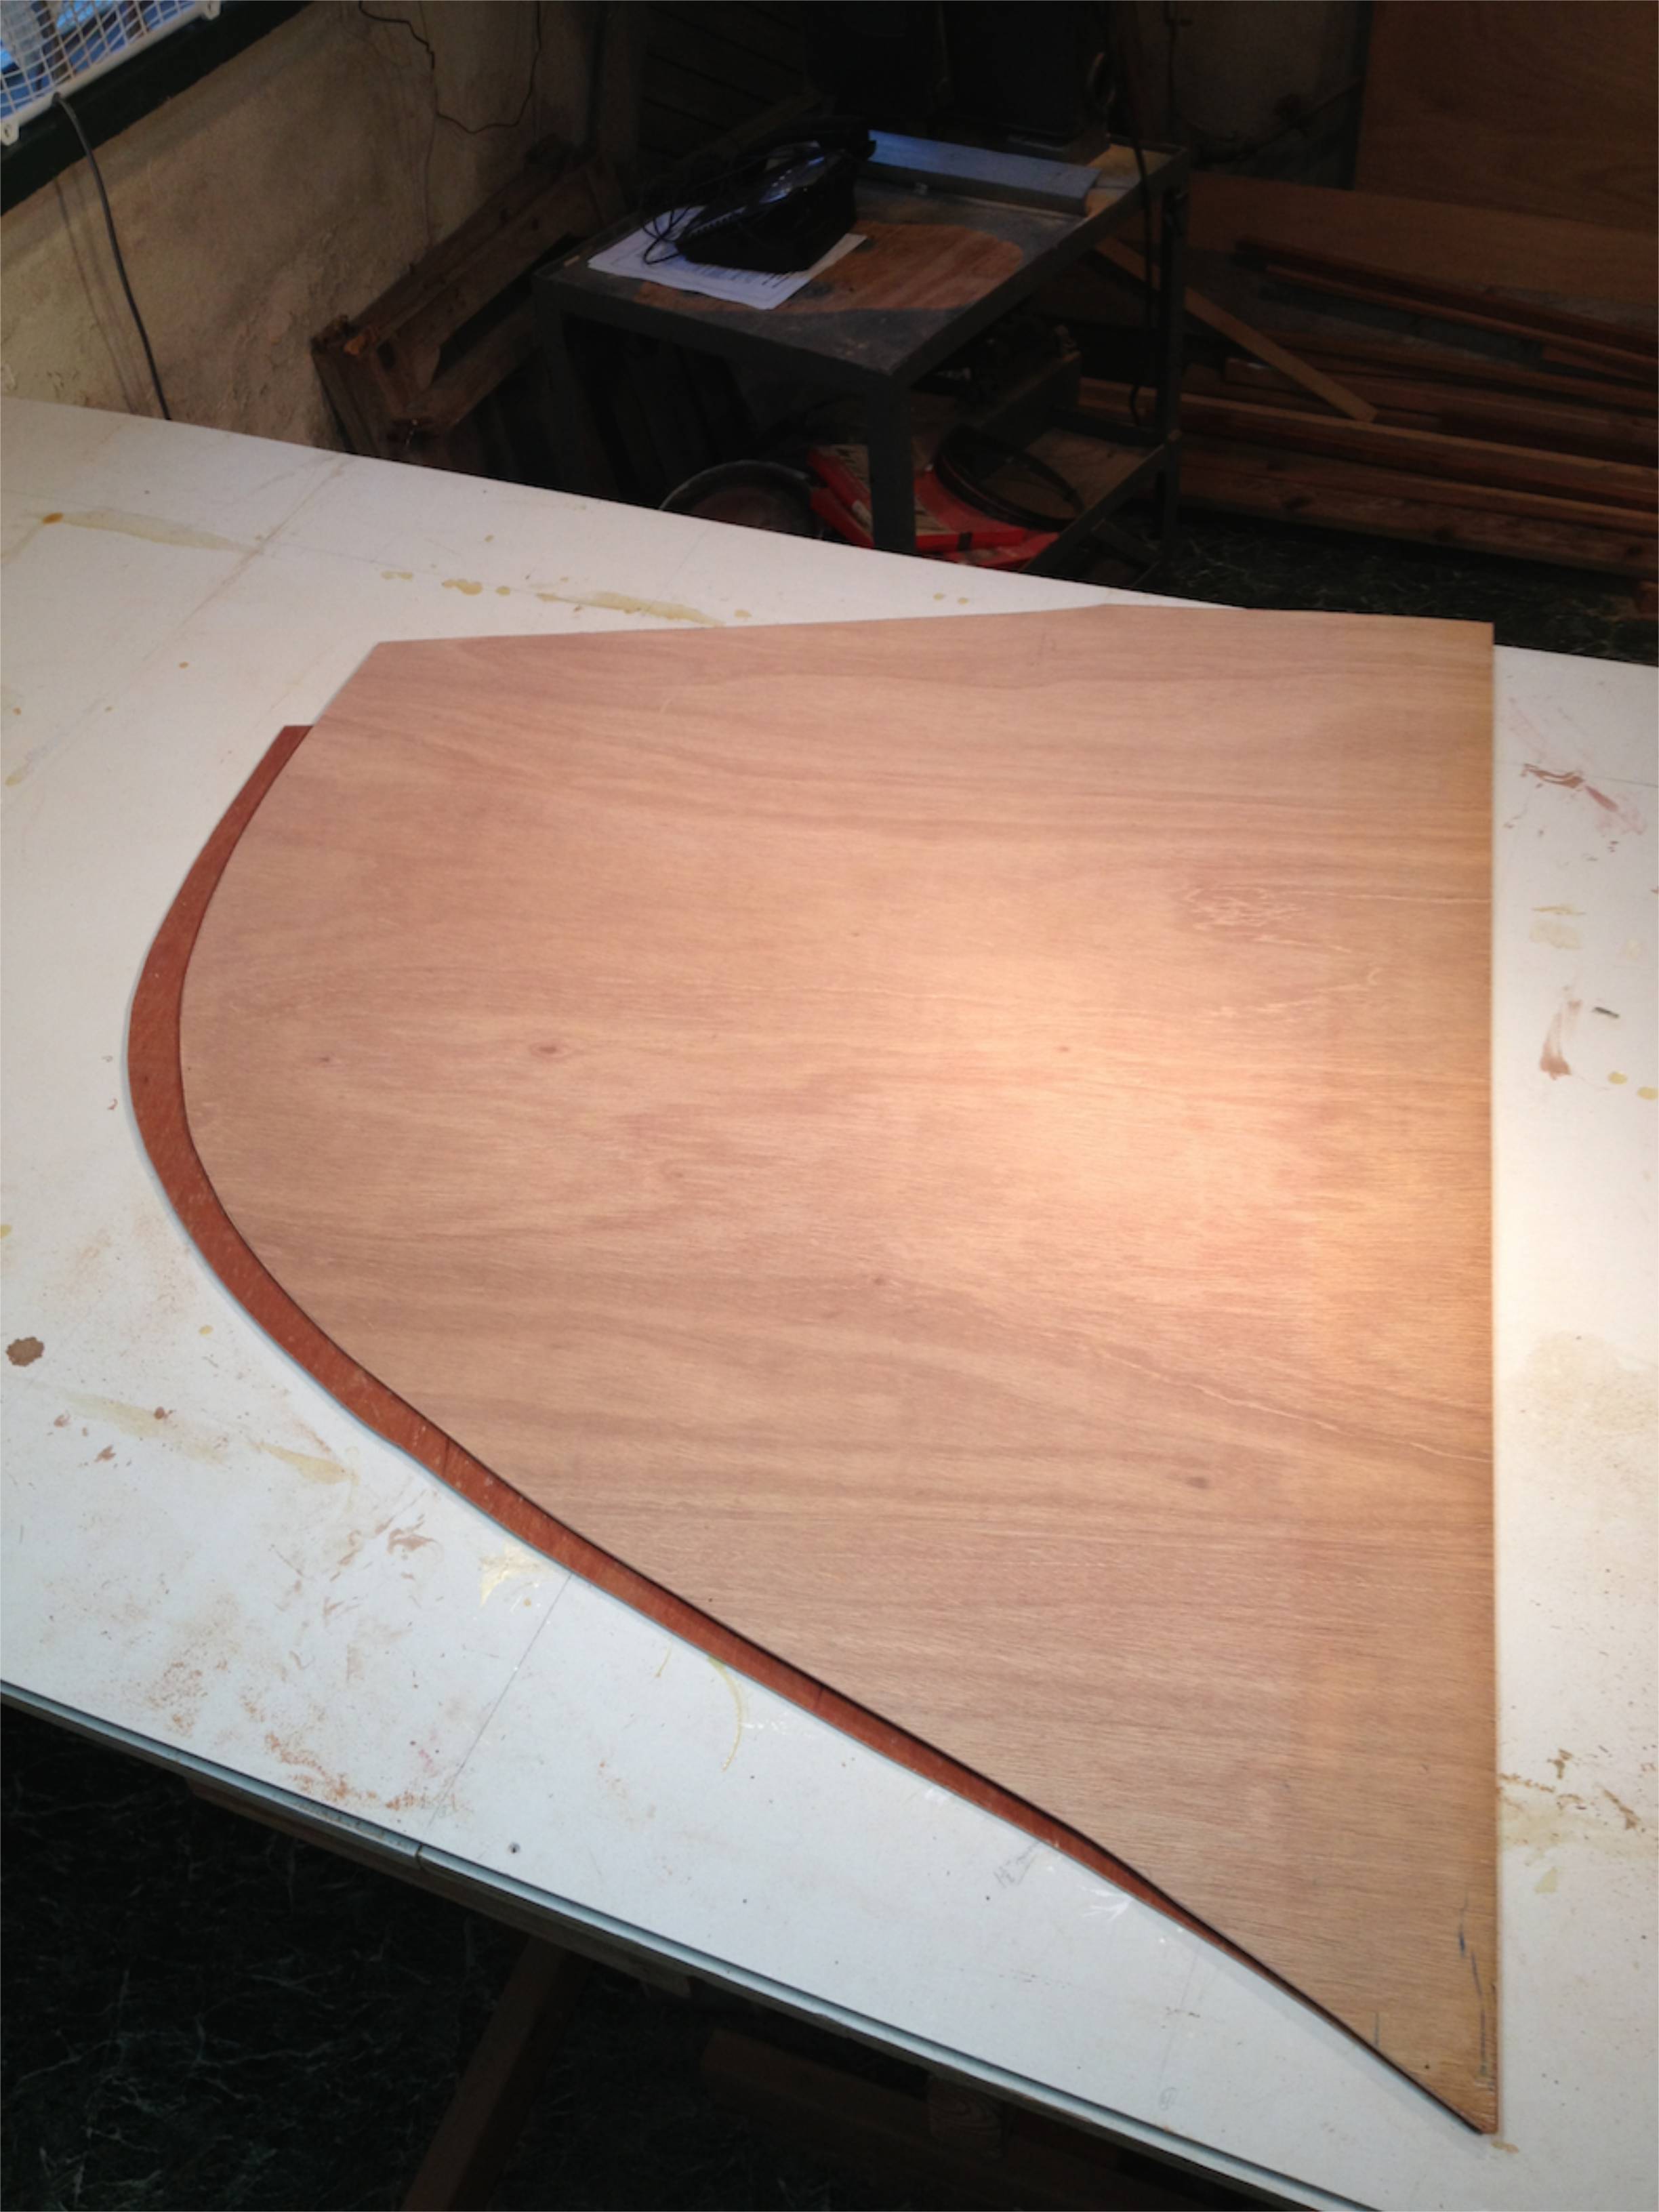
Then it was time for the first fitting. If you did everything correctly, the pattern should fit perfectly. Or at least perfectly enough. I brought a small block plane with me to take a few shavings here and there off the edge. A few test fittings and a few shaves had the bulkhead pattern fitting pretty darn well.
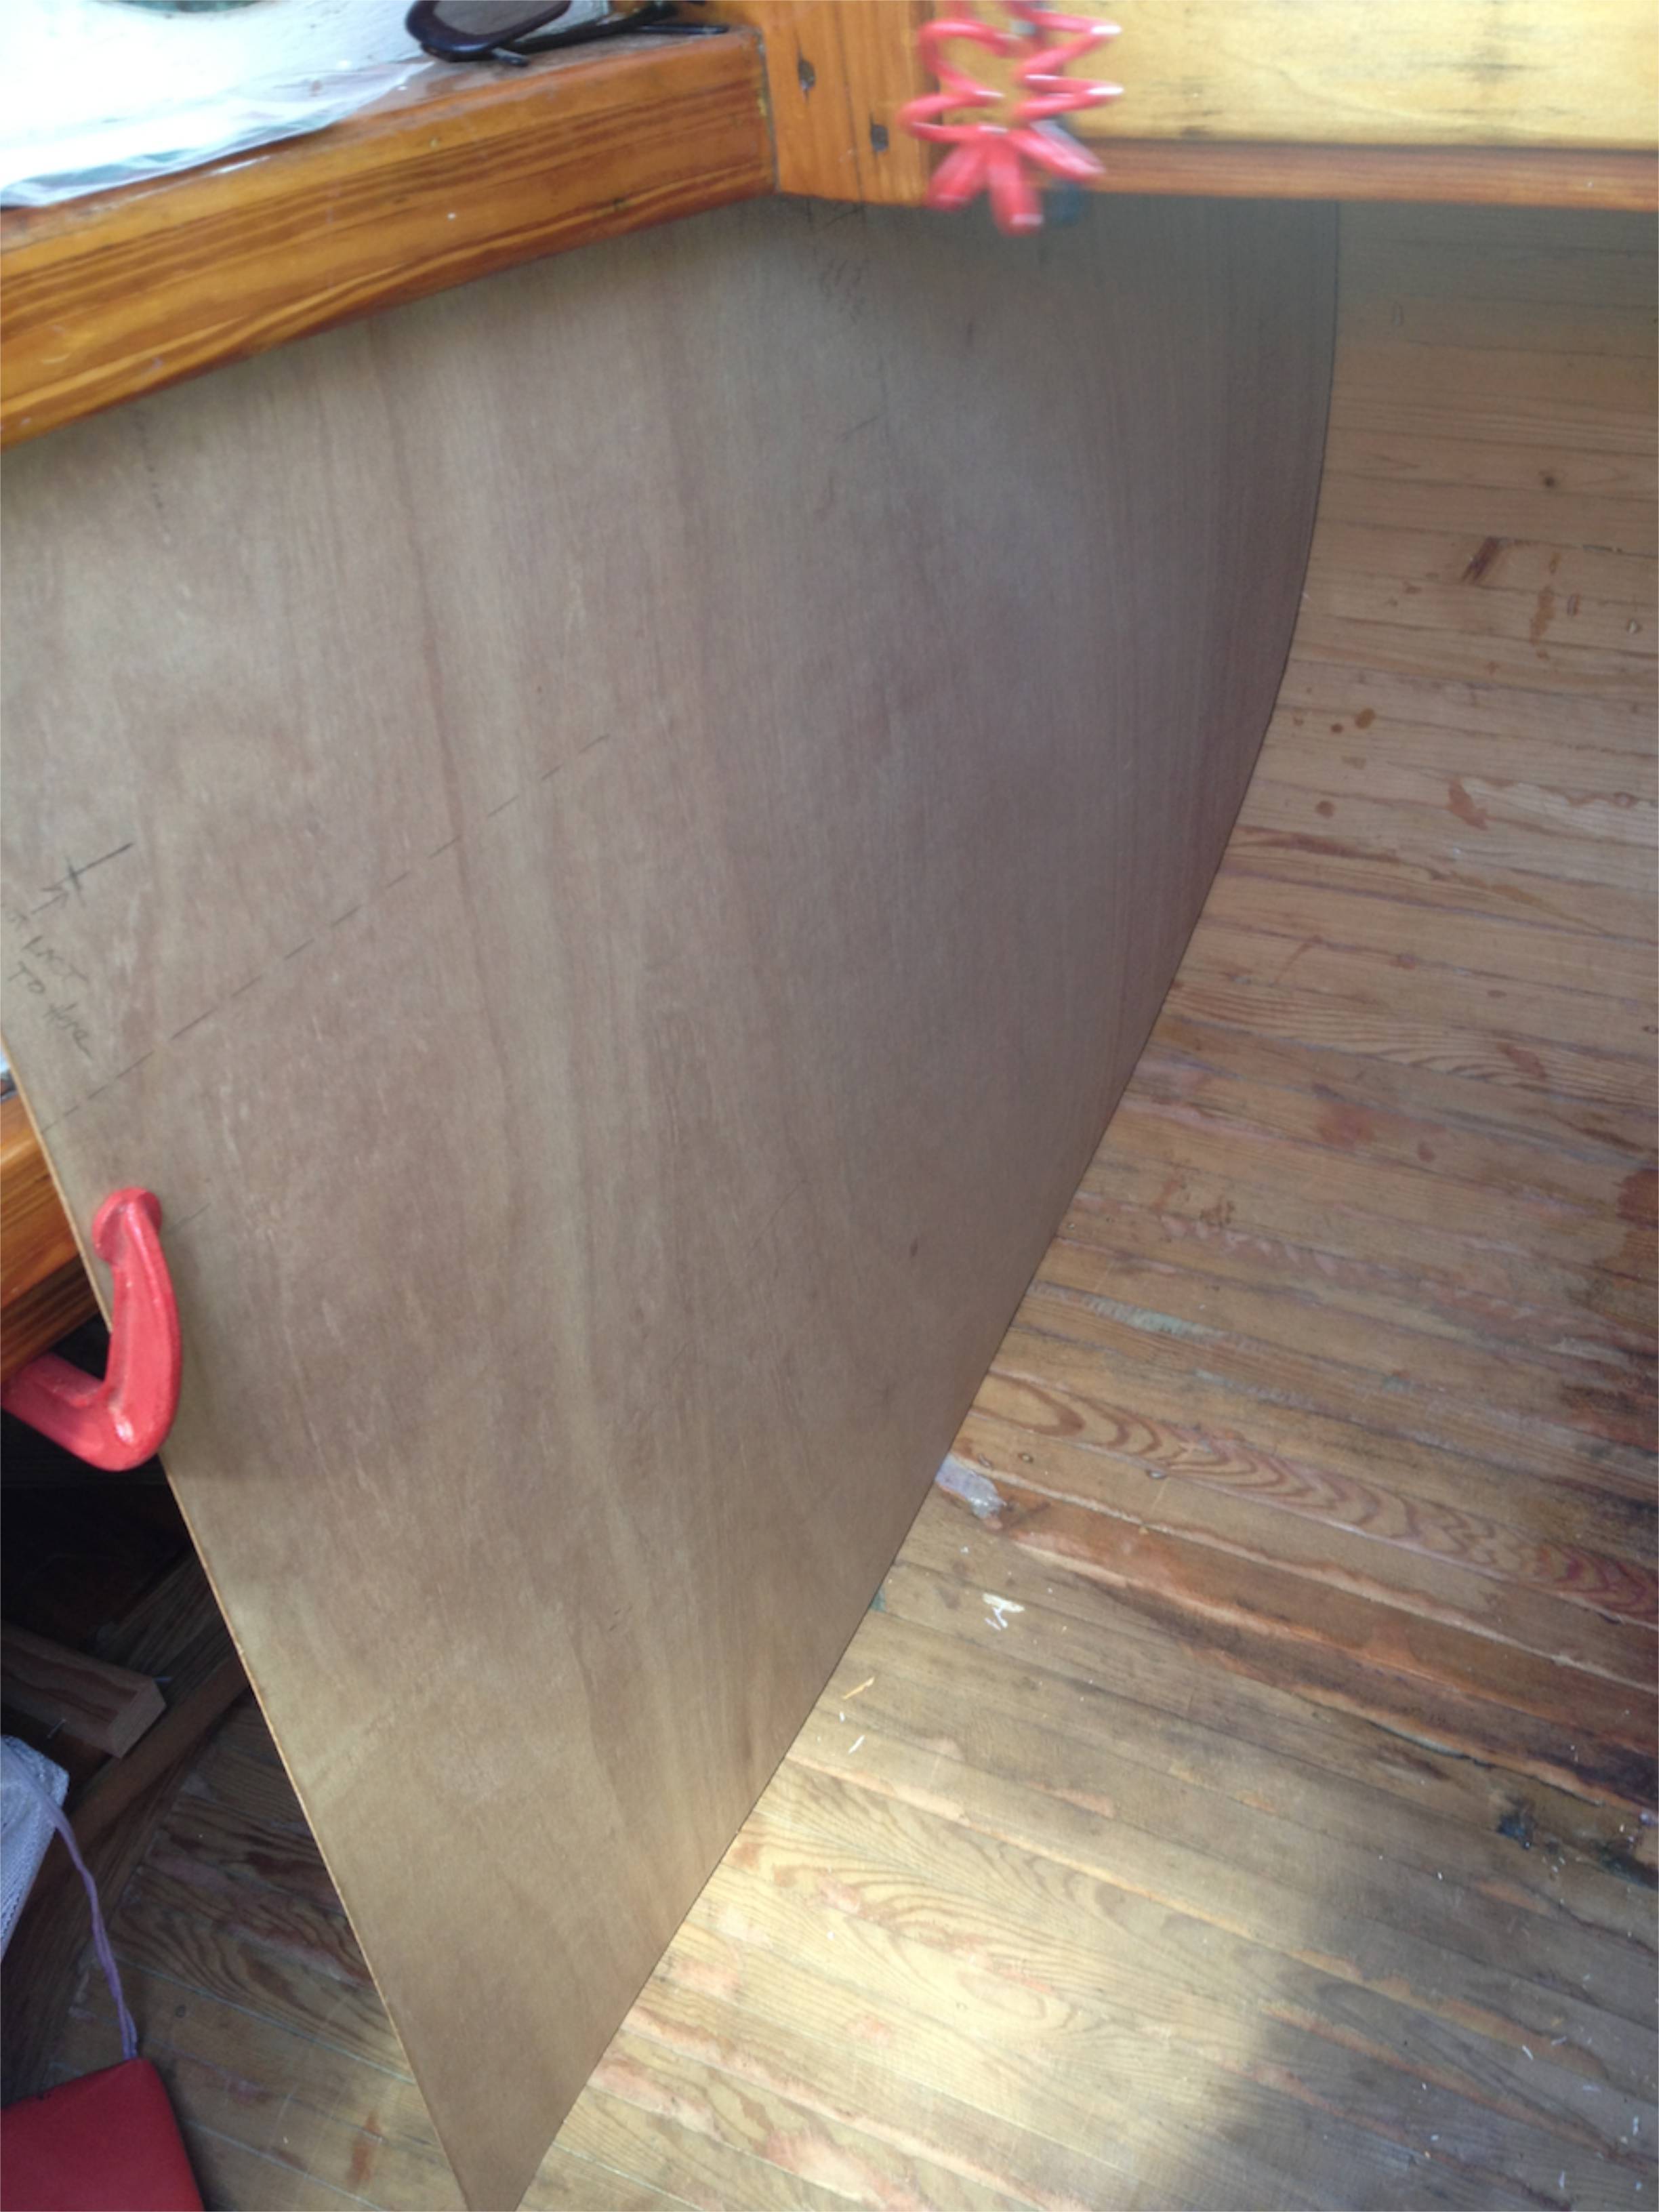 |
| Before cutting real plywood, check for fit. (Not bad, eh?!?) |
I also brought a saw with me to roughly cut out the top rail of the bulkhead. The side of the bulkhead will be 6" above the counter top. The corners will actually be rounded, but I just wanted to capture the rough shape in the pattern. I'd clean it up in the shop, later on, and duplicate the cuts on the other pattern.
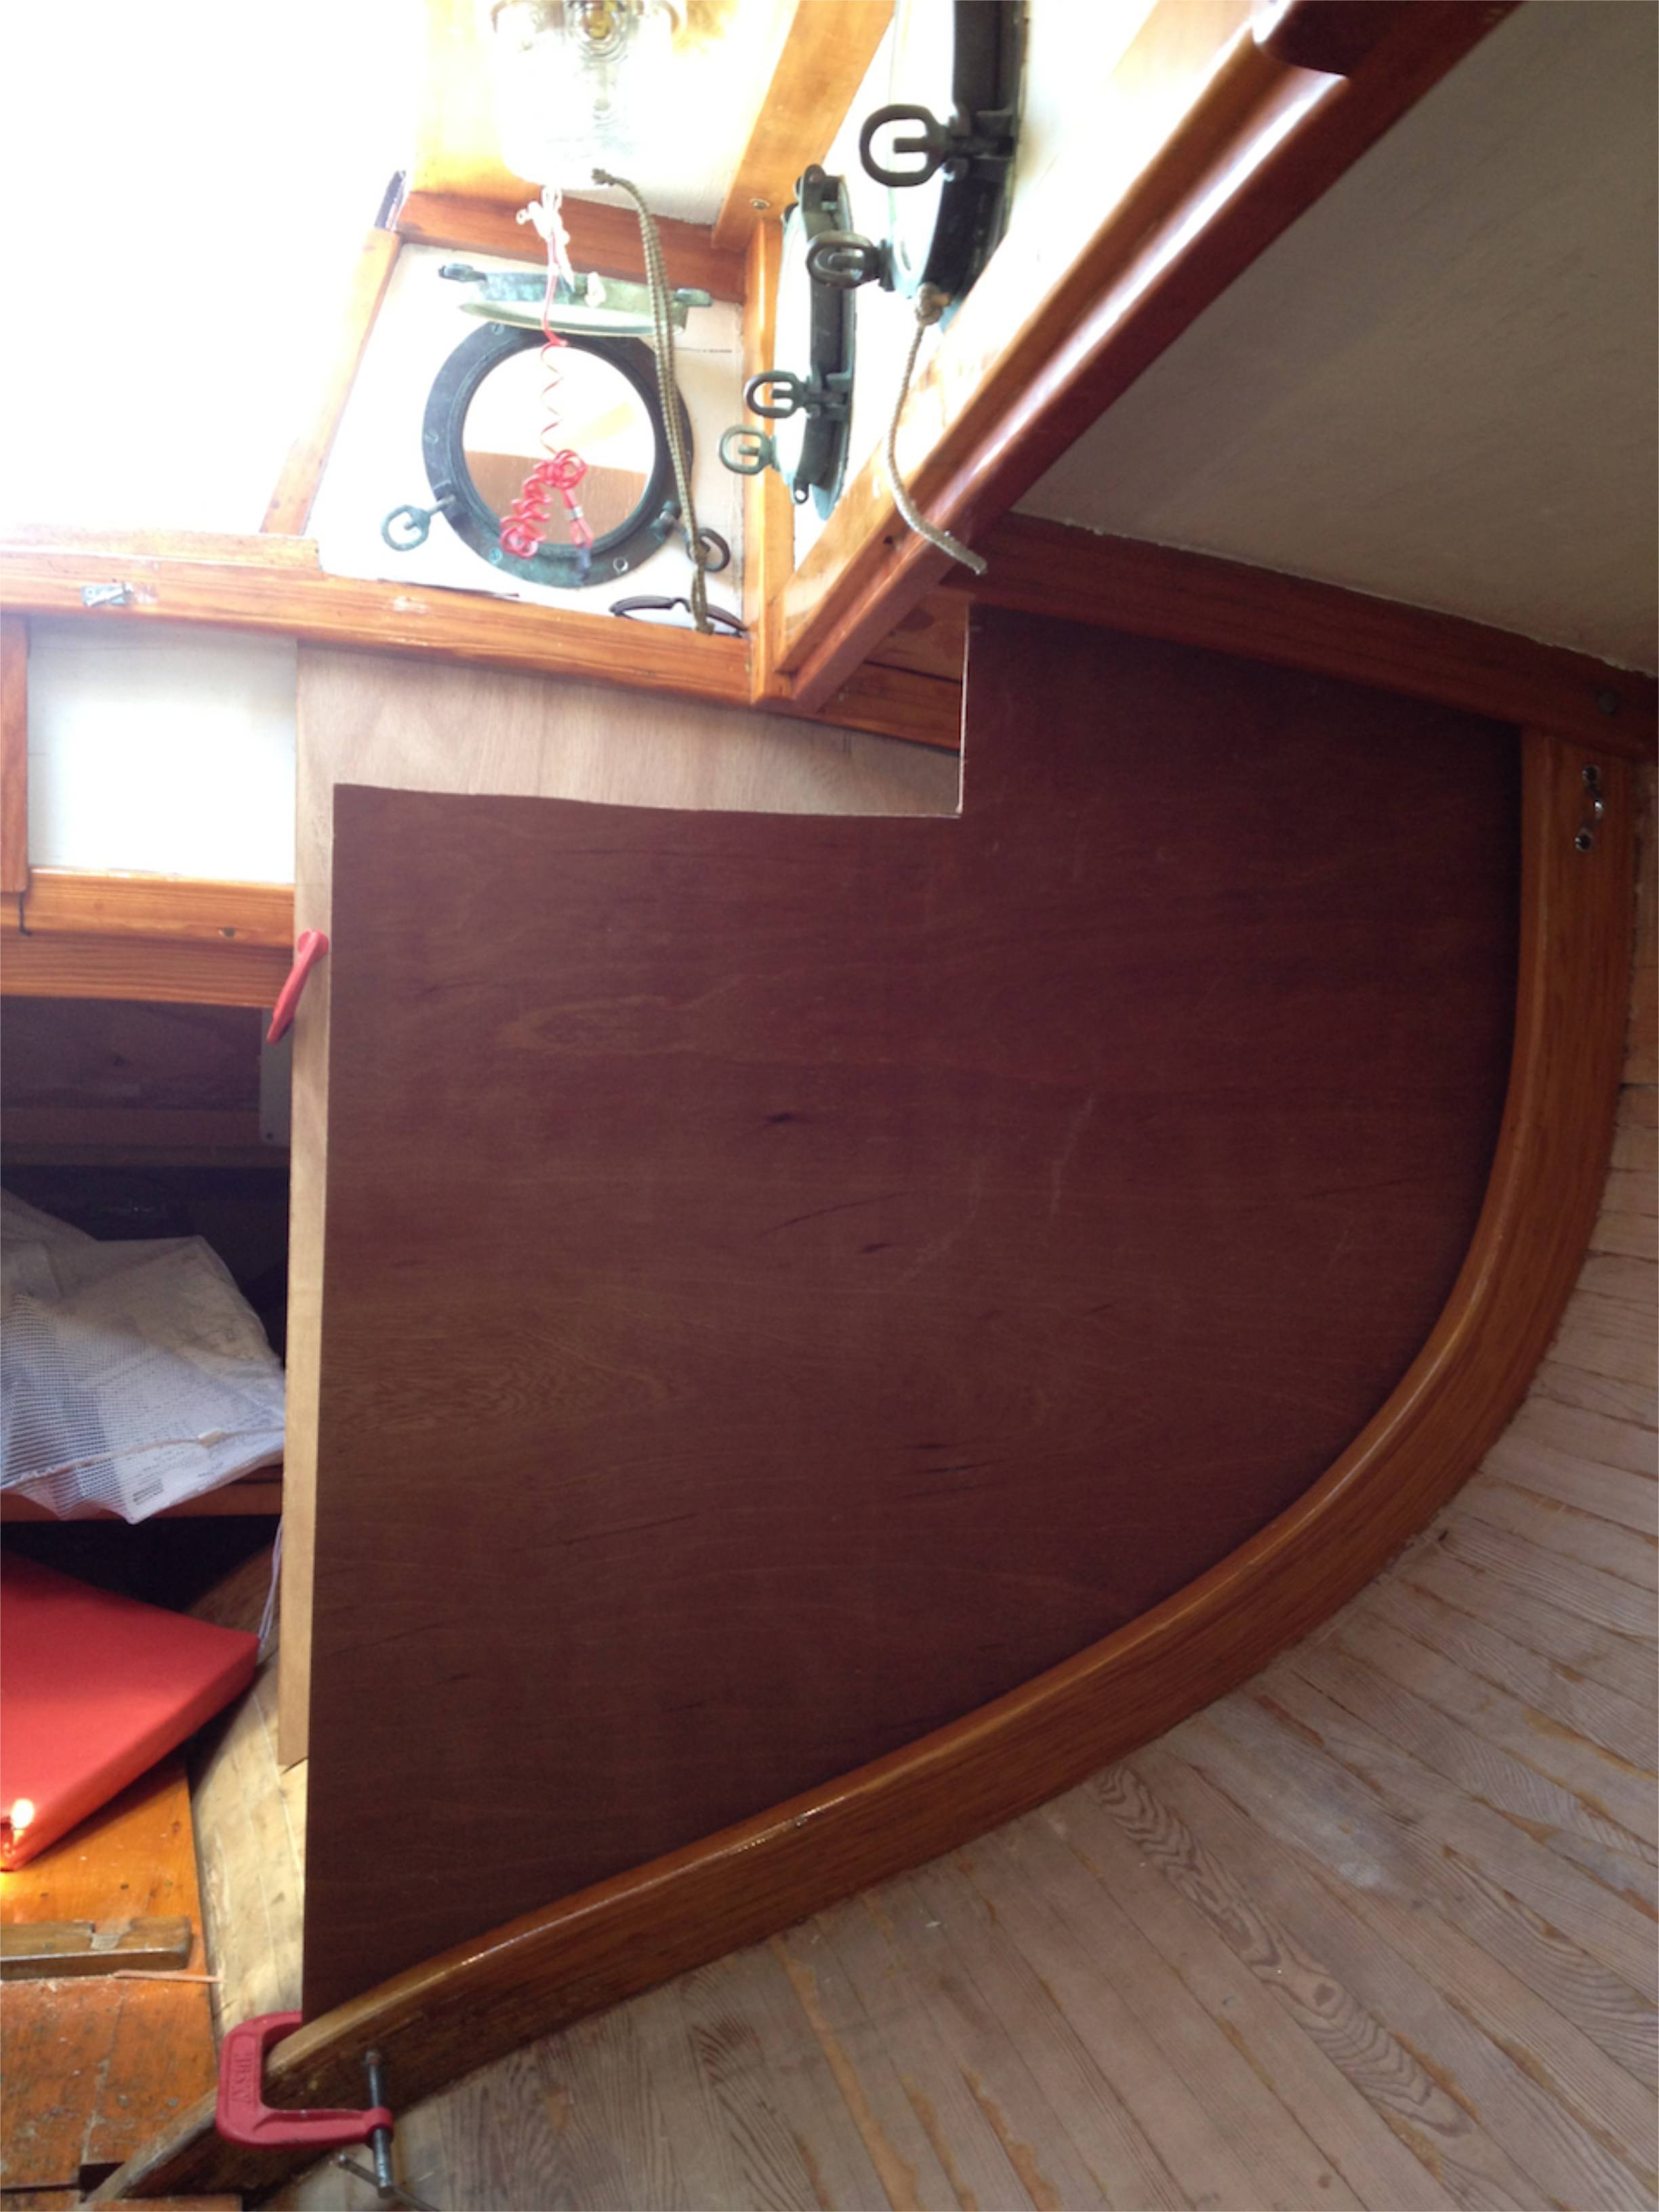 |
| Make sure the fronts line up! Again, not too bad, for the first time! |
Finally, I took the photo above to show how the two front edges should line up with each other. By 'front' I mean the left edges. Note how you can see both edges, one behind the other, and that they are parallel to each other.
I would call that 'good enough'.
With the patterns made and fitted, it was time to cut real plywood...
Next Episode: The Perfect Pump
Wow, a stripped planked boat. Welcome to the club. Hope you do not have the open seam problems I have. My Amphibi-Con was built in 1956. Lots of air space for water to come in.
ReplyDeleteNo leaks yet but she was built with epoxy, which is probably a bit stronger than the glue the had in 1956. Do you have purple seams?
DeleteVery interesting post. I'm in the middle of restoring a Glen-L Fancy Free. It's a fun project and we hope to be sailing it sometime in June.
ReplyDeleteBest photo . . . "beautiful woman holding your work" . . . great touch.
Smooth sailing, Steve :)
Steve: yes, I've been following your progress. Very nice.
DeleteI still hope you're going to slap some varnish over that epoxy!
I agree about the best photo...