| Chronos... a dirty fighter, if there ever was one. |
I started off pretty well. After testing the fit of my two patterns, I laid them out on my sheet of exterior-grade MDO plywood, trying to use the wood as efficiently as possible.
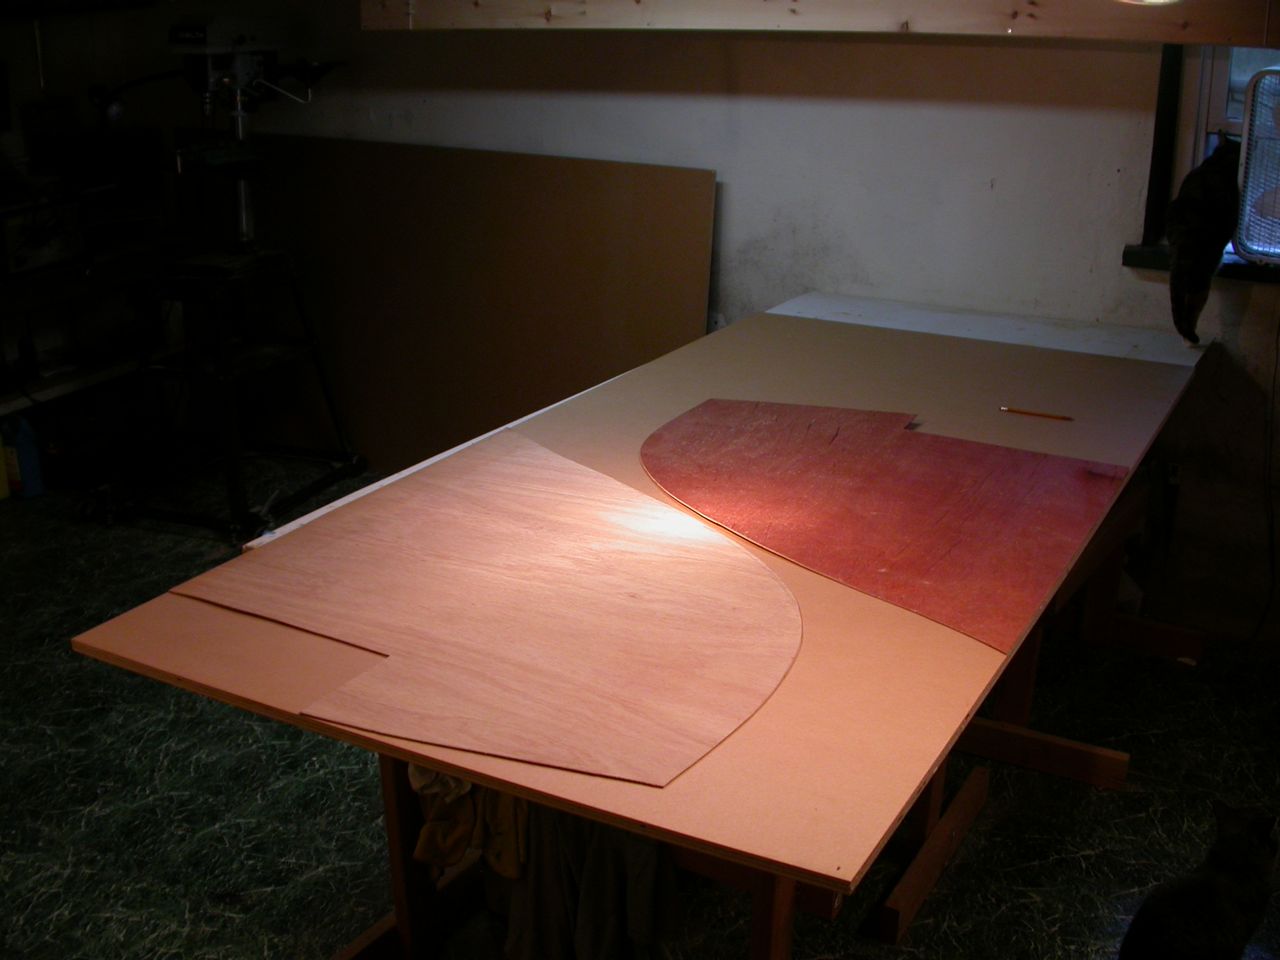 |
| Laying patterns out on plywood |
However, if you use the stiffest blade you can find, cut very slowly so you are not forcing the blade into the wood, and are extremely careful about keeping the blade vertical, you can do an adequate job. I had just a few spots that needed leveling with a chisel, afterwards.
If you know a better tool for cutting out big pieces like this, I'd love to hear about it.
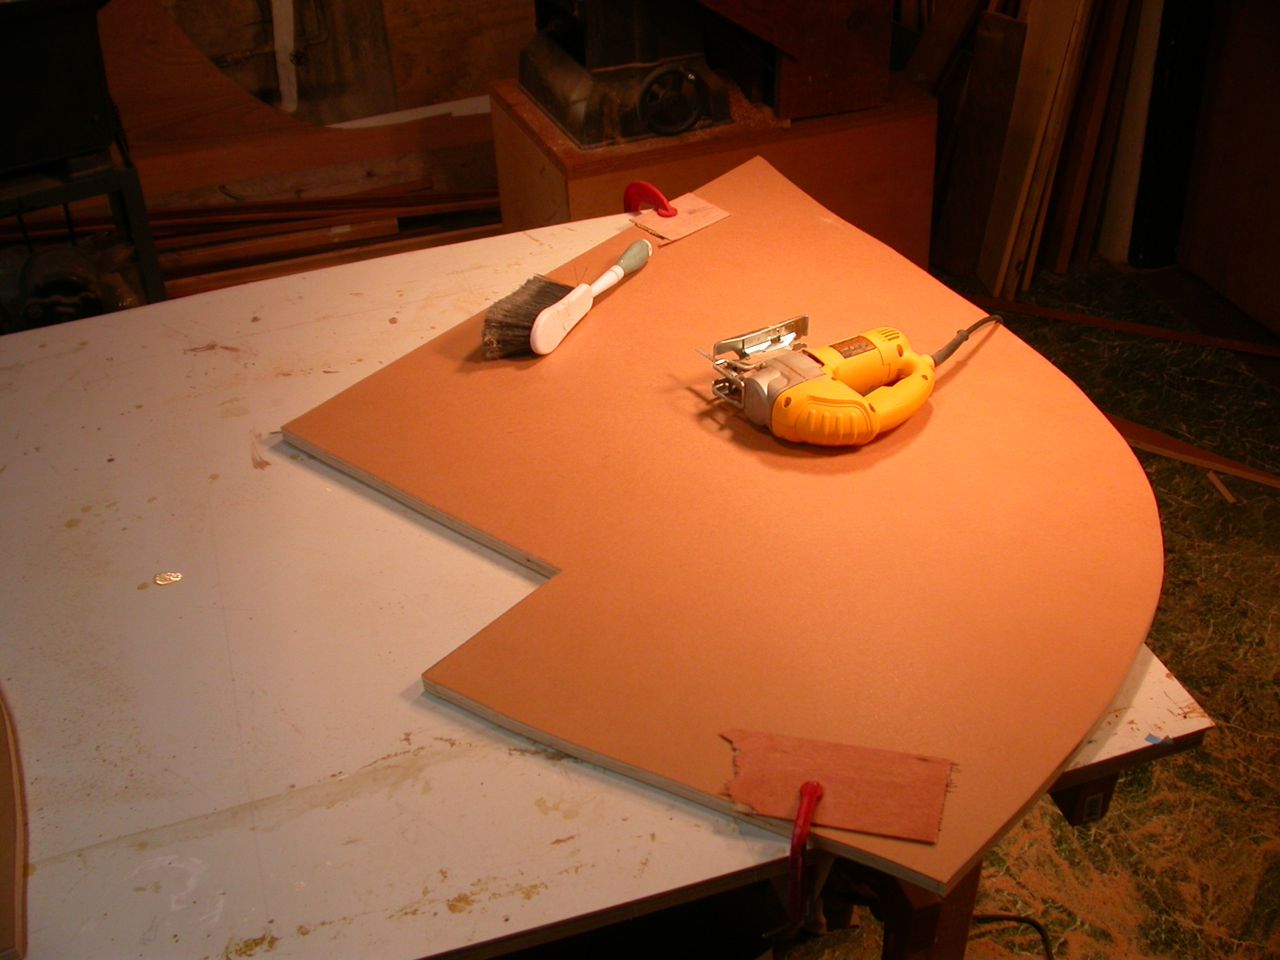 |
| Cut out with trusty sabre saw |
With the two panels cut out, it was time to start working on the teak trim. I always like to start with the hardest part, so I decided to start with the curved corner piece -- the piece that will connect the vertical edge of the panel with the top rail. You want this corner to be rounded so that if you are thrown against it in a seaway, it won't poke a hole in your ribs.
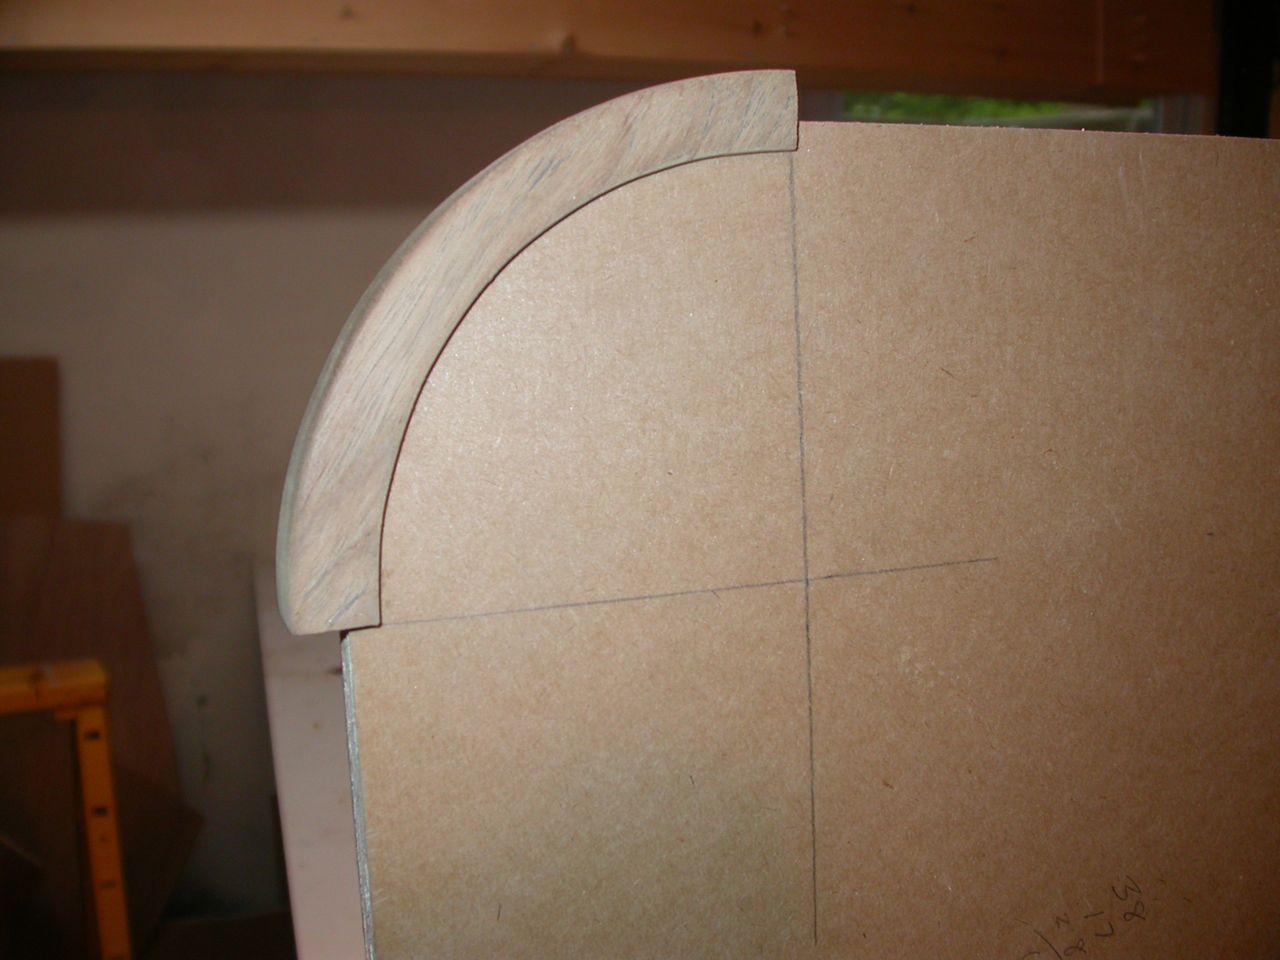
First, I made a pattern for the piece. I wanted a 4" radius curve. I have a book on this stuff, and it recommended orienting the pattern on the grain as shown below.
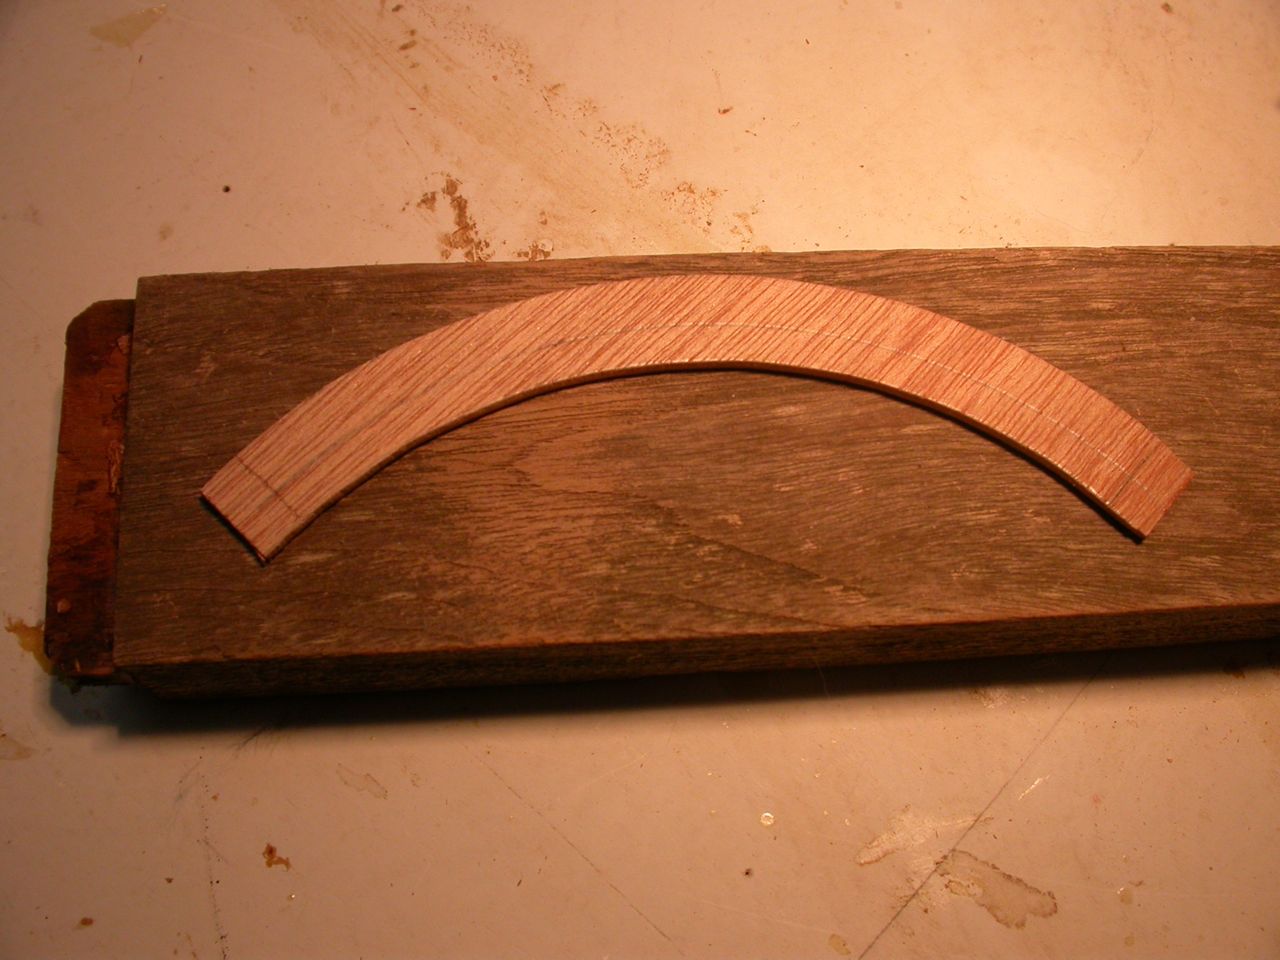 |
| Pattern for corner trim |
Here is the piece with the inside edge revealed. At this point, I realized I'd have to clamp the piece in a vise to cut the groove, so left bottom cut till later.
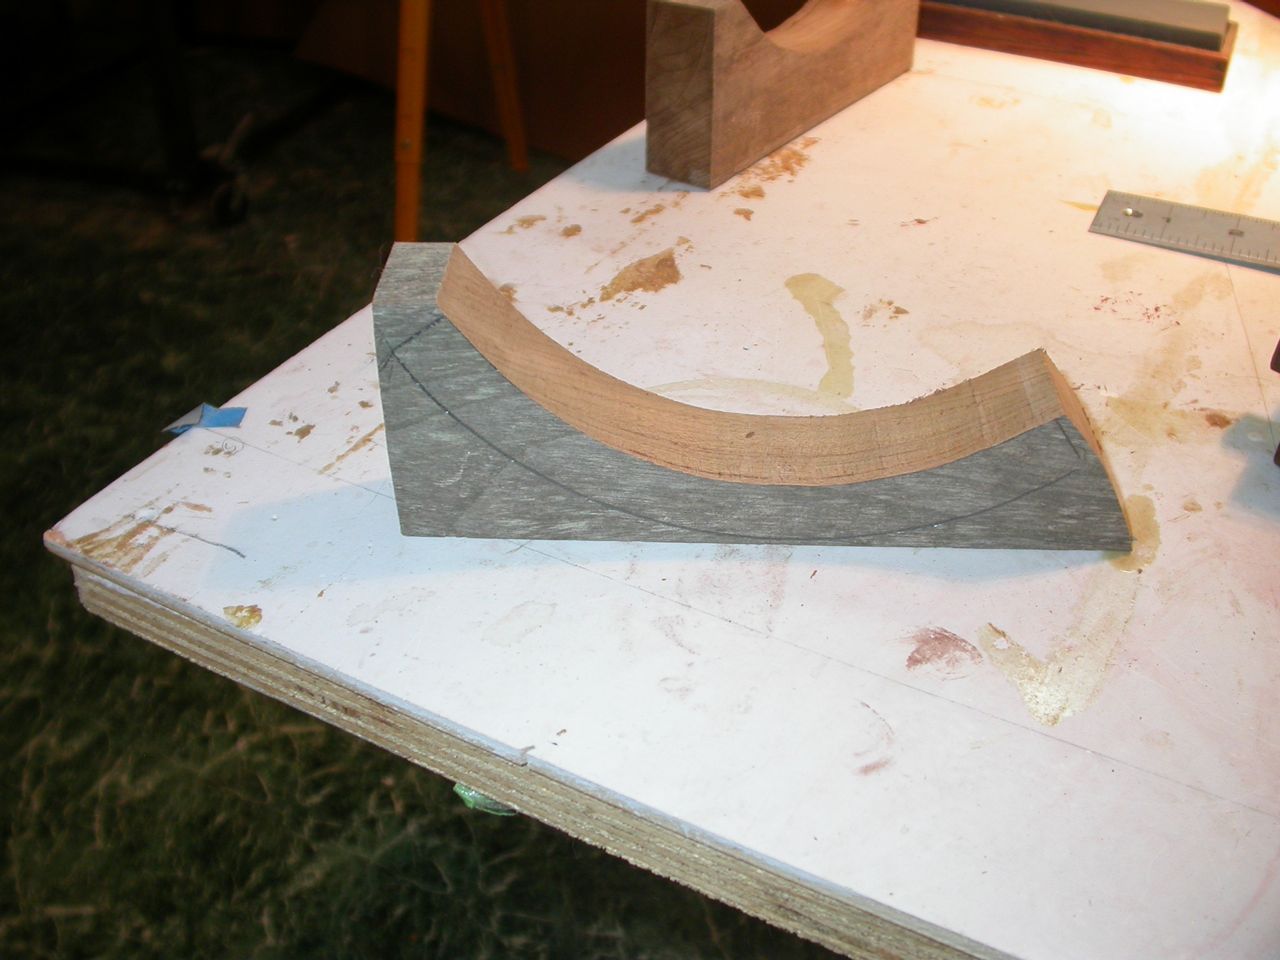 |
| Inside edge exposed, with meat left to clamp to |
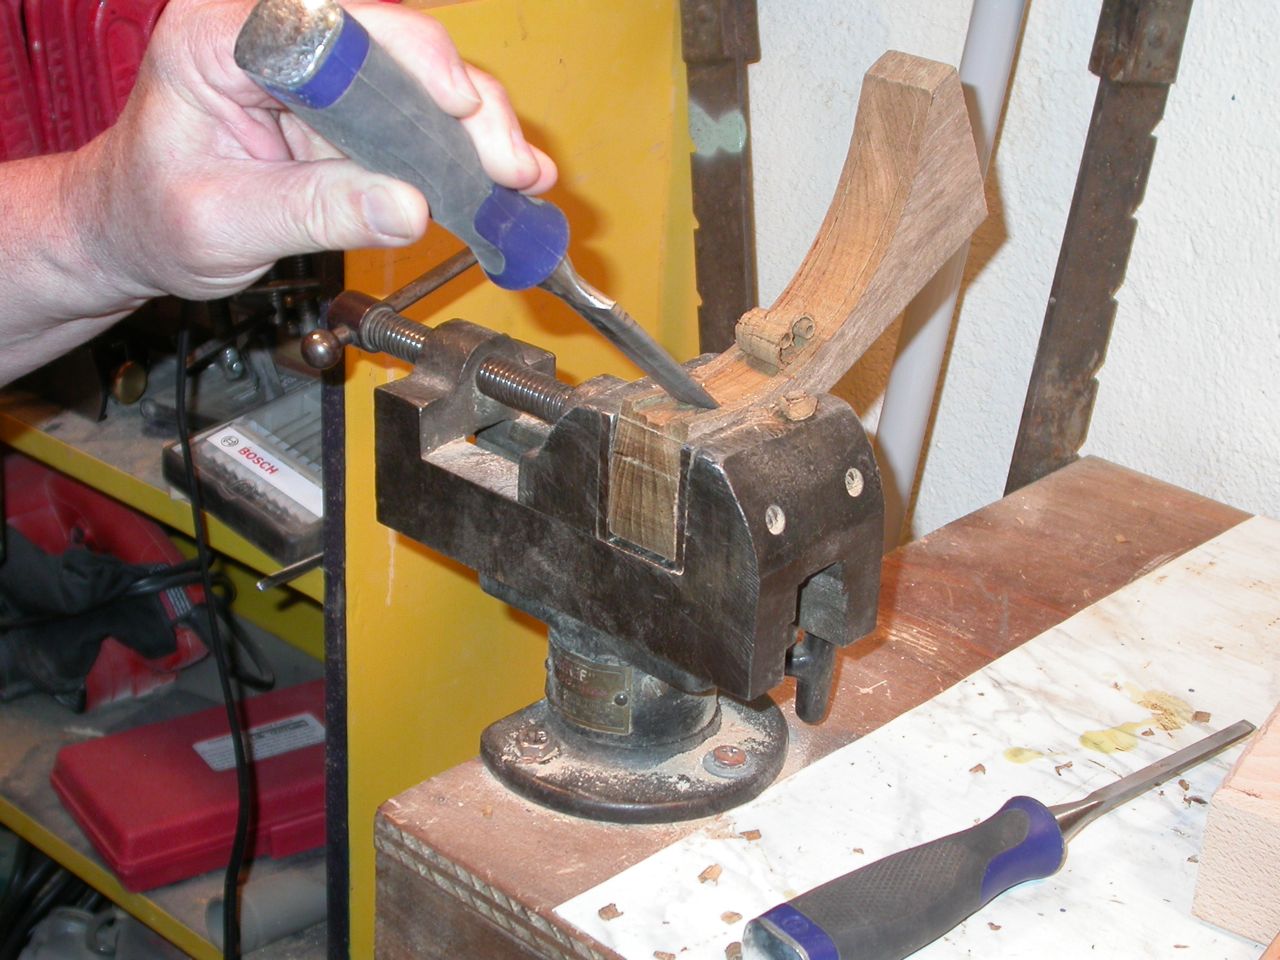 |
| Cutting channel with chisel. (who holds a chisel like that???) |
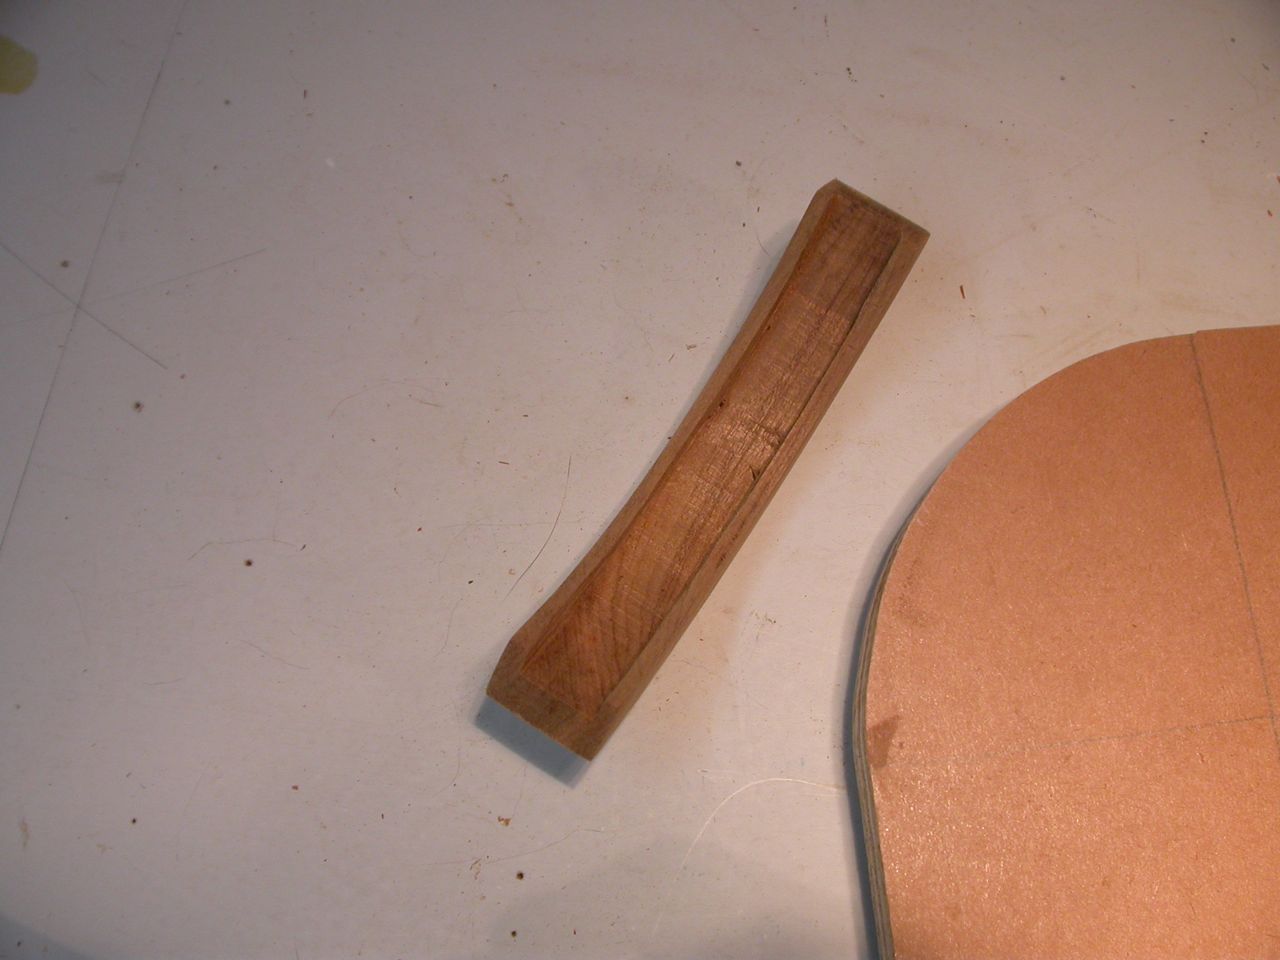 |
| Finished channel, with corner cut in scrap of plywood for testing. |
As you can see, it fit perfectly! Eventually!
 |
| It fits! |
I appealed to the Wooden Boat forum for ideas, but most of the proposed solutions entailed using a router and router table, neither of which I own. The tips were accompanied by dire warnings about what routers could do to the fingers of novice users, particularly on the curves.
I really do want to get a router, one of these days, but an inspection of my builder's fund quickly ruled out that option. At that point -- mercifully -- I was whisked off to Maine where I would have plenty of time to ponder the problem and, hopefully, find a solution.
While studying the books at the Wooden Boat School in Brooklin, ME, I found a book called "Boat Interior Construction", by Michael Naujok. It was all about fitting out a fiberglass hull, but had lots of detail on building galleys, bunks, etc., which were relevant for wooden boats, too.
Naturally, I went straight to the chapter on trim, and found these fateful words:
As an amateur boatbuilder, you are able to do a lot of things yourself, but precision cutting and milling of battens (teak trim) should be left to the professional. He has seasoned wood, profiling machines, and the experience to make these parts well.My first thought was, "Dang! You can buy this stuff??? Problem solved!"
A bit of digging on the Internet revealed that teak trim could indeed be purchase, in straights or curves (with 2" radius), with 1/2" or 3/4" grooves. I ordered enough for my little galley, and it was waiting for me when I arrived home.
I also ordered a Fuller countersink set, with plug cutters, so I could plug the screw holes. This is a set of tools I've long coveted, and I finally had a project that justified the cost.
With the right trim and the right tools, I figured it would be a snap to finish the job.
But, "Not so fast," said Chronos.
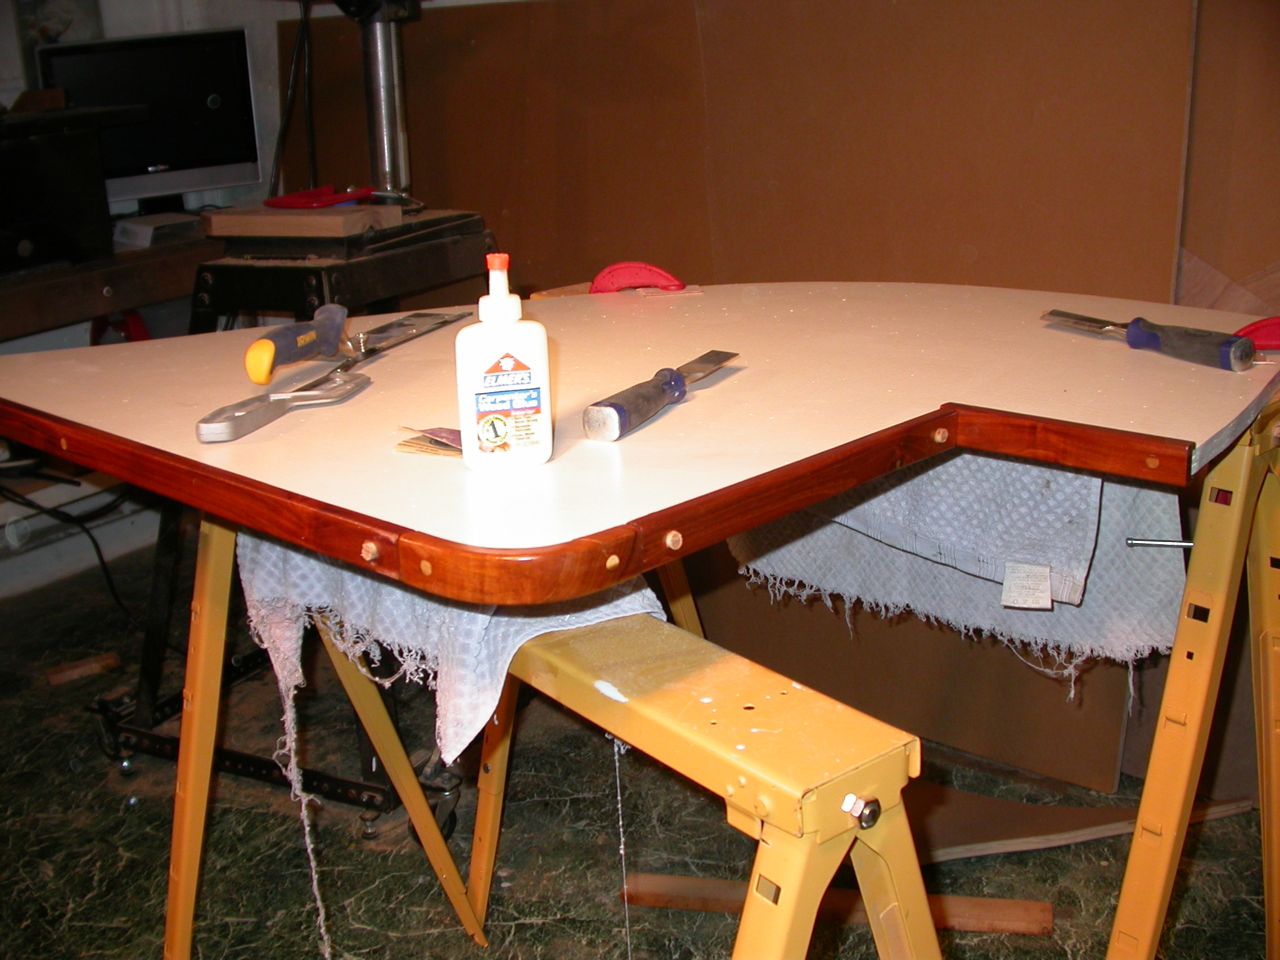 |
| Manufactured molding, varnished and half-plugged |
I have now arrived at the meat of my subject. It was indeed a simple job (sort of) to cut the trim to the correct lengths. I cut the 2" corner in the panel (glad, indeed, that I hadn't cut the 4" corner originally planned for!), made sure everything fit, removed the trim, laid it out on my bench, and began the slow process of painting and varnishing.
I used a good oil-based paint for the panels, using 'Bone White' rather than a pure white, to lend a softer tone to the cabin, and a good exterior grade varnish. Both normally take 24 hours to dry, but Chronos had arranged particularly hot and muggy conditions for this part of the job, so I often had to wait 48 hours between coats, to ensure the pieces were completely dry.
I sanded both paint and varnish between coats with 220 grit paper. It was slow work, but I was glad to think that all the pieces would be done at the same time, so I could quickly move on to the next step in an organized and efficient manner.
Ha! said Chronos.
In my despair, I didn't take pictures, but after waiting 72 hours for the final coats to dry, to make sure the paint was good and hard (can you hear Father Time's clock ticking loudly?) I began drilling holes in the trim and fitting them to the first panel.
The top rail didn't fit.
Not even close. There was a good 1/4" gap between the curved piece and the top rail. I was shocked. Aghast, even. How could such a thing happen?
Even worse, the top rail was short on both panels. How? Much as I pondered this question, I could not come up with an answer. Even as I write this, its a mystery. I must have done something wrong, but what, I do not know.
Anyway, after throwing a bit of a tantrum, I walked away from the project for a couple days, then went back and cut two more rails, making double, nay triple-sure they fit just so.
But if you've ever done any varnishing, you know that I was back to square one. I couldn't finish the project until those two little pieces were varnished properly.
Thinking I might as well do whatever I could do to speed the process along, I fastened the finished trim pieces to the panels and began plugging the holes. I'd never done this before, but it seemed a simple process. Just cut the plugs, 'glue' them into place, let the 'glue' dry, trim them off flush with the surface, and then varnish over the plugs.
Easy-peasy, right?
I'd read somewhere that for bright work, you should use varnish as glue, rather than glue as glue, so to fasten each plug in its hole, I dabbed both the hole and the plug with varnish, drove the plug firmly into the hole, and waited 24 hours for the varnish to dry.
However, when I began trimming the plugs, 3 of them popped out of their holes during the trimming process. More gnashing of teeth and rending of garments. Chronos! Again!
The upshot was that my careful schedule as all a-scramble. Half the project was assembled, but the mis-cut and broken bits were back on my work bench in various stages of completion. I sat in my moaning chair, bewailing my fate, but after a good cry, got up, reasoning that there was nothing for it but to plug along, finishing each bit when it was ready to be completed, letting the glue and varnish requirements drive the process, as they always do.
Amateurs like me must build in serial, one thing after another, but professionals can't do it this way, or they would never finish the job. Somehow -- and exactly how they achieve this is the greatest mystery of all to me -- they are able to work on things in parallel, and avoid making mistakes that throw their schedules off.
It's the same as the difference between home cooks and professional chefs, I guess. Somehow, the professionals are able to put together a meal in 15 minutes, when it would take the home chef an hour and half.
This is Chronos' secret... and it sure is a good one.
 |
| Side view showing fit and 'interesting' variation in wood color |
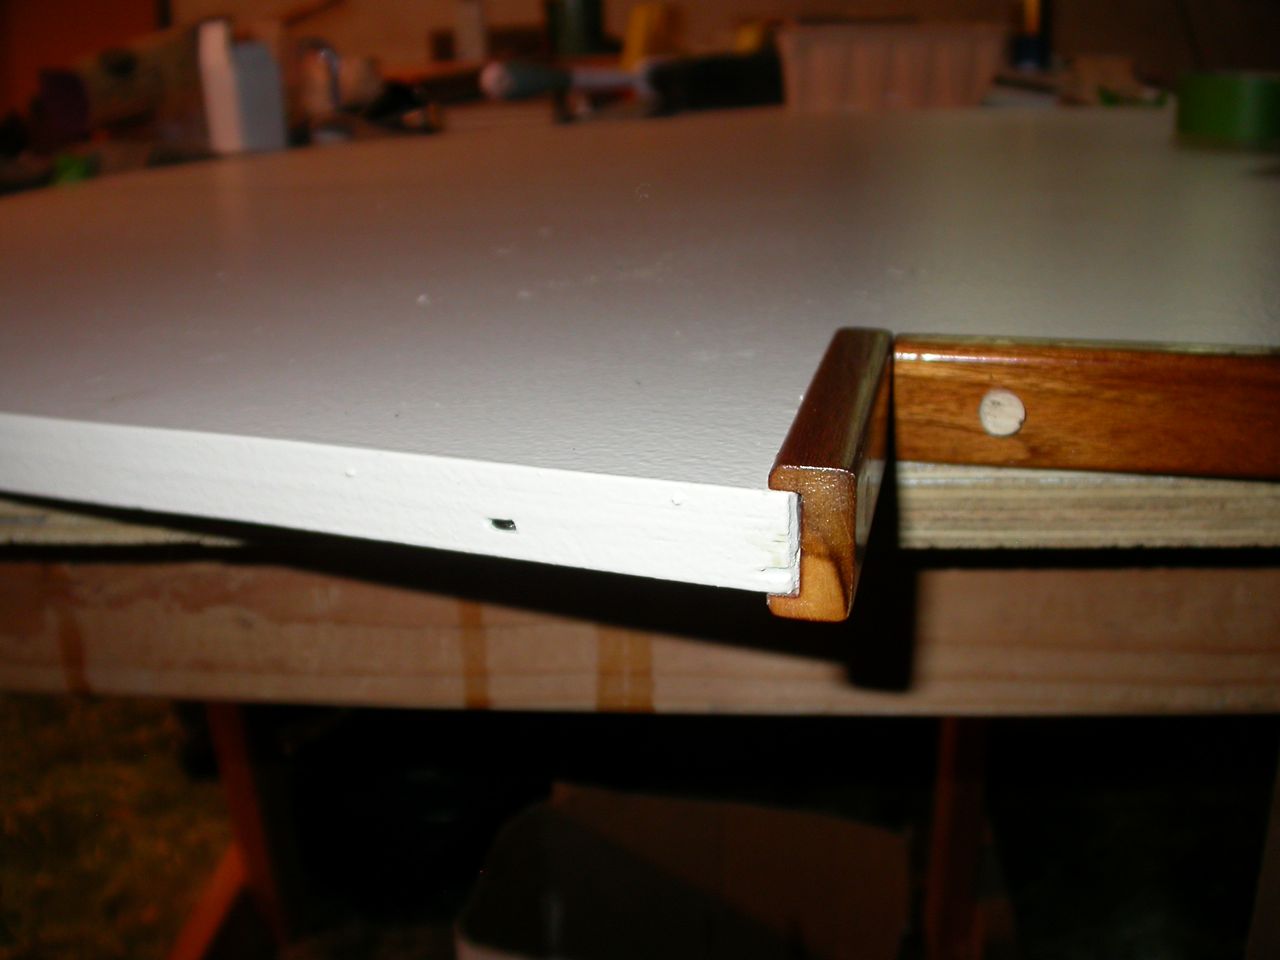
One final note, when plugging the holes, I noticed something odd: though I cut the plugs from off-cuts of the teak molding, some of the plugs were good color matches, and some -- like the one above -- were not.
This mystery was more easily solved than some others: apparently, the bought molding -- machined by 'professionals' -- is made of lesser wood than I would have chosen for the job. Note the cross-section of molding in the photo above. The upper half of the piece is dark brown, while the lower half is white.
Sapwood? I'm not a teak expert, but that's my guess. Only time will tell how it holds up, but if I had to do it over again, I'd be very tempted to do my own milling, to ensure quality wood -- even if it meant another week's in Chronos' hands.
So, live and learn.
Here are some extra plugs, and you can see the color variation in their cross sections.
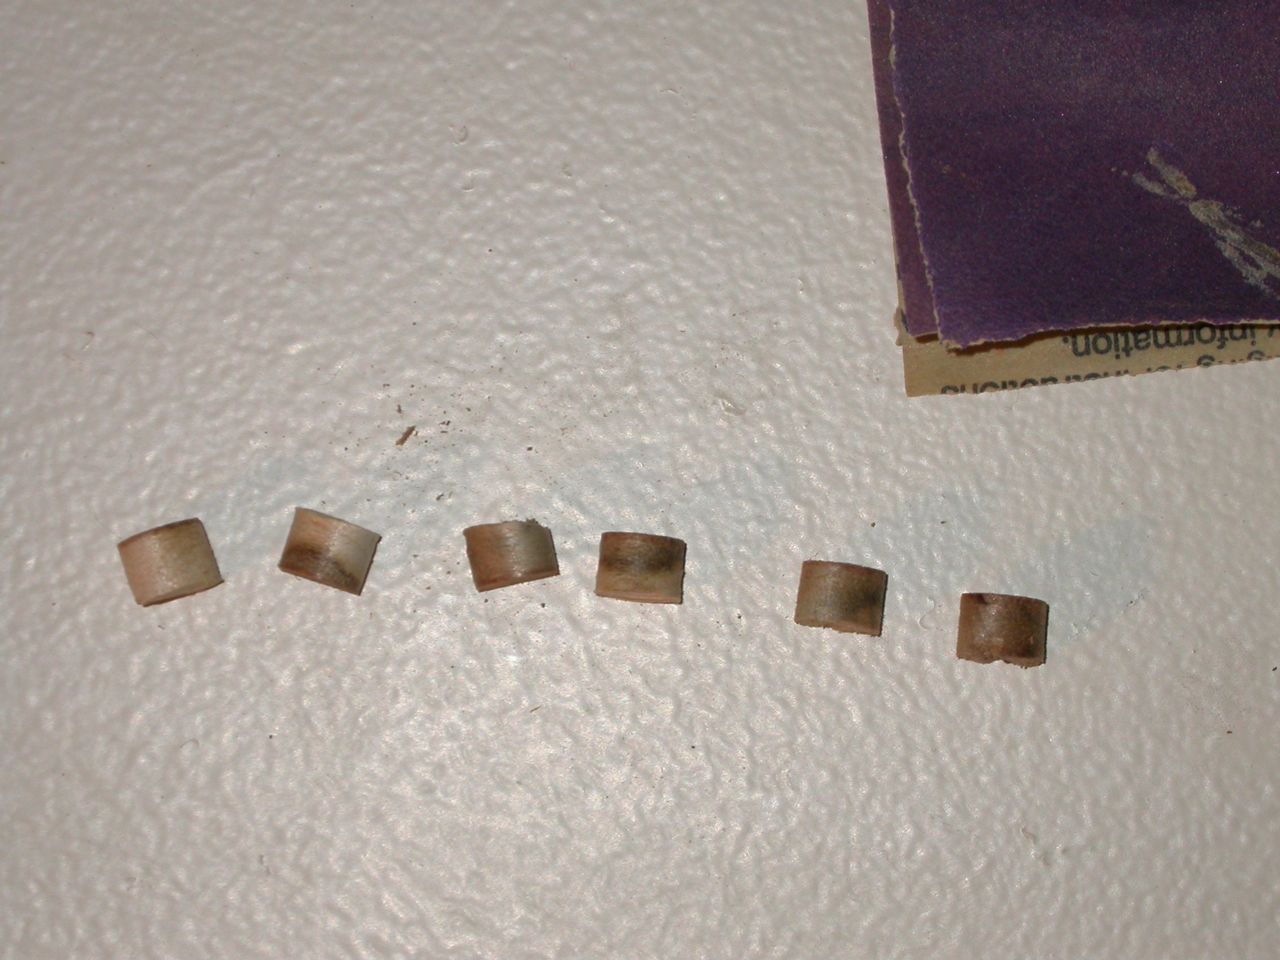 |
| Variation in plug colors |
Next Episode: Measure As Ye Judge
A "jigsaw" is fine provided you guide it dont force it. In particular on corners turn the saw around using the front of the blade as your pivot point not twisting with your wrist. Practice on scrap material until you get it right. Also mark out & cut from the back of the sheet where possible.
ReplyDeleteYes, that's basically what I do... slow and careful. I just wonder if there's a better way to do it.
DeleteTry using a router. I used a laminate trimmer to cut out all my patterns for my i550 sailboat.
ReplyDeleteNoel
Can a router cut through 3/4" plywood? Or do you mean cut it out roughly with the jigsaw and then trim to the line with the router? That might be a good approach... if I had a router ;-)
DeleteA router sounds like the best idea to me. You'll get that smooth even cut. It's easy to see that you are a perfectionist; your work is outstanding.
ReplyDeleteHey, come on over and see my launch day photos. Gypsy Rose is in the water, at last!
Steve
She looks great! I just hope you varnished over that epoxy.
Delete