"That's the beauty of steel boats," they said. "If you wonder if something is rusting, just cut her open and look. You can always weld her shut again."
They had done just that several times, to fix tanks and other things. No need for that kind of work on Petronella, but there was one steel job that I had on the schedule for our St. Mary's haul out. Thanks to the Langford's example and encouragement, I was sure we could tackle it.
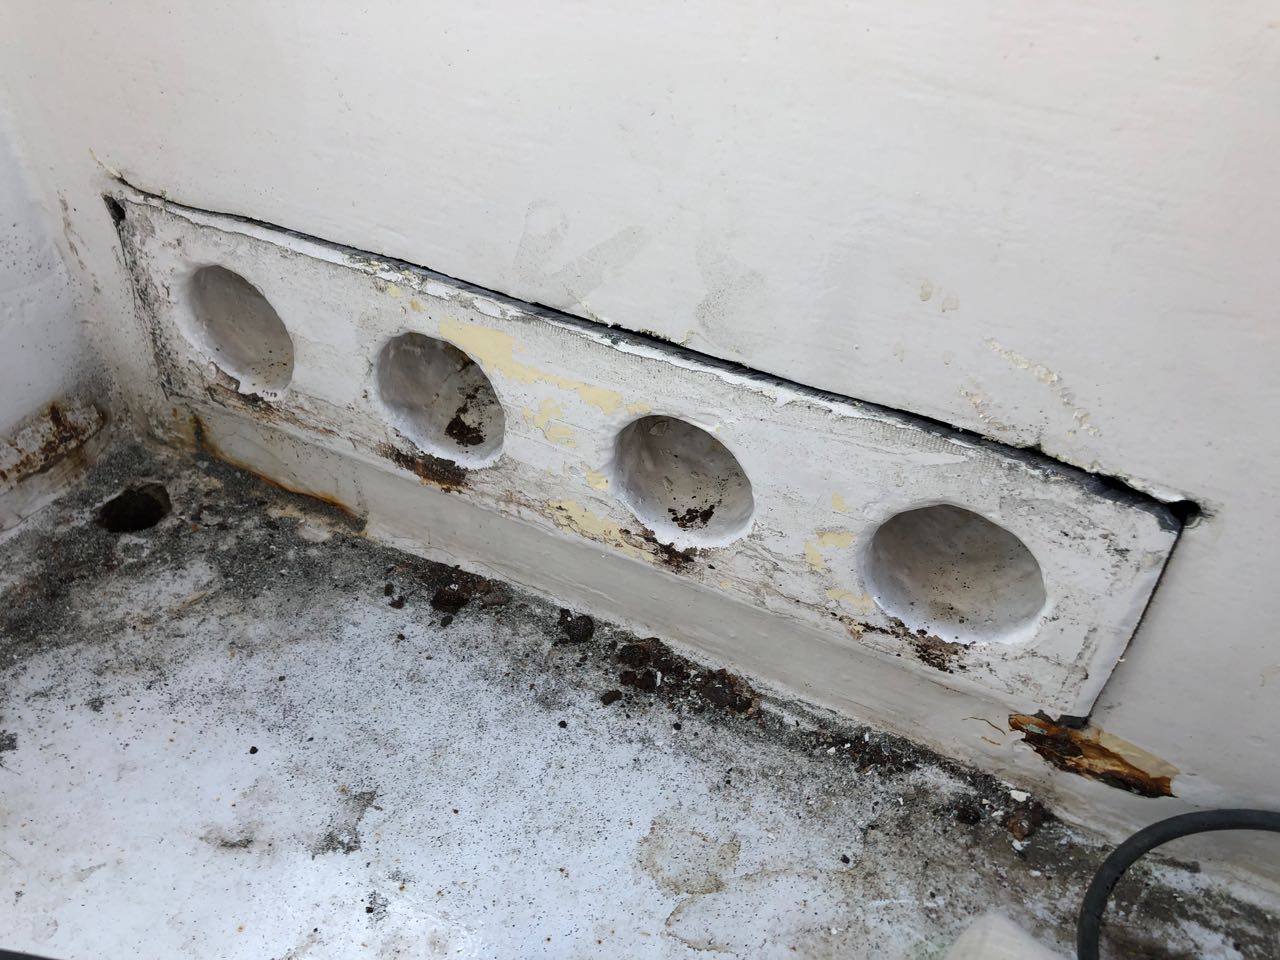 |
| Cutting out the Engine Vent Assembly |
My plan was to cut out the whole vent assembly, and then have a welder fabricate a new one. The first problem was to cut it out in such a confined space.
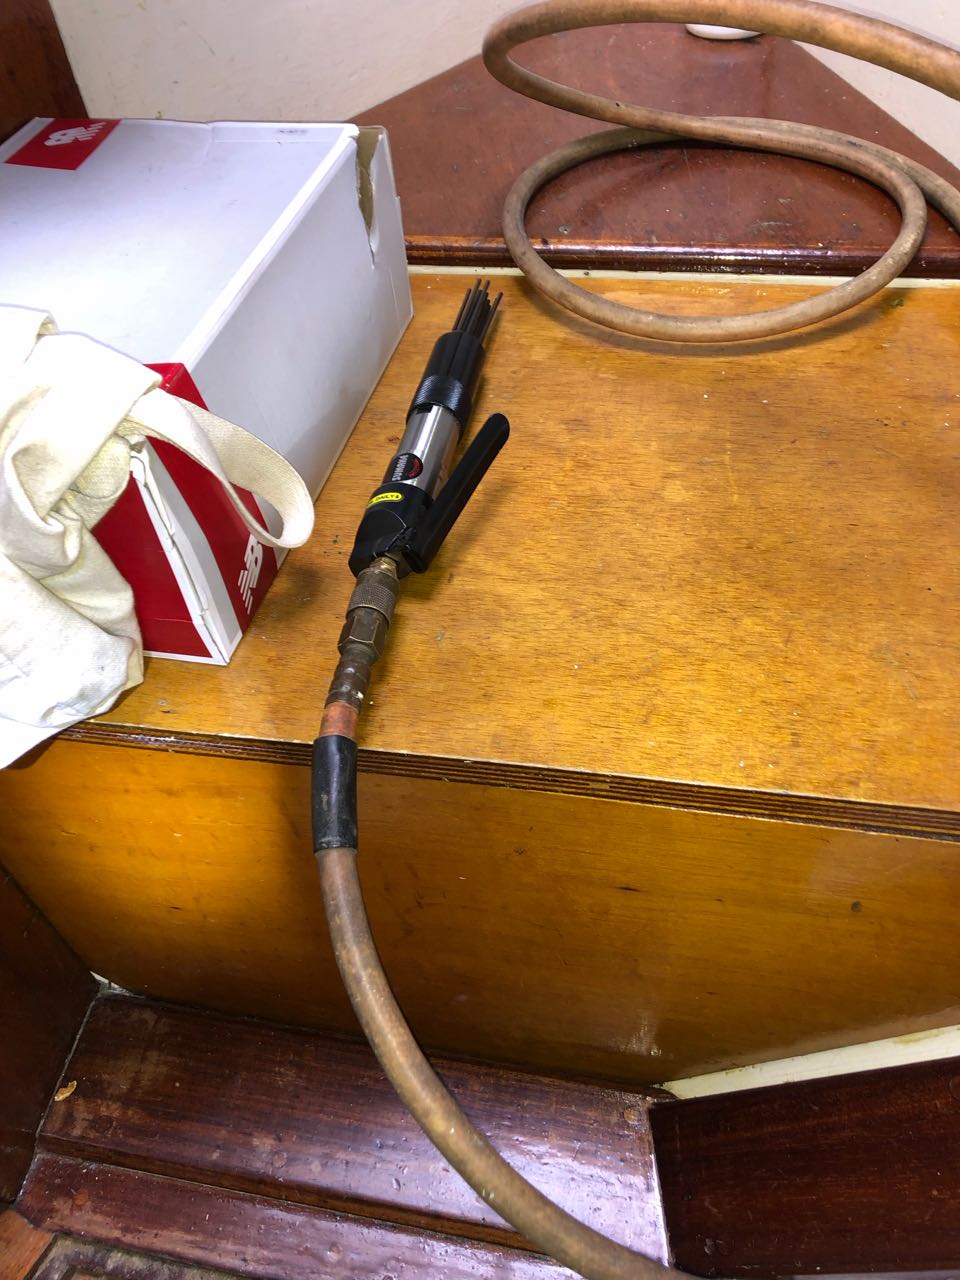
My jigsaw, equipped with a metal cutting blade, made short work of two sides, but it was too large to get to the other two sides. I tried several tools, including a bare hacksaw blade, but the guys in the yard recommended an oscillating multi-tool. I'd seen these in hardware stores, but had no idea how they worked. Turns out, they work pretty well at cutting steel in confined spots. It is easy to burn out the rather expensive blades, but once I backed off and let the blade do the cutting (always a good idea with a cutting tool), it worked great.
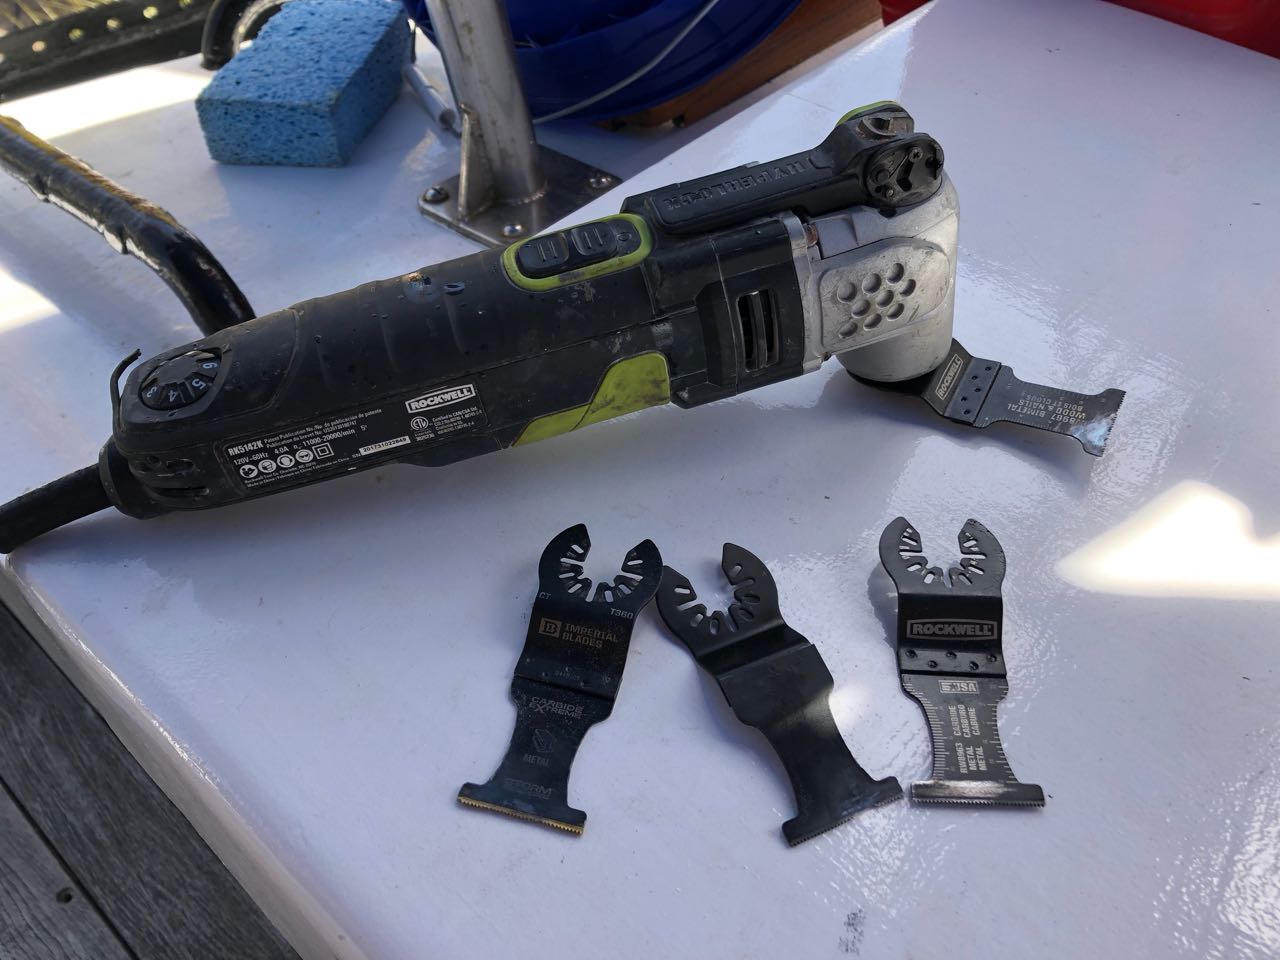 |
| My new favorite tool |
It was definitely time to replace them!
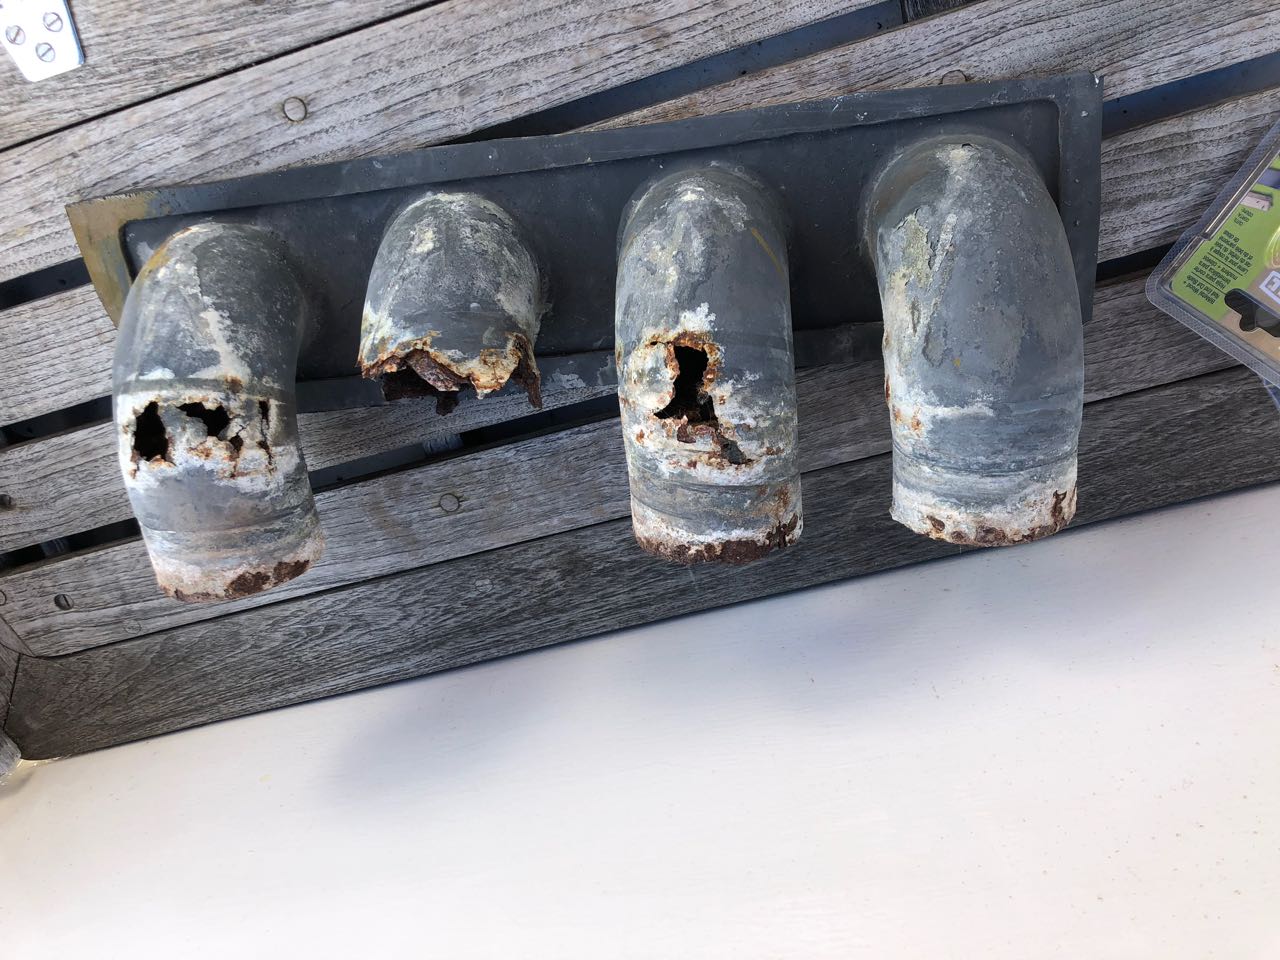 |
| The old vent assembly |
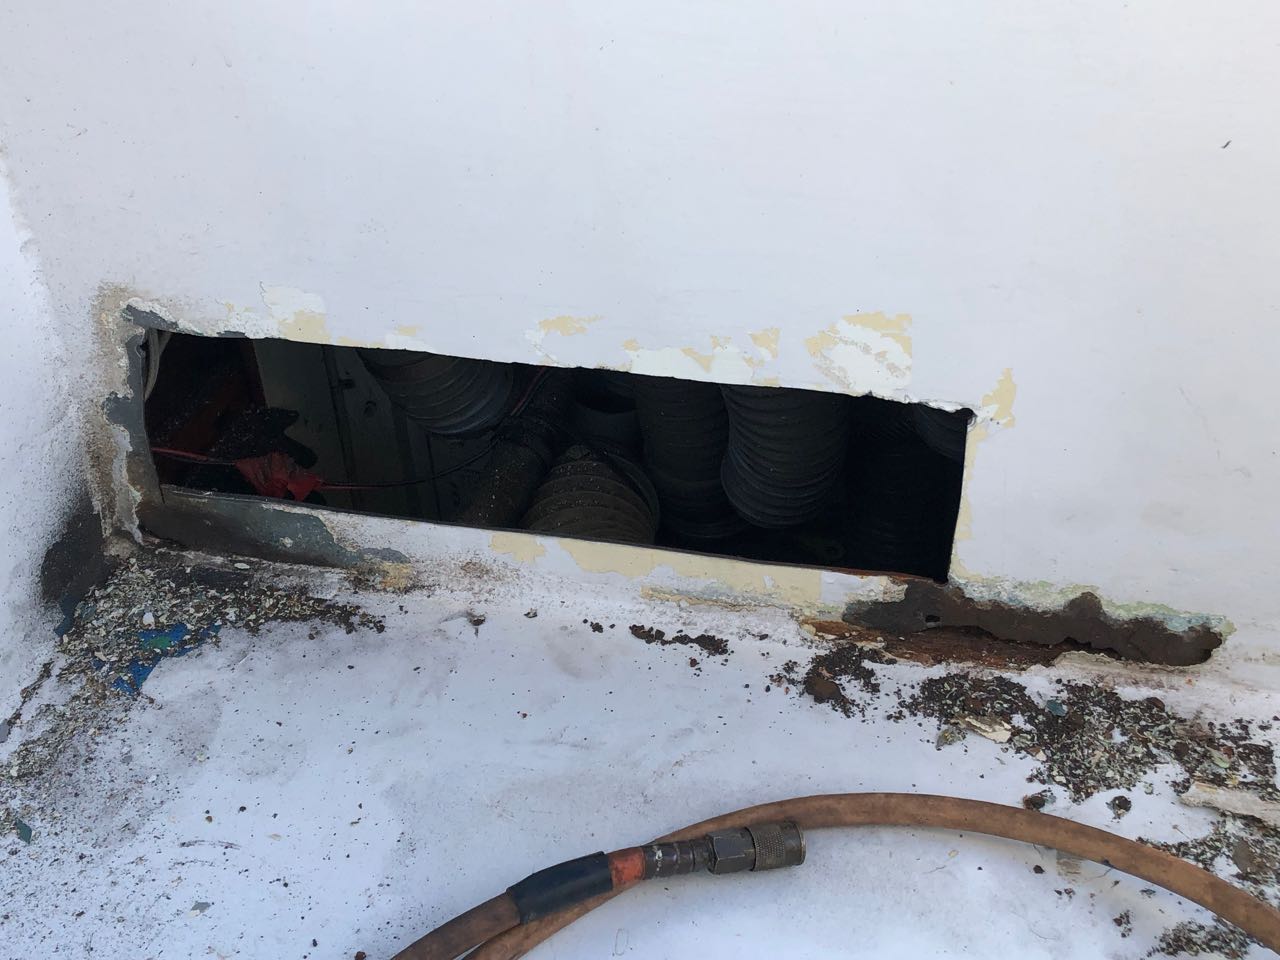
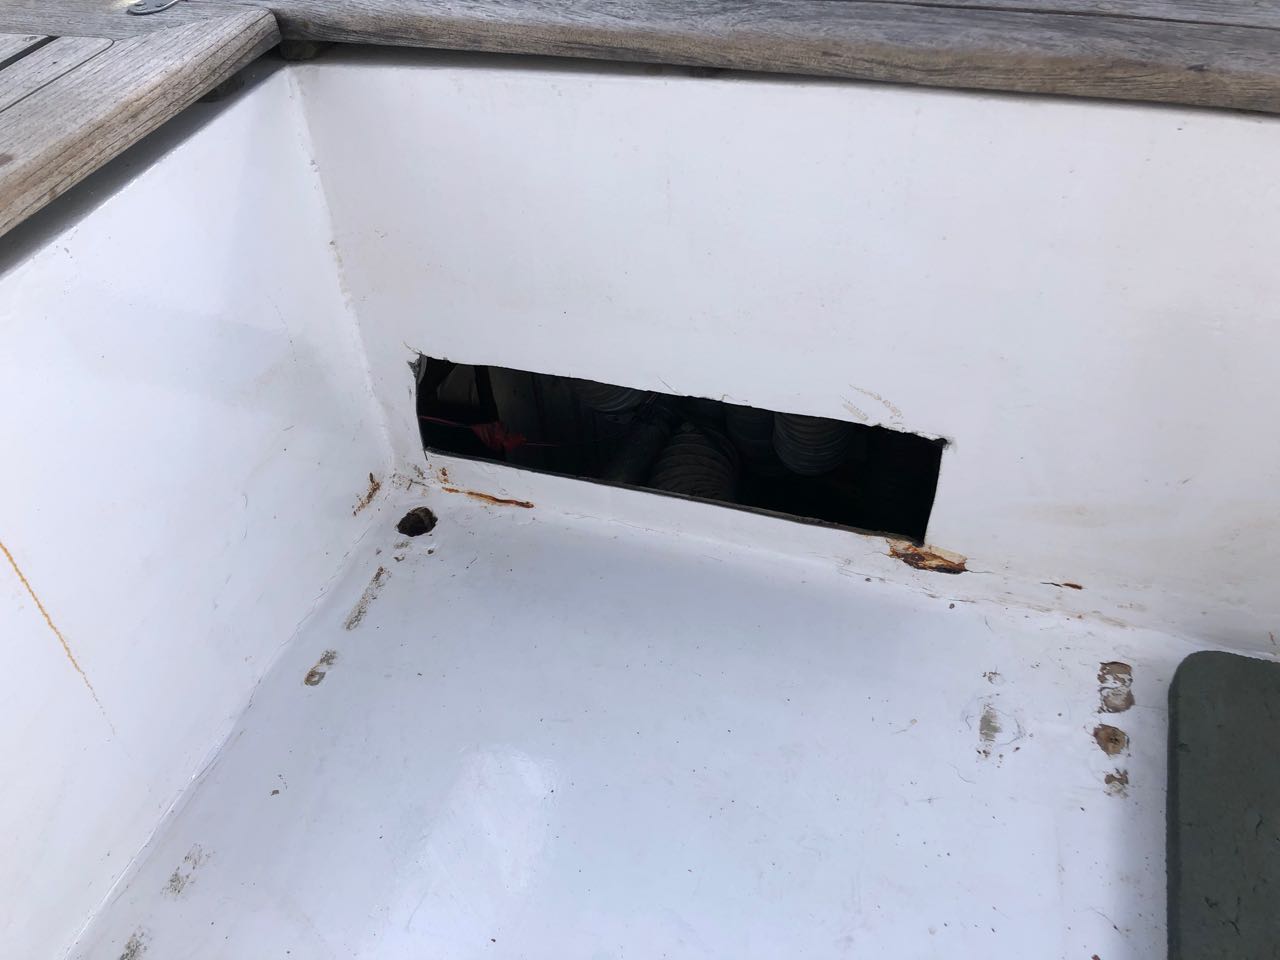 |
| The resulting hole in the footwell |
So, I gave the old vent assembly to Rocky at St. Mary's so he could fabricate a new one. Meanwhile, I wanted to clean up some of the rusty bits you can see in the photo above, prior to painting the area.
I set about this job relieved that I had had the nerve to tackle this project and that a major problem would soon be fixed.
 |
| Air-powered needle gun |
It worked great, and I discovered that the needle gun was also good for opening cans. As in 'can of worms'.
 |
| What the needle gun revealed.. |
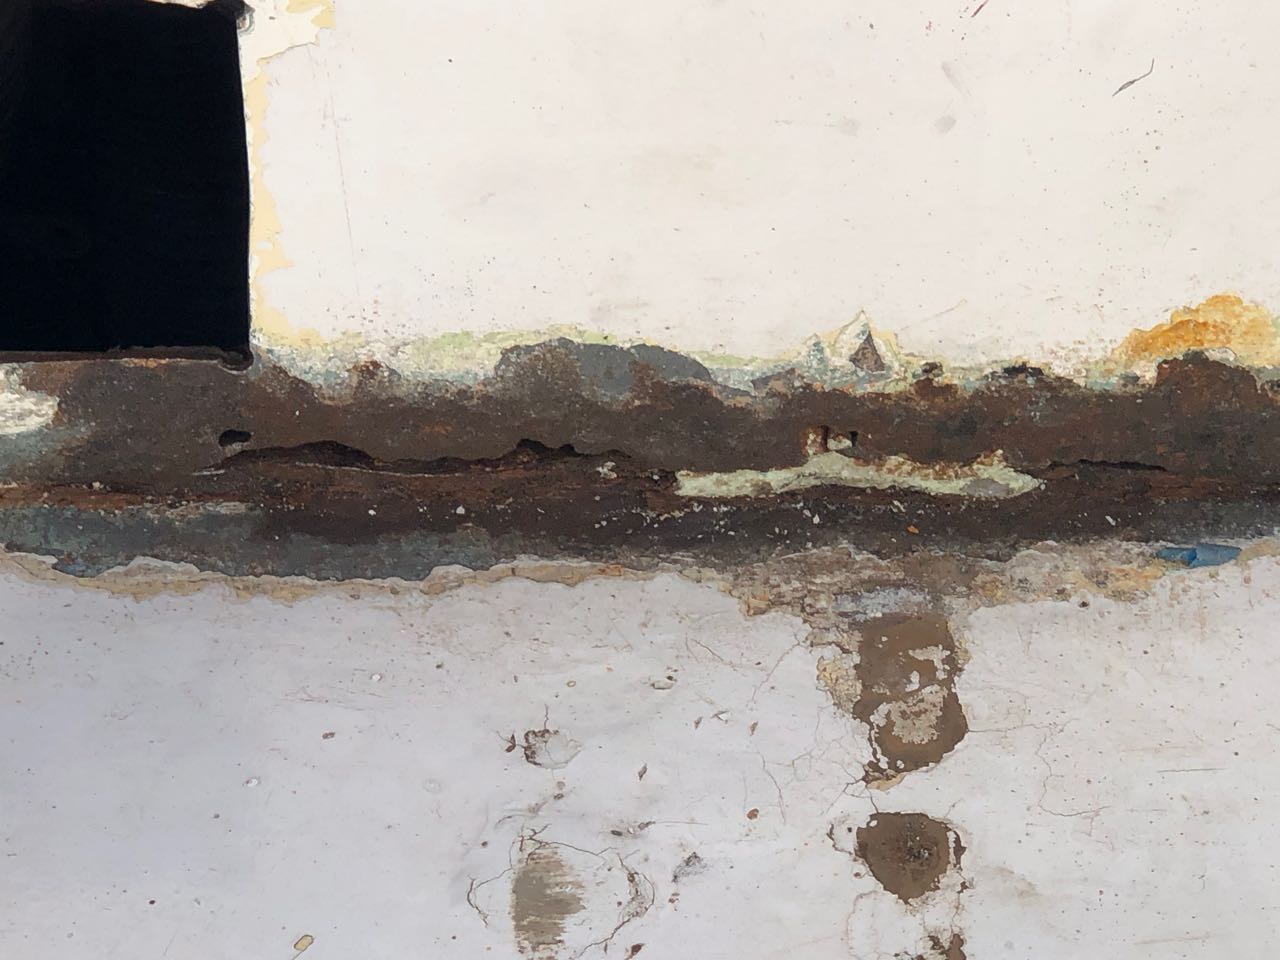 |
| What happens when you don't look (or paint) under the footwell floorboards for a few years. |
I found this depressing, and at the same time thrilling. Since buying Petronella, Helena and I have been on a quest to cure all leaks. Water, diesel, anti-freeze, or whatever. In this quest, we had replaced a leaky water pump, replaced several old hoses in the cooling system, and replaced the engine injector fuel lines. This eliminated most of the leaks and nasty diesel smells, but there was still a persistent slow leak that did not seem to correlate with motoring or rain storms or any other potential source of the leak.
I was convinced we had a leaky water tank, but I had put different colored dye into each tank and waited for colored water to appear in the bilge. Nope. Not trace of dye. Just clear water.
I'd nearly given up in despair, but seeing these holes rusted through in the footwell seemed like an Ah-Ha! moment if there ever was one. I never would have suspected the footwell was leaking, but because I'd had the nerve to fix the engine vent, and furthermore took an obsessive approach to prepping the hole for painting, I'd uncovered what could be the source of our sneaky leak.
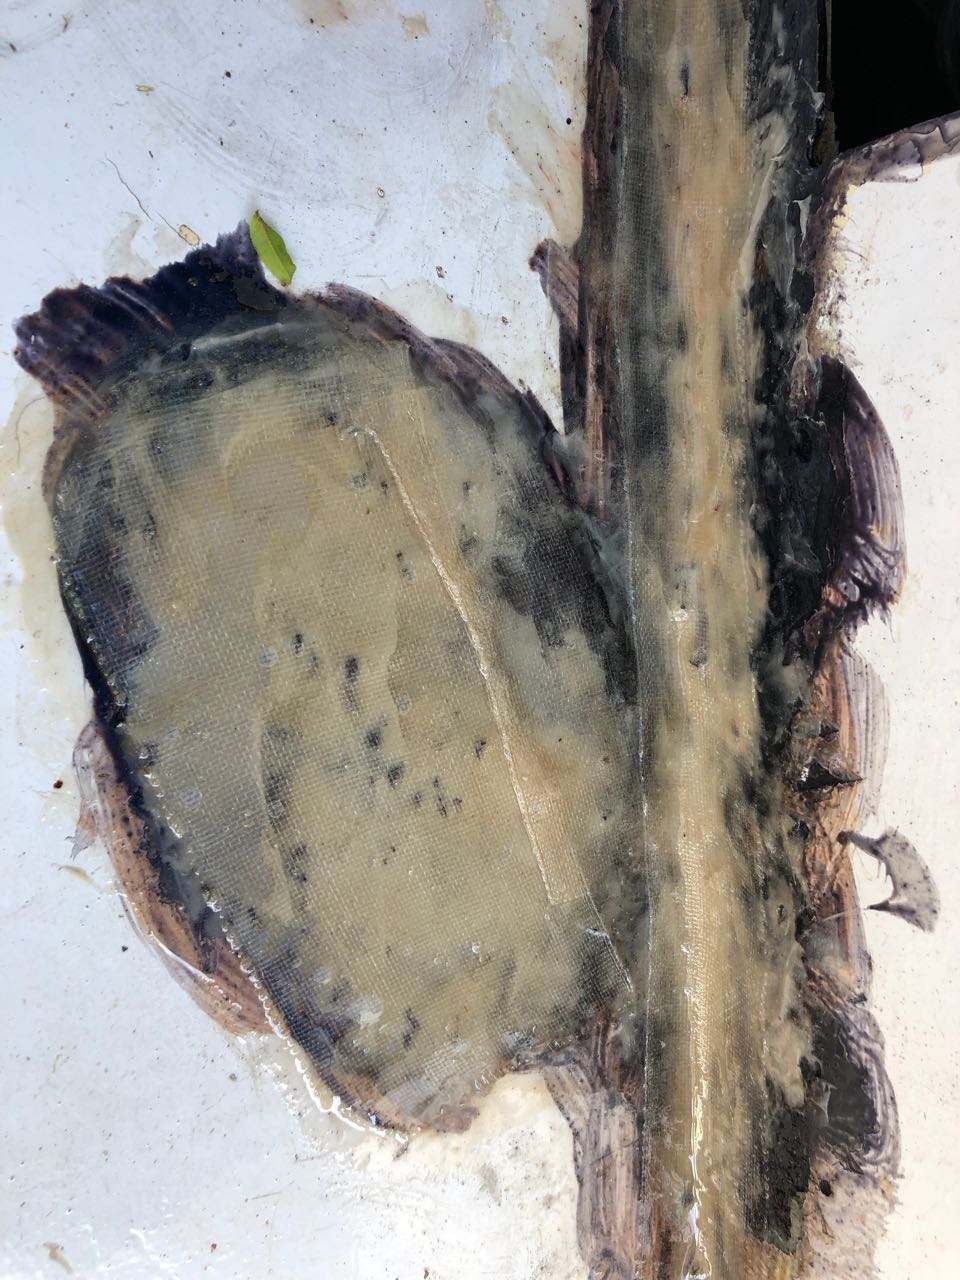 |
| Repairing the holes with epoxy and fiberglass. |
The floor of the footwell had been removable to provide access to the engine, but this had probably helped cause the problem in the first place. We agreed that when Petronella needed re-powering in the (hopefully) distant future, that would be the time to cut out the whole footwell and replace it with a new one.
For now, fiberglass would make the footwell truly waterproof and strong enough for whatever we threw at it (or into it.)
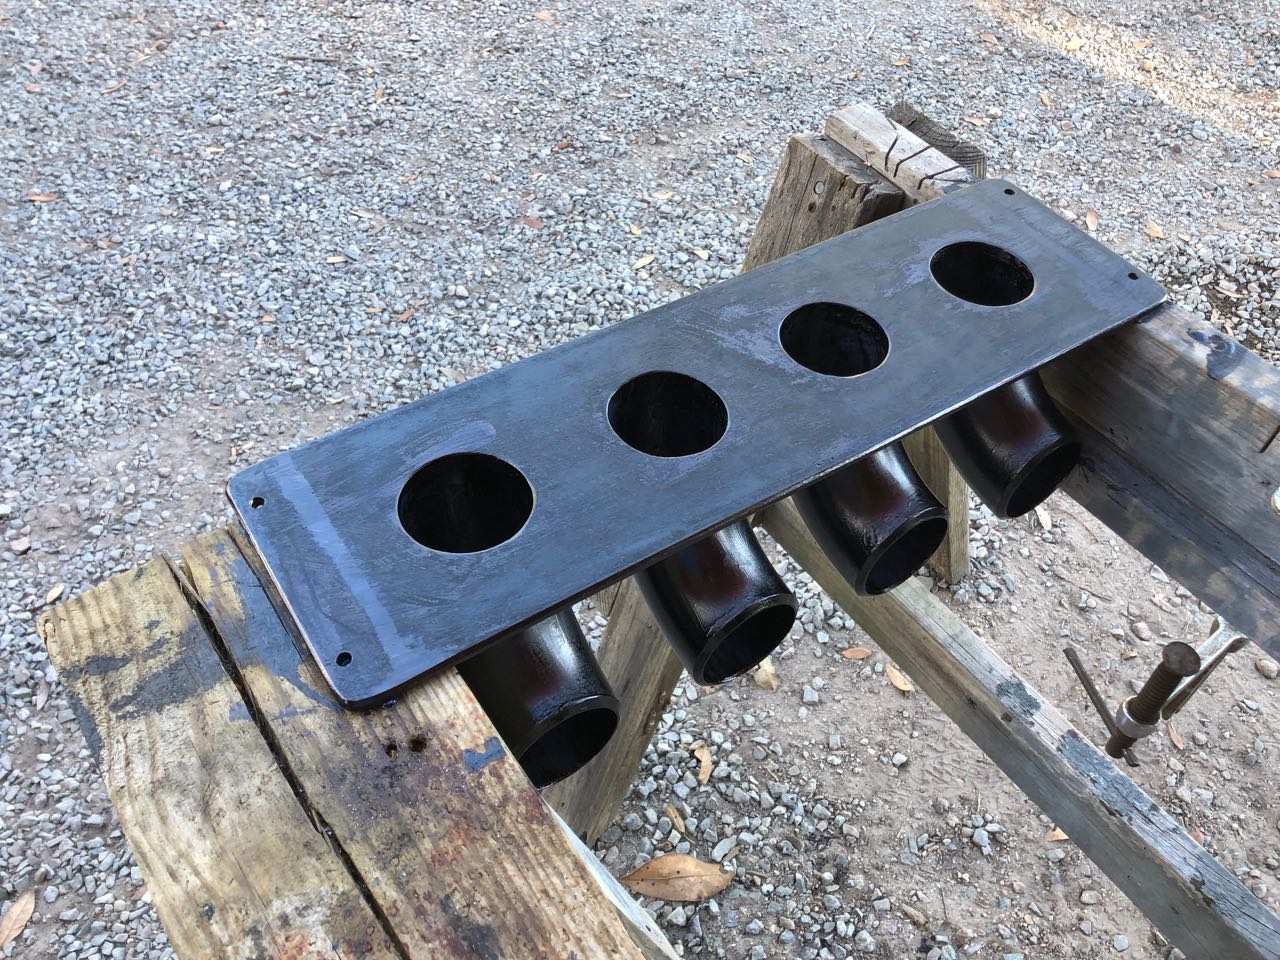 |
| The new vent assembly |
We had had the assembly built 3/4" larger, all around, so that it could be bolted over the hole, rather than welded in. This was because Rocky was worried about welding over the engine compartment, with its risk of fire.
Eventually, it was time to bolt it in. We reattached the vent hoses with new hose clamps (the old ones were rusted badly) and bedded it down with 4200.
 |
| Bolting the new assembly into place |
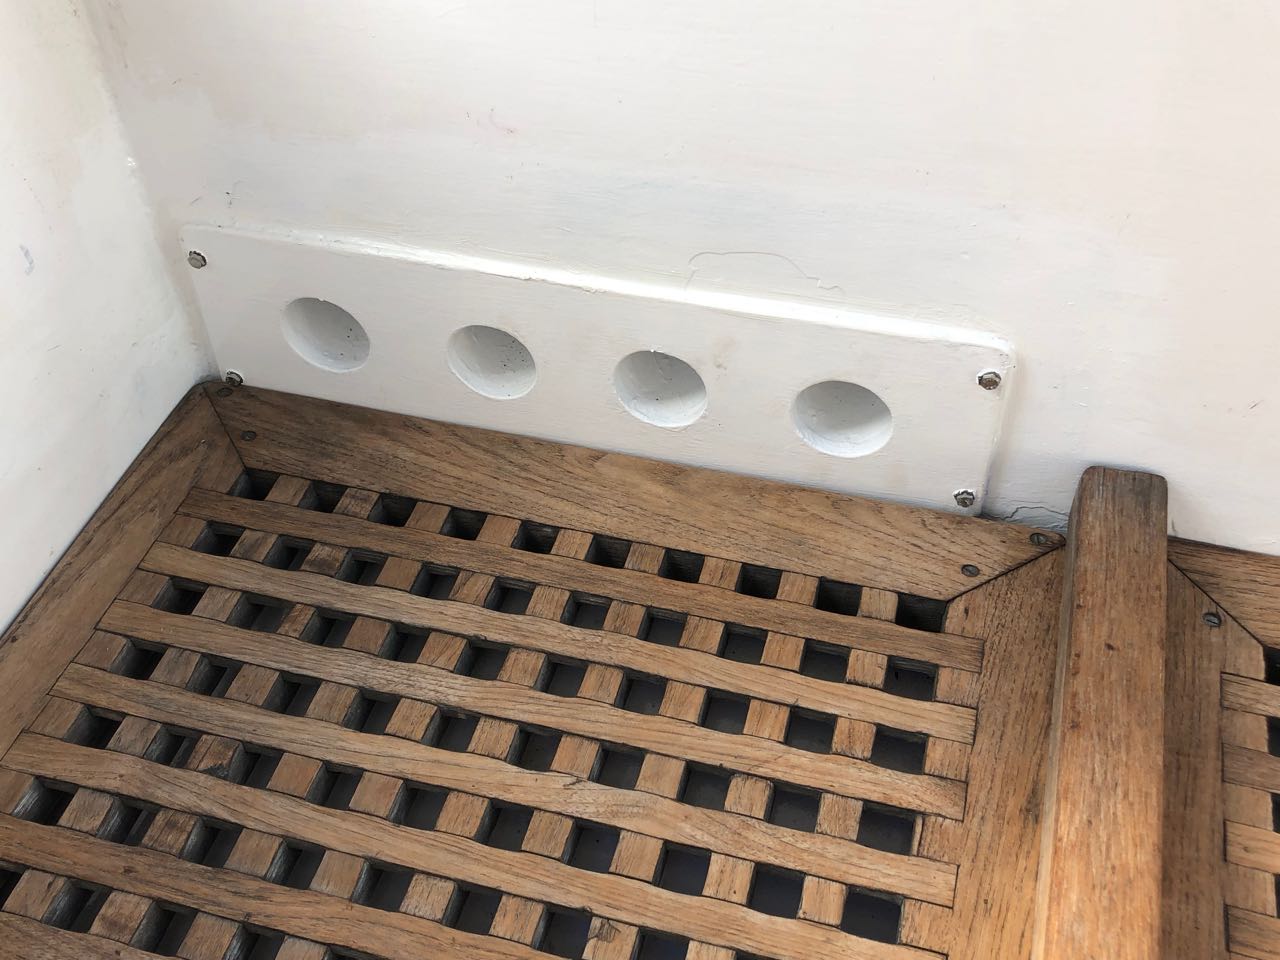 |
| Job done |
Since we nearly always have our awning up when it rains, we never got much water in the cockpit from rain storms. But when we decided to shower in the cockpit, we would often dump several gallons of fresh water into the cockpit. That's where the water had been coming from.
So, a mystery that had stumped us for 2 years was finally solved. Our bilges are now dry and Petronella is as watertight as she was when launched in 1976. It's a good feeling.
Thank you, Neil and Ley, for showing us the way. I hope you are doing well wherever your travels have taken you.
Next Up: SSCA Weather Talk
Hello John, Congratulations on your new found skills! The needle gun IS a marvellous “investigative” tool. It’s the epitome of non-destructive testing on a steel boat. Anything sound and solid is not effected, anything weak and inadequate is immediately obvious. By the way, welding over the engine would not have been a problem, I would have found another welder ...... and made that vent from 316 stainless. In a complex part like that, the design and fabrication labour far exceeds the materials cost - using stainless won’t change the price much at all. In fact it can save you money, as the need for protective coatings is minimised. Cheers, Neil
ReplyDelete